Best Rhinestone Placement Techniques for Nail Designs

Best Rhinestone Placement Techniques for Nail Designs

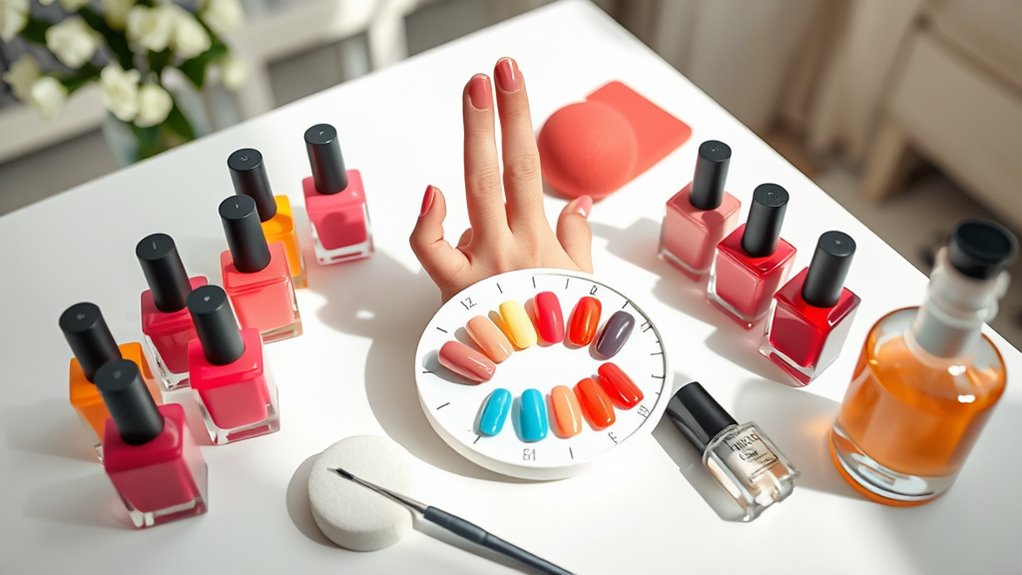
To ace rhinestone placement, start by choosing the right stones—think size, color, and shape. Use tweezers and a dotting tool for easy application, and don’t forget to clean your nails first! A tiny dot of glue goes a long way, so don’t overdo it. Consider neat patterns or eye-catching clusters to really shine. Remember to let the glue get tacky before placing your gems, and always finish with a top coat for sparkle protection. With these tips, your nails will dazzle! Stick around, and you’ll find even more creative ideas for your nail designs.

Choosing the Right Rhinestones
Best_Rhinestone_Placement_Techniques_for_Nail_Designs_0001.jpg

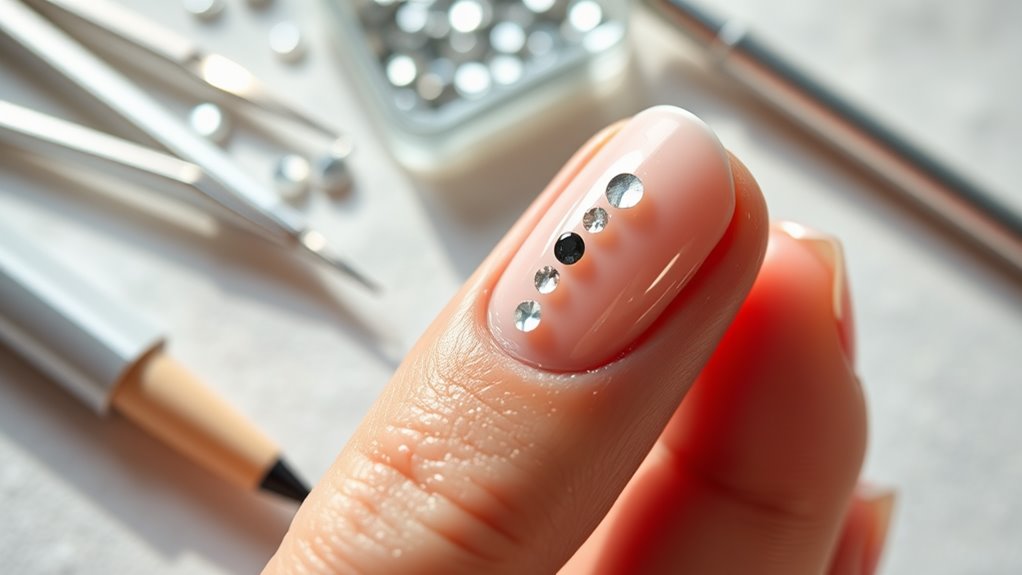
When it comes to nail designs, selecting the right rhinestones can make all the difference. You want your nails to shine, right? So, picking the perfect rhinestones is key!

First, think about size. Smaller rhinestones are great for detailed designs, while larger ones can really pop and grab attention. Next, consider color. Do you want something bold or subtle? Clear rhinestones are classic, but colored ones can add a fun twist!

Also, don’t forget about shape. You can find round, square, or even star-shaped rhinestones. Each shape brings its own flair to your design.

Now, let’s talk about the finish. Some rhinestones have a shiny, glossy look, while others may be more matte. Which one fits your style?

Lastly, think about how you want to use them. You might want to create a pattern, spell out a word, or just add a few for sparkle.

Whatever you choose, make sure it reflects your personality. So, grab your rhinestones and get creative! Your nails are your canvas, and you’re the artist. Let the bling begin!

Tools for Perfect Placement
Best_Rhinestone_Placement_Techniques_for_Nail_Designs_0002.jpg

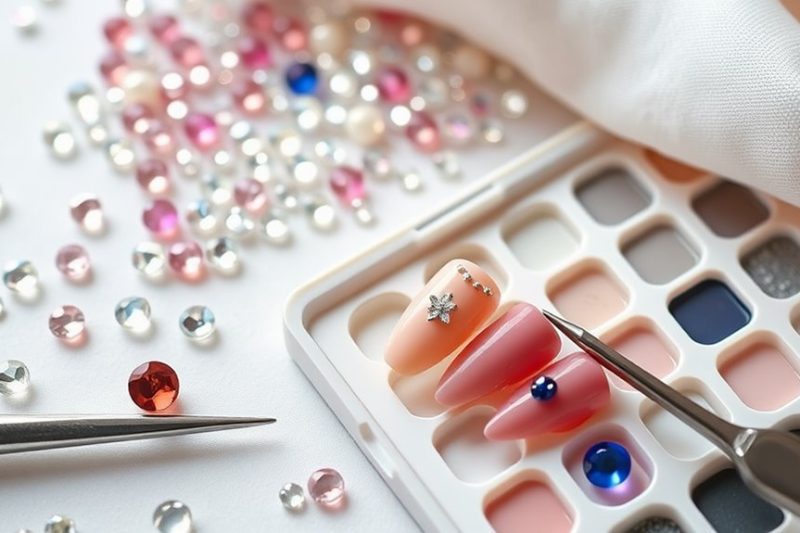
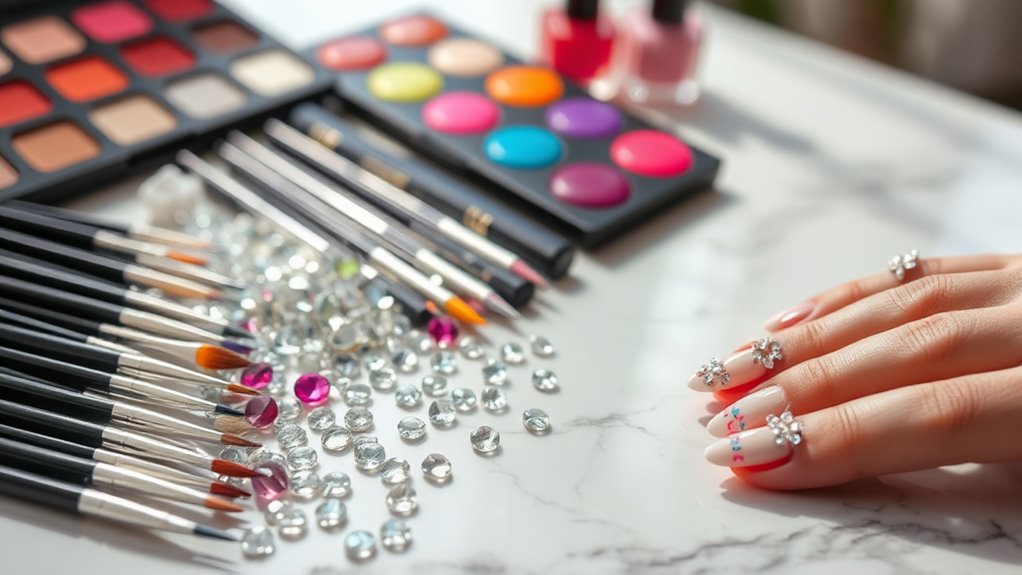
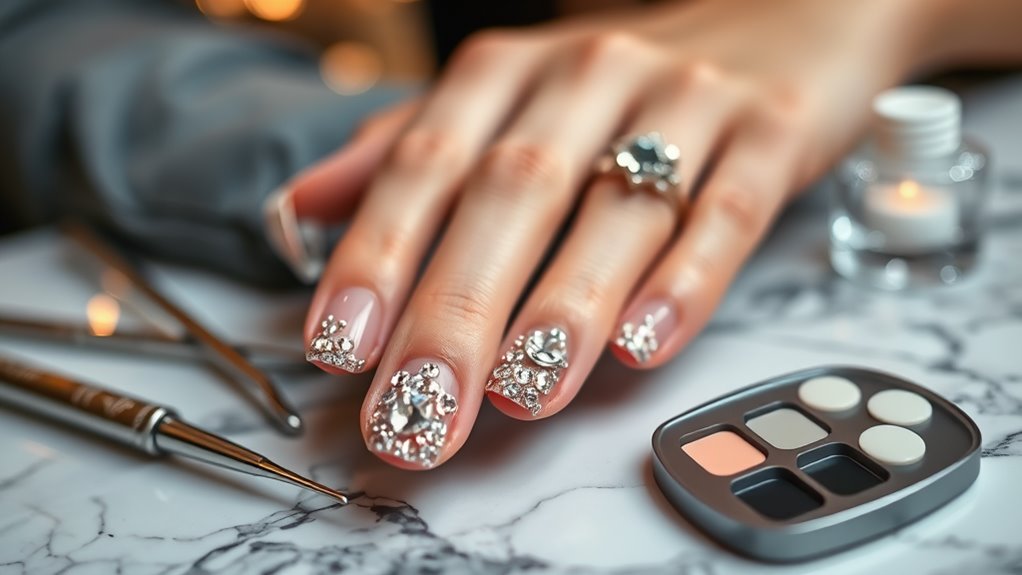
To achieve flawless rhinestone placement on your nails, having the right tools at your fingertips is essential. You don’t want to be fumbling around when you’re trying to create that dazzling look!

First up, grab a pair of tweezers. They’re perfect for picking up those tiny rhinestones without smudging your polish. You can feel like a nail artist handling your gems like a pro!

Next, you’ll want a dotting tool or a toothpick. These nifty little gadgets help you apply just the right amount of nail glue for each rhinestone, so you don’t end up with a sticky mess. Speaking of glue, make sure you’ve got a good quality nail glue that dries clear. You don’t want your beautiful design ruined by a glue blob!

Lastly, have a small brush handy. It’s great for cleaning up any excess glue or stray glitter around your rhinestones.

With these tools in your kit, you’re well on your way to perfect placement! So, get ready, set up your workspace, and let’s make those nails shine brighter than a disco ball!

Basic Placement Techniques
Best_Rhinestone_Placement_Techniques_for_Nail_Designs_0003.jpg

Before diving into the dazzling world of rhinestone placement, you should familiarize yourself with some basic techniques that will elevate your nail art game.

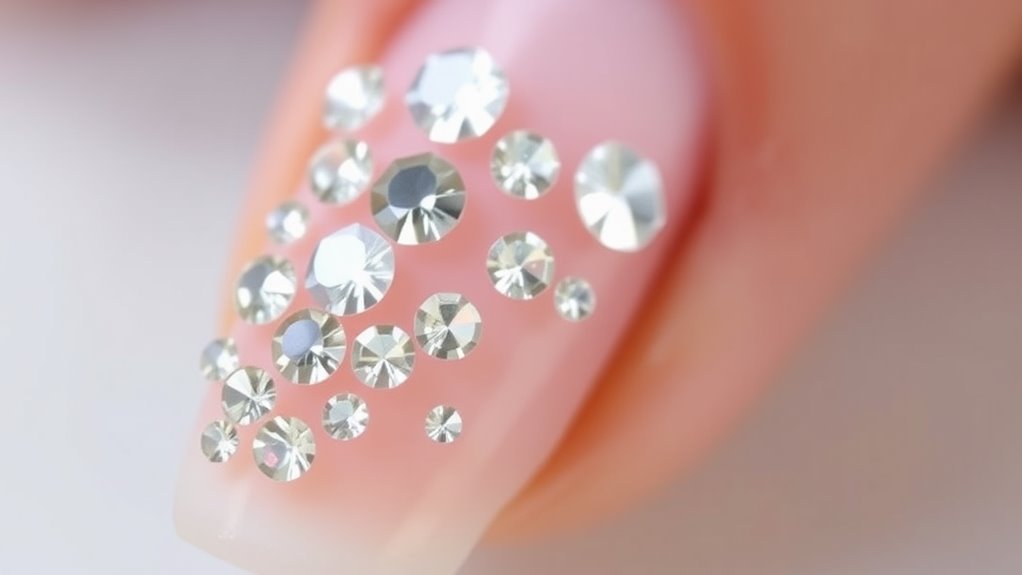
First off, always start with a clean nail surface. You wouldn’t want your gems slipping and sliding like they’re on a rollercoaster!

Next, use a good nail adhesive. It’s like the glue that holds your friendship together, but for your rhinestones. Just a tiny dot will do; too much can make a mess.

When picking up rhinestones, use a tool like a wax pencil or a dotting tool. It makes placement as easy as pie!

Now, think about where you want to place your rhinestones. You can go for a single gem as a statement piece, or cluster them for a more dramatic look.

Don’t forget to space them evenly—unless you want them to look like they’re having a dance party!

Creating Patterns With Rhinestones

Best_Rhinestone_Placement_Techniques_for_Nail_Designs_0004.jpg

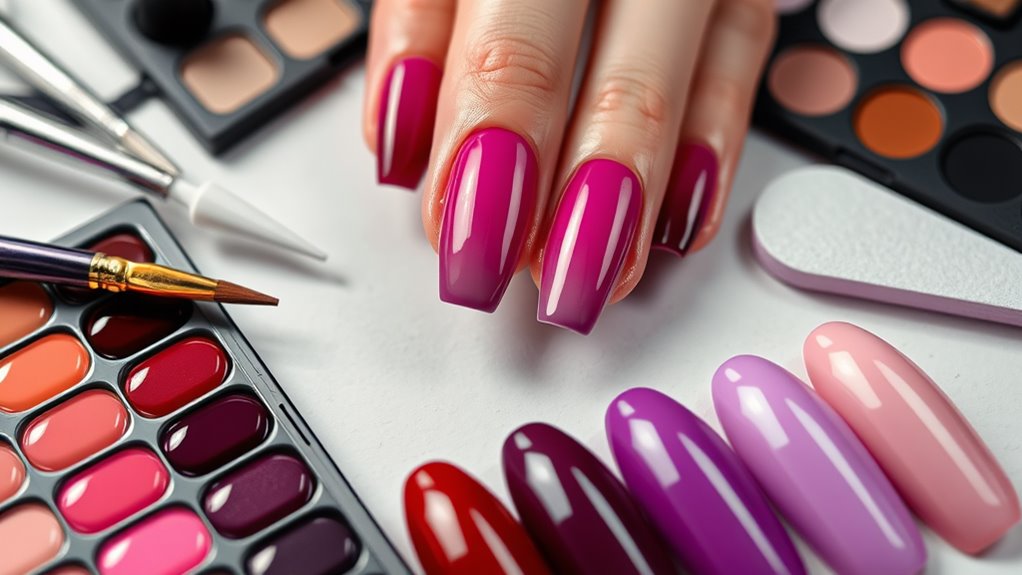
Designing enchanting patterns with rhinestones can transform your nails from simple to spectacular. When you start thinking about patterns, the possibilities are endless! You can create stripes, swirls, or even floral designs using different sizes and colors of rhinestones.

First, pick a theme or color scheme that speaks to you. Maybe you want a sparkly rainbow or a chic black-and-gold vibe. Once you’ve got that down, it’s time to play!

Begin by sketching your design lightly on paper. This will help you visualize where each rhinestone will go. You can even use a dotting tool to mark spots on your nails before placing the stones.

When you’re ready, carefully pick up each rhinestone with a pair of tweezers and place them on your nails. Don’t rush! Take your time to make sure they’re evenly spaced and aligned.

If you’re feeling adventurous, try mixing different shapes, like hearts or stars, alongside the classic round ones. Remember, it’s all about having fun and letting your creativity shine.

Accent Nails Design Ideas
Best_Rhinestone_Placement_Techniques_for_Nail_Designs_0005.jpg

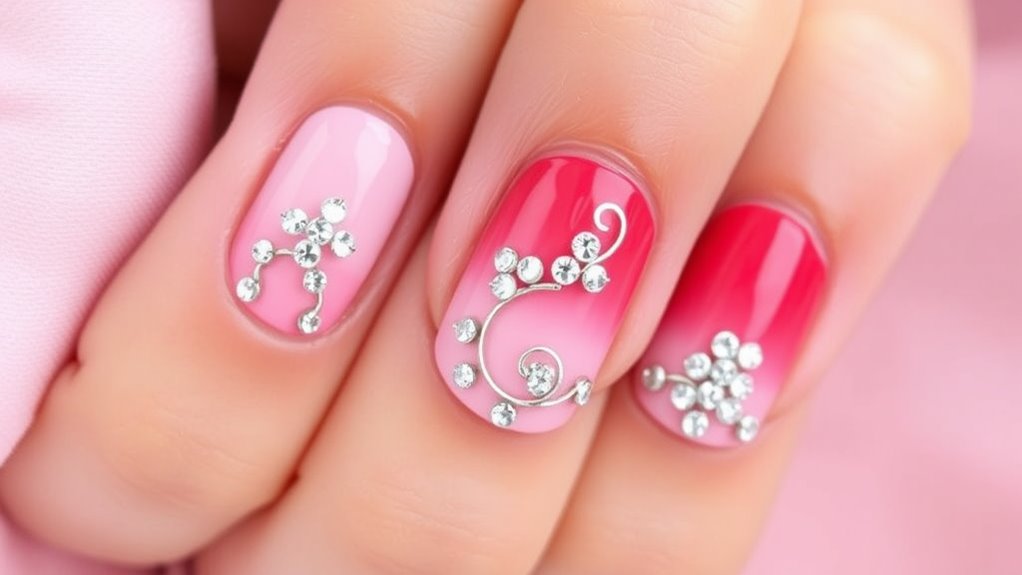
When it comes to nail art, accent nails can add a unique twist that elevates your overall look. These special nails stand out and let your personality shine. You can choose one nail on each hand to decorate, or just go wild with one hand!

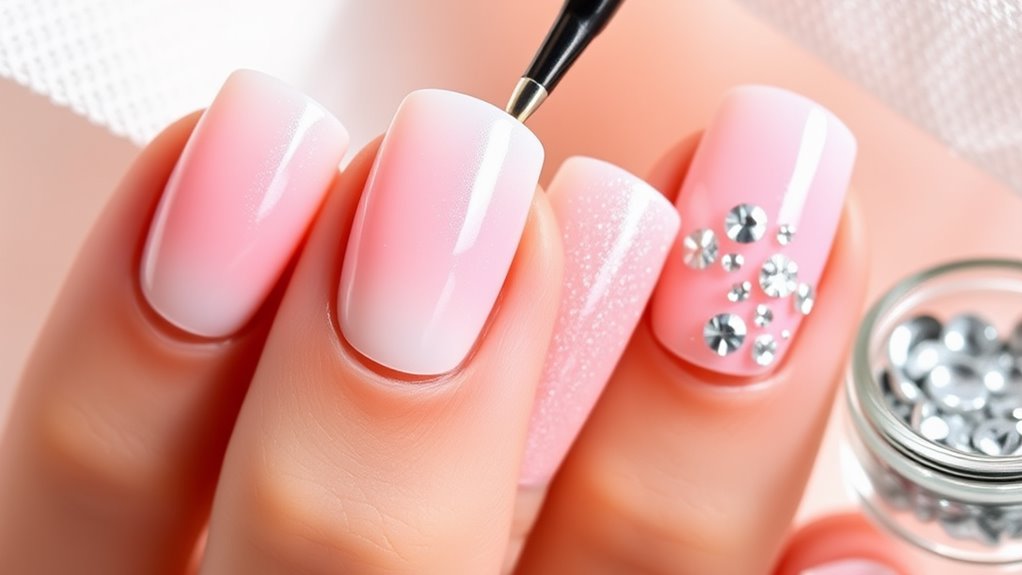
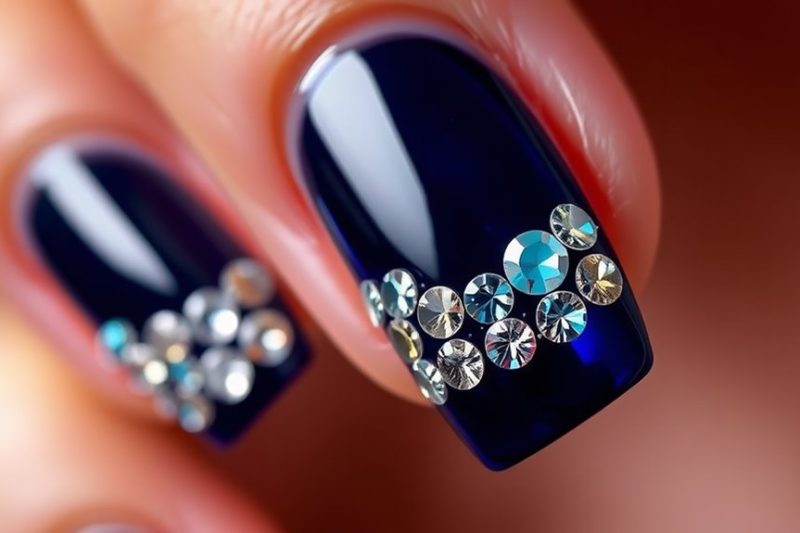
Try a bold color on your accent nail, like a fiery red or a deep navy. Then, add some rhinestones for that extra sparkle. Imagine how great it’ll look! You could also pick a fun design, like stripes or polka dots, for your accent nail while keeping the rest simple.

For a more subtle approach, consider using a neutral shade for the main nails and a glittery or metallic polish for the accent nail. This will give a classy vibe that’s perfect for any occasion.

Feeling adventurous? Go for a theme! If you love flowers, paint your accent nail with a cute flower design while keeping the others in a solid color.

The sky’s the limit with your creativity! Remember, the best part of accent nails is having fun and expressing yourself, so don’t hold back!

Balancing Size and Shape
Best_Rhinestone_Placement_Techniques_for_Nail_Designs_0006.jpg

Finding the right balance between size and shape is essential for creating stunning nail designs with rhinestones. You want your nails to shine, but you don’t want them to look like a disco ball!

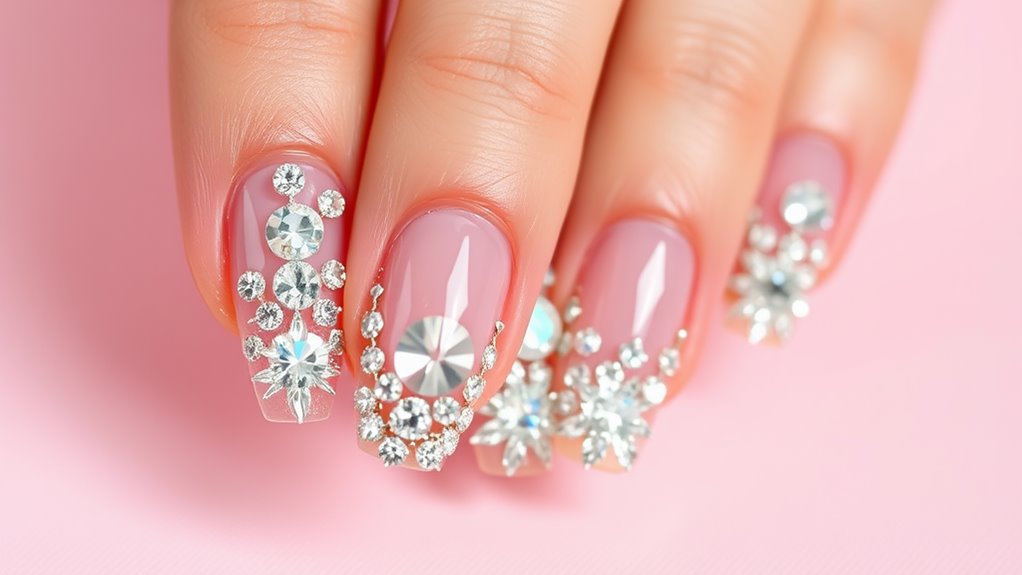
Start by pondering the size of the rhinestones you’re using. Big stones can be eye-catching, but if you use them too close together, they can overwhelm your nails. Instead, mix larger stones with smaller ones. This creates a lovely gradient effect that’s easy on the eyes.

Next, think about the shapes. Round rhinestones can add a classic touch, while square or teardrop shapes can bring a modern vibe. When you combine different shapes, it adds dimension and interest.

Try placing larger stones at the center of your design and surround them with smaller shapes. This technique helps draw attention to the focal point without going overboard.

Also, remember to reflect on your nail shape! If you have long, slender nails, you can be more adventurous with your placement. Short nails might look best with a simpler design.

Ultimately, have fun experimenting until you find the perfect balance that reflects your style!

Using Rhinestones for Textures
Best_Rhinestone_Placement_Techniques_for_Nail_Designs_0007.jpg

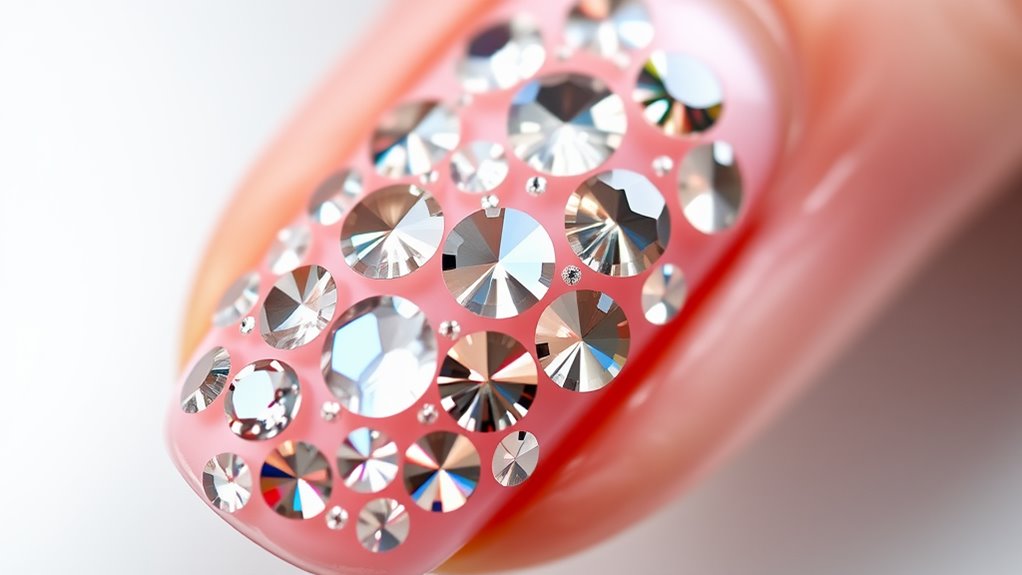
Rhinestones can transform your nail designs by adding enchanting textures that elevate their overall look. When you think about it, who wouldn’t love a little sparkle and shine?

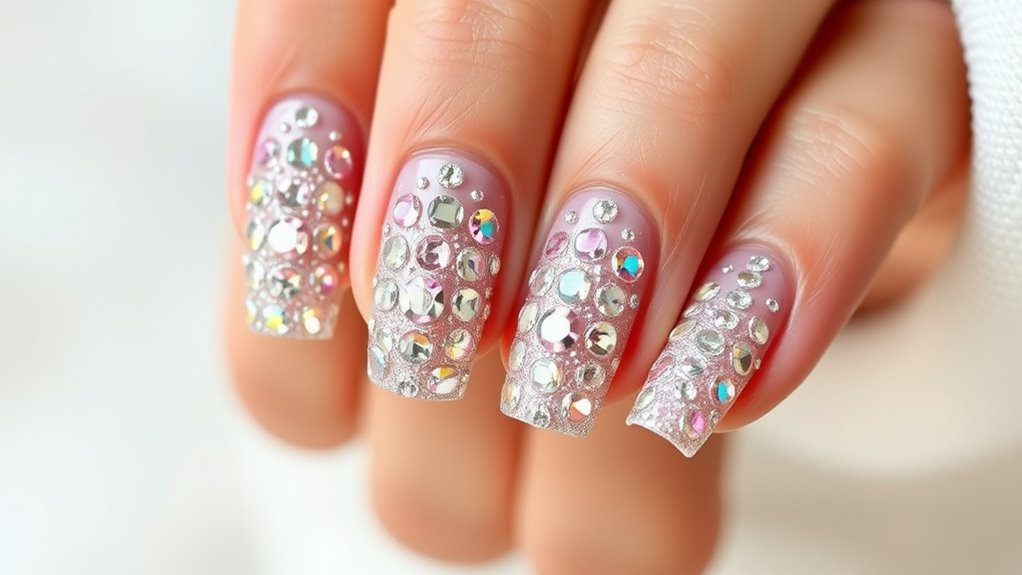
To create interesting textures, you can use different sizes and shapes of rhinestones. Mixing tiny gems with larger ones can give your nails a unique, layered effect that grabs attention.

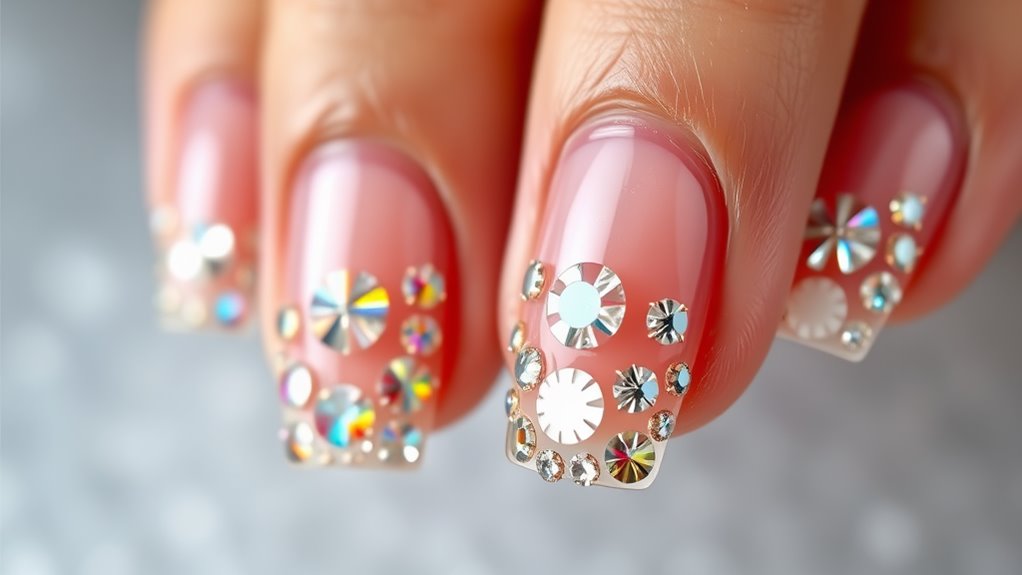
Start by placing larger rhinestones at the base of your nail or near the cuticle. This creates a bold anchor point. Then, add smaller stones around them, like a sparkling halo. You can even create patterns, like zig-zags or swirls, to make your design pop!

Don’t forget about the color coordination. Choosing rhinestones that match or complement your nail polish can enhance the overall texture and vibe.

And if you’re feeling adventurous, try using rhinestones in different finishes, like matte or shiny, to create even more contrast.

Just remember, balance is key. Too many rhinestones can make your design look cluttered, while the right amount can make it stunning.

Tips for Long-Lasting Adhesion
Best_Rhinestone_Placement_Techniques_for_Nail_Designs_0008.jpg

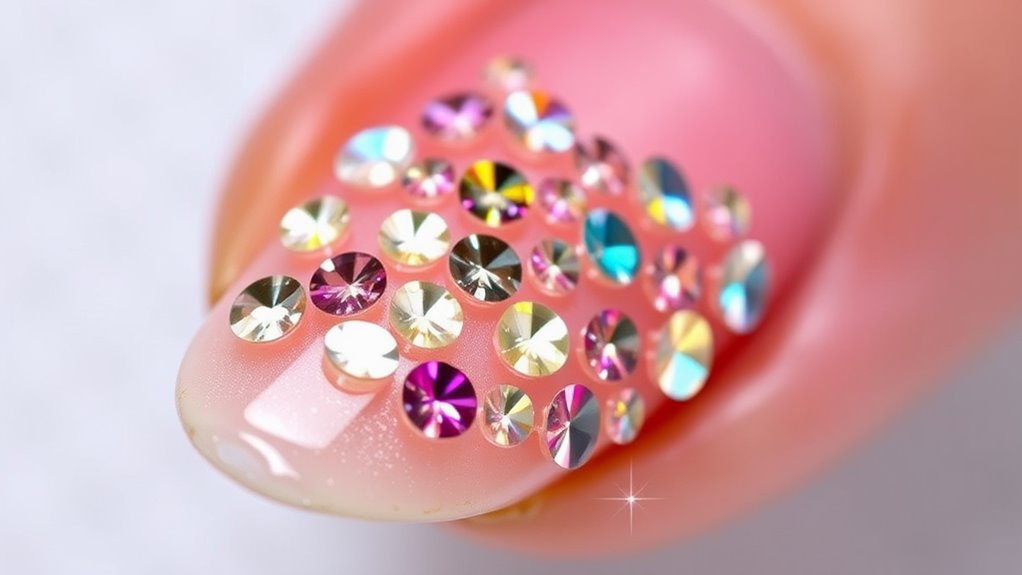
To guarantee your dazzling rhinestones stay put and maintain their sparkle, you need to focus on proper adhesion techniques. First, pick a high-quality adhesive designed for nails. This isn’t the time for a glue stick from your school supplies! A nail-specific glue will create a strong bond, ensuring your gems don’t go rogue.

Before applying the rhinestones, make sure your nails are clean and dry. Any leftover polish or oil can weaken the bond, so give those nails a little TLC.

Now, when you apply the glue, use a tiny dot—less is more! Too much glue can be a sticky situation and might even drown your rhinestones.

Once you place the rhinestones, let them sit for a few minutes to secure their spot. Patience is key here; don’t rush your nail art masterpiece.

After they’ve set, you can seal everything with a top coat, but be careful! Avoid directly painting over the rhinestones to keep their shine intact.

With these tips, you’ll be ready to rock those rhinestones without worrying about them losing their charm. Happy decorating!

Incorporating Color Schemes
Best_Rhinestone_Placement_Techniques_for_Nail_Designs_0009.jpg

When you plan your nail designs, considering color schemes can elevate your rhinestone art to a whole new level. Think of your nails as a canvas, and color is your paint!

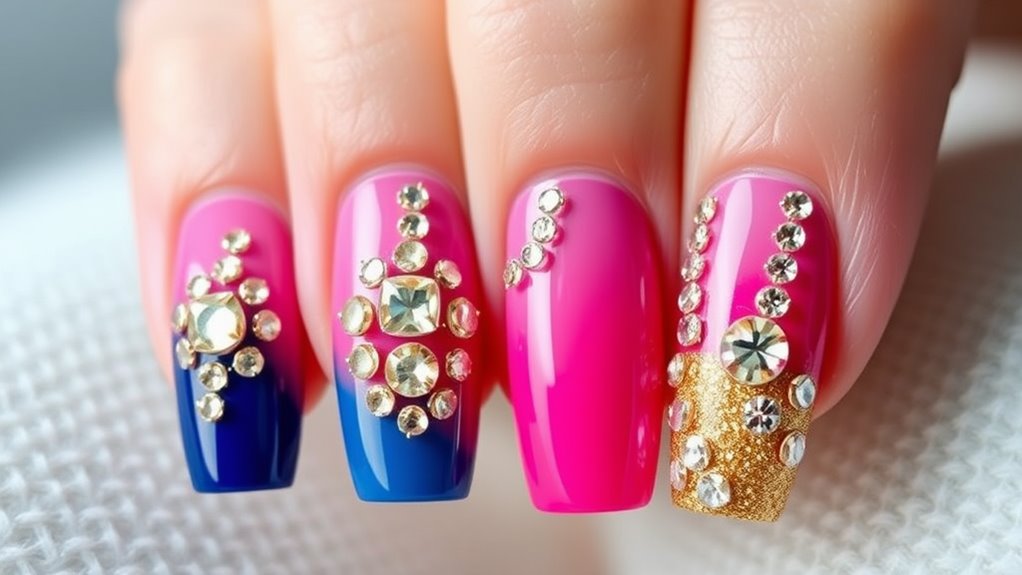
First, pick a base color that you love. It could be a bold red, a soft pink, or even a funky teal. Once you have your base, choose rhinestones that either match or contrast beautifully. For example, if you go with a deep blue base, clear or silver rhinestones can shine brightly against it.

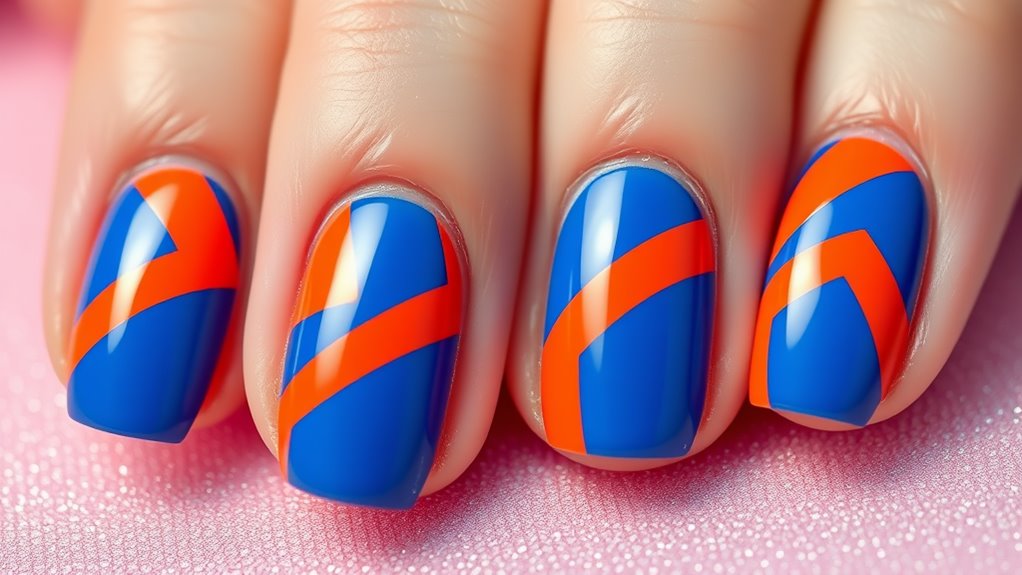
Don’t forget about the color wheel! Colors opposite each other, like blue and orange, create a striking look.

You can also try an ombre effect, blending two colors together, and then add rhinestones in both shades for a fun twist.

Troubleshooting Common Issues
Best_Rhinestone_Placement_Techniques_for_Nail_Designs_0010.jpg

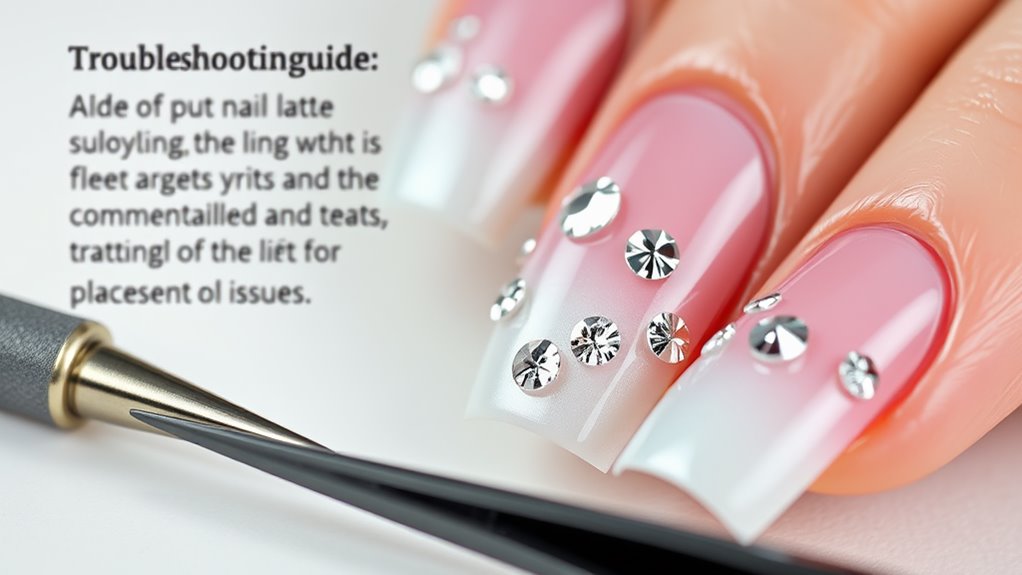
Often, nail artists encounter common issues while applying rhinestones that can hinder the overall look of their designs. One of the biggest problems is the rhinestones falling off too soon. To prevent this, make sure you’re using a strong top coat. If you notice your rhinestones aren’t sticking properly, try using a clear nail glue for extra hold.

Another issue is uneven placement. It can feel like a puzzle trying to get everything just right! To fix this, lay out your design on a sticky pad first. This way, you can rearrange them until you love the look.

Sometimes, the colors clash or just don’t pop as you imagined. If this happens, don’t hesitate to swap out a few rhinestones for ones that complement your base color better. Remember, you want your design to shine, literally and figuratively!

Lastly, if your nails feel too heavy, you might’ve gone overboard with the rhinestones. Keep it balanced by mixing big stones with smaller ones.

With these tips, you’ll be ready to tackle any rhinestone drama like a pro! Happy decorating!

Conclusion

Now that you know the best rhinestone placement techniques, it’s time to let your creativity shine! Remember, practice makes perfect, so don’t be afraid to experiment with different designs and colors. Whether you’re going for a simple look or something more dazzling, rhinestones can add that extra sparkle to your nails. And hey, if one falls off, just call it a “nail accessory adventure”! Have fun and enjoy making your nails uniquely yours!

Step-by-Step Guide to Ombre Nail Techniques

Step-by-Step Guide to Ombre Nail Techniques

Creating ombre nails at home is super fun and easy! First, gather your tools—at least two nail polish colors, a makeup sponge, and base and top coats. Prep your nails by removing old polish, trimming, and moisturizing. Choose colors that blend well, and remember, the more daring, the better! Start with a base coat, then use the sponge to dab on your chosen colors, blending them for that gorgeous gradient. Finish with a clear top coat for shine. Keep nails clean and hydrated afterwards, and you’ll be all set to impress. Stick around for even more handy tips!

Understanding Ombre Nails

StepbyStep_Guide_to_Ombre_Nail_Techniques_0001.jpg

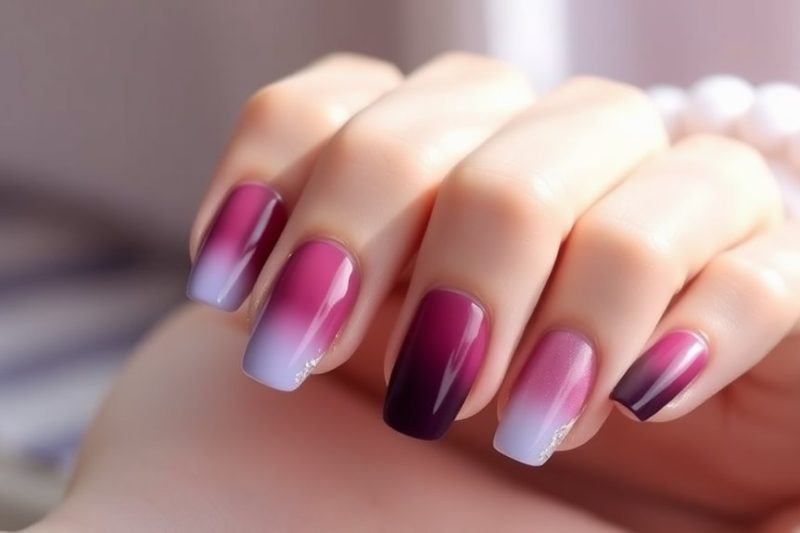
Ombre nails are a stunning way to blend colors and create a gradient effect on your fingertips. Imagine your nails evolving from one beautiful shade to another, like a sunset! It’s a fun way to express your personality and creativity. Ombre can be as bold or subtle as you want. You might choose soft pastels for a sweet look or vibrant colors for something more eye-catching.

Understanding ombre nails starts with knowing that the technique involves blending two or more colors seamlessly. You can use similar shades for a more cohesive look, or go wild with contrasting colors for a playful vibe. The best part? You can customize your ombre style to match any outfit or occasion.

You’ll find that ombre nails are pretty versatile—they work great on short or long nails. Plus, they can be done with either gel or regular polish, depending on what you like best.

Essential Tools Needed

StepbyStep_Guide_to_Ombre_Nail_Techniques_0002.jpg

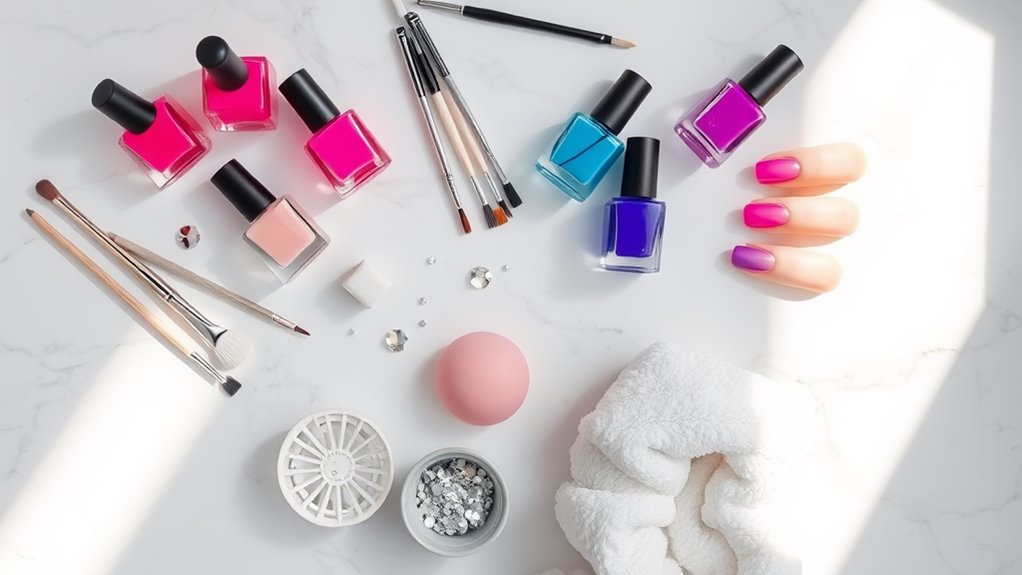
To achieve the perfect ombre nails, you’ll need a few essential tools that make the process easier and more enjoyable. First up, grab your nail polish in the colors you want to blend. You’ll need at least two shades—one for the base and another for the ombre effect.

Next, get a makeup sponge. Yep, that’s right! A simple sponge works wonders for blending those colors together.

Don’t forget a good base coat. It helps your nails stay healthy and makes your polish last longer. You’ll also need a top coat to seal in your beautiful work and add shine. A small brush or toothpick is handy for cleaning up any messy edges, too.

Lastly, make sure to have some cotton balls and nail polish remover nearby. Trust me, you’ll thank yourself later when you need to fix any little mistakes.

Oh, and a good playlist or podcast can make the whole process way more fun! So, gather these tools, and you’re all set to create stunning ombre nails that will impress everyone around you. Let’s get started on this colorful adventure!

Choosing Your Color Palette

StepbyStep_Guide_to_Ombre_Nail_Techniques_0003.jpg

When it comes to choosing your color palette for ombre nails, consider the mood or theme you want to express. Do you want something bright and fun, or maybe soft and elegant? Think about the colors that make you feel good or the ones that match your favorite outfit. It’s like picking toppings for your ice cream—everyone has their own favorite combo!

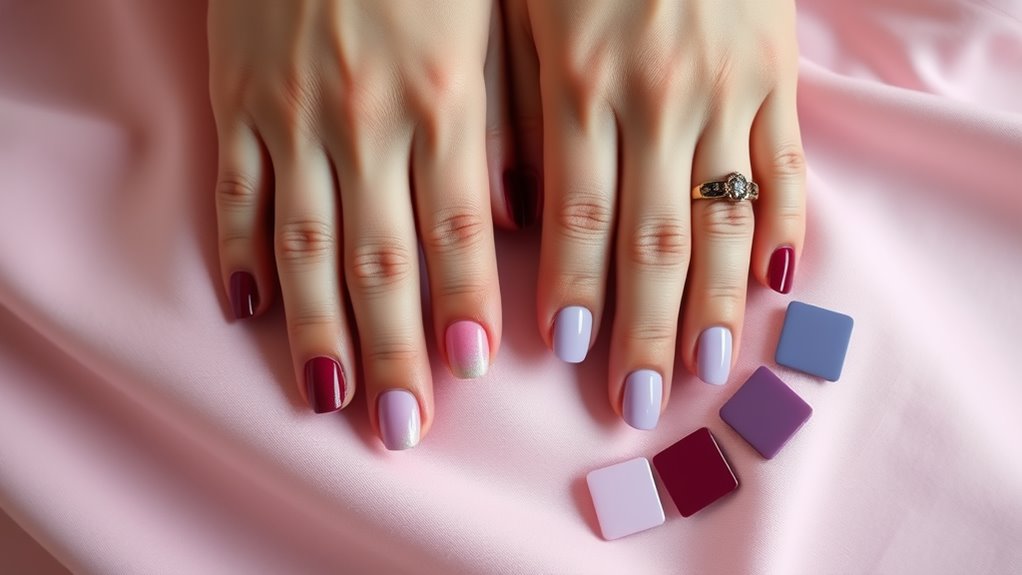
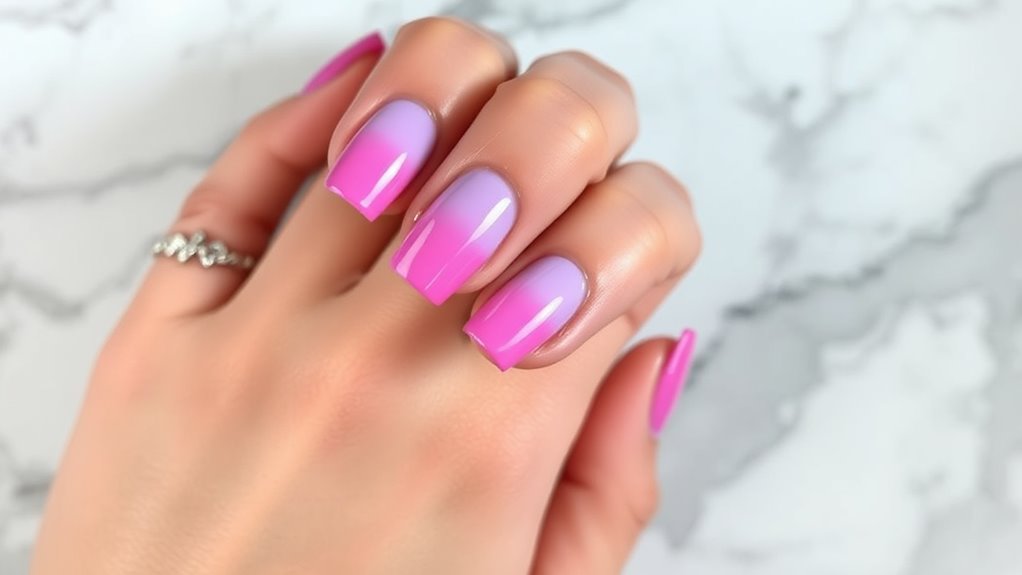
Start by picking two or three colors that blend well together. You could go for a bold contrast, like hot pink and deep purple, or softer shades, like pastel blue and lavender.

Don’t be afraid to experiment! Grab some nail polish samples and see how they look side by side.

Also, remember the season! Bright colors are perfect for summer, while deep, rich hues work great in the fall.

If you’re feeling adventurous, try a gradient effect with three colors for an eye-catching look.

Preparing Your Nails

StepbyStep_Guide_to_Ombre_Nail_Techniques_0004.jpg

After selecting your color palette, it’s time to get your nails ready for the stunning ombre effect. First, you’ll want to remove any old polish. Grab some nail polish remover and a cotton ball—this part’s pretty easy! Just swipe it over your nails until they’re clean.

Next, trim and file your nails to your desired shape. Whether you like them square, round, or a little pointy, make sure they’re all even.

Now, it’s time for a little pampering! Push back your cuticles gently using a cuticle stick. This not only makes your nails look neat but also helps the polish stick better.

If your hands are feeling rough, don’t forget to moisturize! A little hand cream goes a long way.

Basic Ombre Techniques

StepbyStep_Guide_to_Ombre_Nail_Techniques_0005.jpg

Creating a beautiful ombre effect on your nails requires a few straightforward techniques. First, you’ll want to pick two or three nail polish colors that blend well together. Think of colors like pink and purple or blue and green—whatever makes your heart sing!

Start by applying a base coat to protect your nails, and then paint your nails with the lighter color as the base.

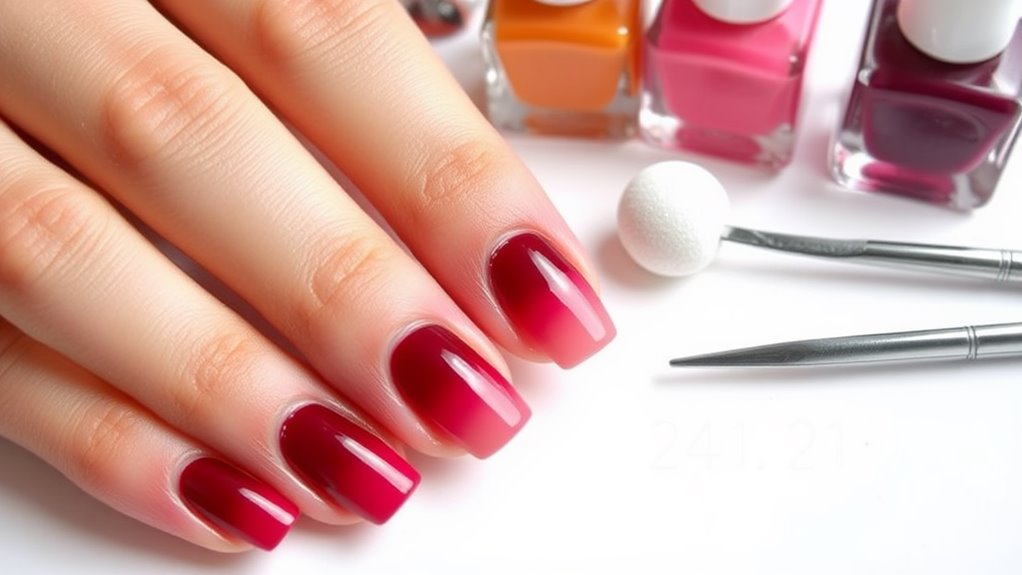
Next, grab a makeup sponge. It’s your secret weapon! Apply a stripe of each color on the sponge, blending them a bit in the middle. Now, gently dab the sponge onto your nails. You might need to do this a few times to get that gorgeous gradient effect. Don’t worry if it gets a bit messy; that’s why you have nail polish remover handy!

Once you’ve achieved the look you love, seal everything in with a clear top coat. This not only makes your nails shine but also helps the colors last longer.

Advanced Ombre Methods

StepbyStep_Guide_to_Ombre_Nail_Techniques_0006.jpg

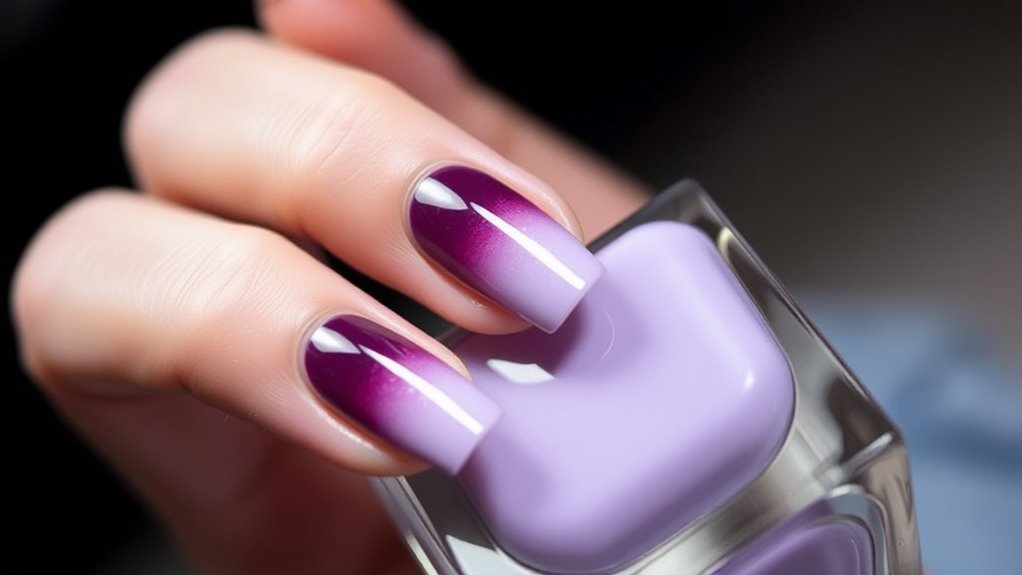
Once you’ve mastered the basics of ombre techniques, it’s time to elevate your nail art with advanced methods. One fun technique you can try is the reverse ombre. Instead of starting with a light color and blending to a darker shade, you flip it! Start with a dark base and blend to a lighter tip. It’s like a sunset on your nails!

Another option is the glitter ombre. After applying your chosen colors, sprinkle some glitter at the tips of your nails. This adds a sparkly twist and makes your nails shine brighter than a disco ball!

You can also experiment with multiple colors. Instead of just two, try three or four! Layer your shades carefully, blending each one into the next. It’s like painting a rainbow, but on your fingertips!

Lastly, consider using a sponge for a softer, more blended look. Dab the colors on with a makeup sponge to create a seamless shift. Just make sure to have some paper towels handy; things might get a bit messy!

These advanced methods will surely impress your friends and might even get you a few compliments! Happy painting!

Tips for Smooth Gradients

StepbyStep_Guide_to_Ombre_Nail_Techniques_0007.jpg

Achieving a smooth gradient on your nails can feel like an art form, but with the right tips, you can master it in no time.

First, choose your colors wisely. Pick shades that blend well together, like light pink and white or blue and purple.

Next, gather your tools. You’ll need a makeup sponge, nail polish, and a base coat. Don’t forget to apply the base coat—this helps the polish stick and protects your nails!

Now, here comes the fun part! Apply a stripe of each color onto the sponge. Make sure the colors touch but don’t mix just yet.

Then, dab the sponge onto your nail, using a light hand. Repeat this until you achieve the desired gradient. Remember, less is more! It’s easier to build up the color gradually than to remove too much.

After you’ve got that beautiful gradient, seal the deal with a top coat. This not only makes your nails shine but also smooths out any uneven areas.

And there you have it! With practice and a little patience, you’ll be rocking those smooth gradients like a pro. Happy nail painting!

Common Mistakes to Avoid

StepbyStep_Guide_to_Ombre_Nail_Techniques_0008.jpg

While experimenting with ombre nails can be exciting, there are a few common mistakes you’ll want to avoid to guarantee a flawless finish.

First off, don’t rush the blending process. If you apply your polishes too quickly, you might end up with harsh lines instead of a smooth gradient. Take your time, and let each layer dry a bit before moving on.

Another mistake is using too many colors. It may sound tempting to go wild, but sticking to two or three shades will keep your look elegant and not chaotic. Trust me, nobody wants rainbow fingers that look like a paint explosion!

You might also forget to prep your nails properly. Always start with a base coat to protect your nails and help the colors stick. Skipping this step can lead to chipping and an uneven finish, which is definitely not the goal.

Lastly, don’t underestimate the power of good tools! Using a makeup sponge can help achieve a seamless blend.

Finishing Touches

StepbyStep_Guide_to_Ombre_Nail_Techniques_0009.jpg

To achieve a polished look with your ombre nails, consider adding a few finishing touches that can elevate your design.

First, think about adding a top coat. This shiny layer not only makes your nails look fabulous, but it also helps protect your hard work from chips and scratches. Who wants to redo their nails right after spending time on them, right?

Next, you might want to add some nail art. Simple designs, like tiny dots or stripes, can enhance your ombre effect without being too overwhelming. If you’re feeling adventurous, try using a small brush or a toothpick to create fun patterns!

Don’t forget about the cuticles! Gently push them back with a cuticle stick and apply some cuticle oil to keep everything looking neat and tidy. It’s like giving your nails a little spa day!

Lastly, consider using a nail dryer or a fan to speed up the drying process. You’ll avoid those pesky smudges that can ruin your masterpiece.

With these finishing touches, your ombre nails will look stunning and professional, and you’ll feel like a nail art superstar!

Nail Care After Ombre

StepbyStep_Guide_to_Ombre_Nail_Techniques_0010.jpg

Caring for your nails after achieving that stunning ombre look is essential for maintaining their beauty and longevity.

First things first, always keep your nails clean and dry. This helps prevent any unwanted breakouts or infections. You don’t want anything ruining your fabulous nails, right?

Next, apply a nourishing cuticle oil regularly. This not only keeps your cuticles healthy but also makes your nails look shiny and fresh. Plus, who doesn’t love a little extra sparkle?

If you’ve used gel polish, make sure to avoid soaking your nails in water for long periods. It’s like giving your nails a little vacation from the water!

Be gentle when you’re doing chores, too. Wear gloves when washing dishes or cleaning to protect your nails from harsh chemicals. Trust me, your nails will thank you later!

Conclusion

Now that you know how to create stunning ombre nails, it’s time to get started! Remember, practice makes perfect, so don’t be afraid to experiment with colors and techniques. You’ll be a nail art pro in no time! And if things get a little messy, just laugh it off—everyone has their off days. So grab your tools, pick your favorite shades, and let your creativity shine. Happy painting! Your nails are about to look fabulous!

Tips for Maintaining Vintage-Inspired Nail Art

Tips for Maintaining Vintage-Inspired Nail Art

To keep your vintage-inspired nail art shining bright, start with quality nail products. Use a strong polish, a base coat, and finish with a good top coat for added shine. Don’t forget to prep your nails first—wash them well, trim, and buff them smooth. Protect them from water too; wearing gloves while cleaning helps! Regular touch-ups are key, so set aside some fun “me-time” each week to fix any chips and refresh the look. Trust me, with these tips, your nails will be the talk of the town, and there’s more to uncover ahead!

Choose Quality Nail Products

Tips_for_Maintaining_VintageInspired_Nail_Art_0001.jpg

Choosing quality nail products is essential for keeping your nail art looking fresh and vibrant. You wouldn’t want to spend hours creating a beautiful design only for it to chip the next day, right?

Start by picking good nail polish that has a strong formula. Look for ones that say “long-lasting” or “chip-resistant” on the label. Trust me, your nails will thank you!

Next, consider a base coat and a top coat. These guys are like the superheroes of nail care. A base coat helps your polish stick better and prevents staining, while a top coat seals everything in and adds that shiny finish.

And don’t skimp on quality here!

Also, check out the ingredients. You want polishes that are free from harmful chemicals like formaldehyde. It’s just better for your health and your nails!

Prepare Your Nails Properly

Tips_for_Maintaining_VintageInspired_Nail_Art_0002.jpg

Before applying your nail art, preparing your nails properly makes a world of difference. First things first, you want to start with clean nails. So, wash your hands and remove any old polish. Don’t worry, we all have those days when we forget!

Next, trim and file your nails to your desired shape. Whether it’s square, round, or almond, just make certain you’re happy with it. Your nails should be smooth and even, so take the time to buff away any rough spots.

If your cuticles are looking a bit wild, it’s a good idea to push them back gently with a cuticle stick. Please don’t go too crazy with the cuticle clippers; we’re not trying to start a nail war here!

Once your nails are all ready, apply a base coat. This step is essential because it protects your nails from staining and helps your nail art stick better. Plus, it makes everything look more polished!

Just remember to let each layer dry before moving on. Following these steps will help guarantee your vintage-inspired nail art stays fabulous for longer. Happy painting!

Apply a Top Coat

Tips_for_Maintaining_VintageInspired_Nail_Art_0003.jpg

Applying a top coat is essential for keeping your nail art looking fresh and vibrant. It’s like giving your nails a protective shield against chips and scratches. You’ve put in all that effort to create a beautiful design, so let’s make it last!

When you apply your top coat, make sure to do it carefully. Start at the base of your nail and gently brush toward the tip. This way, you cover the edges, which are the most vulnerable spots. Don’t forget to seal the edges! It’s a small step that makes a big difference.

Plus, a good top coat can give your nails that shiny, salon-finish look that’ll make you feel like a million bucks.

You can choose between glossy and matte finishes, depending on your style. Feeling adventurous? Try a glittery top coat for some extra sparkle!

Avoid Excessive Moisture

Tips_for_Maintaining_VintageInspired_Nail_Art_0004.jpg

Even with a great top coat, excessive moisture can wreak havoc on your nail art.

Think about it—when your nails get too wet, the polish can peel, chip, or smudge. You don’t want your hard work to go down the drain, right? So, here are some tips to keep your nail art looking fabulous.

First, when you’re washing dishes or cleaning the house, wear gloves. It might feel a little silly, but your nails will thank you!

If you love long showers, try to keep your hands out of the water as much as possible.

Next, consider the weather. If it’s super humid outside, be mindful of how it might affect your designs. You might want to skip the outdoor activities or find a cozy spot indoors.

Lastly, avoid soaking your nails in water for long periods. Yes, that means no nail baths!

Instead, opt for a quick rinse when needed.

Touch Up Regularly

Tips_for_Maintaining_VintageInspired_Nail_Art_0005.jpg

To keep your nail art looking fresh and vibrant, regular touch-ups are essential. Just like a vintage car needs a little polish now and then, your nails deserve the same love! If you notice any chips or fading, don’t wait too long to fix them. Grab your favorite nail polish and give those nails a quick refresh. It’s super easy and can be done in just a few minutes.

Make it a fun ritual! You could set aside some time each week to sit down with your nail supplies, maybe even put on your favorite music. While touching up, pay attention to the edges—those can wear out faster than you think.

If you’re feeling fancy, add a little sparkle or a design to take it up a notch!

And don’t forget about your top coat! A good top coat not only adds shine but also protects your art from chipping. So, if your nails start looking a little dull, that’s your cue to give them some TLC.

Conclusion

So, there you have it! By using quality nail products, prepping your nails right, and adding that top coat, you can keep your vintage-inspired nail art looking fabulous. Don’t forget to avoid too much moisture and touch up when needed. Your nails deserve all the love! With just a little care, you’ll rock those retro designs like a pro and maybe even get a few compliments. Happy painting, and may your nails shine like the stars!

How to Achieve the Perfect Ombre Nail Look

How to Achieve the Perfect Ombre Nail Look

To achieve the perfect ombre nail look, start by gathering your supplies, including 2-3 favorite nail polishes and a makeup sponge. Choose colors that make you happy, like soft pastels or bold shades. Prepare your nails by cleaning and shaping them, then apply a base coat. For the ombre effect, paint a base color on your nails, then dab the sponge with a second color to blend it in. Seal your masterpiece with a top coat for shine. Keep your nails healthy and vibrant with regular touch-ups and cuticle oil. Stick around for more tips on mastering this trendy look!

Gather Your Supplies

How_to_Achieve_the_Perfect_Ombre_Nail_Look_0001.jpg

To create the perfect ombre nail look, you’ll need a few essential supplies. First, grab your favorite nail polishes. You’ll want at least two colors that work well together. If you’re feeling adventurous, three colors can create even more depth!

Next, pick up a makeup sponge. Yes, the kind you use for foundation; it’s a secret weapon for blending those colors smoothly. You’ll also need a top coat to seal the deal and keep your nails shiny and beautiful.

Don’t forget a base coat, too! It helps protect your nails from staining and gives your colors a fresh canvas to shine. A small brush or toothpick can come in handy for cleanup if you go a little wild with the polish, which is totally okay!

Lastly, have some cotton balls and nail polish remover ready. Trust me, you’ll want these for any little mess-ups.

Now you’re all set! With your supplies gathered, you’re ready to plunge into the fun part of creating your ombre masterpiece. Who knew getting ready could feel like an art project? Enjoy the process—your nails are about to get a fabulous makeover!

Choose Your Color Palette

How_to_Achieve_the_Perfect_Ombre_Nail_Look_0002.jpg

What colors are you drawn to? When choosing your ombre nail palette, think about the shades that make you smile.

Do you love soft pastels, or are bold, vibrant colors more your style? It’s all about expressing yourself! You can mix and match colors that complement each other, like a light pink fading into a deeper rose.

Or, you might want to try a sunset vibe with oranges, yellows, and purples.

Don’t forget about contrasts, too! A dark blue blending into a light blue can look stunning.

And if you’re feeling adventurous, why not go for a rainbow ombre? The choices are endless!

When selecting your colors, consider the occasion. If you’re going to a fancy event, maybe stick with classy neutrals, but for a fun day out, brighter shades could be perfect.

You can even check your wardrobe for inspiration!

Prepare Your Nails

How_to_Achieve_the_Perfect_Ombre_Nail_Look_0003.jpg

Before diving into your ombre nail design, it’s important to prep your nails for the best results. Start by removing any old nail polish. You want a clean canvas, just like an artist!

Next, trim and shape your nails to your desired length and style. Whether you like them short and neat or long and dramatic, get them how you want.

After that, it’s time to file. Gently buff the surface to smooth out any ridges. Think of it as giving your nails a mini spa day.

Once they’re smooth, wash your hands to get rid of any dust.

Now, apply a base coat. This step is vital, as it protects your nails from staining and helps the polish stick better. Let it dry completely—patience is key here!

If you’re feeling fancy, you can also moisturize your cuticles with some oil or cream. They deserve some love too!

With your nails prepped and pampered, you’re ready to take on the colorful world of ombre. Get excited, because your beautiful nail masterpiece is just around the corner!

Blend the Colors

How_to_Achieve_the_Perfect_Ombre_Nail_Look_0004.jpg

How do you create that seamless ombre effect? Blending the colors is the key, and it’s easier than you might think!

Start by applying your base color to the entire nail. Once it’s dry, grab your second color and put a small amount on a makeup sponge. You’ll want to do this carefully, so don’t go wild just yet!

Now, gently dab the sponge onto your nail, moving it up and down a bit. You’re not painting a masterpiece here; just get a nice blend.

If you don’t see enough of the second color, add a bit more to the sponge and dab again. You can also use a small brush to help blend the edges if needed.

Apply a Top Coat

How_to_Achieve_the_Perfect_Ombre_Nail_Look_0005.jpg

A top coat is essential for completing your ombre nail look. Not only does it add a beautiful shine, but it also helps protect your design from chips and scratches. So, once you’ve achieved that stunning blend of colors, it’s time to grab your trusty top coat!

Start by shaking the bottle gently. This helps to mix the product without creating bubbles. Then, take a small amount on your brush and carefully apply it over your nails. Be sure to cover the entire nail, including the tips. This is super important because it seals in your hard work and prevents wear and tear.

Don’t rush it! Allow the top coat to dry completely before you do anything else. You wouldn’t want to accidentally smudge your masterpiece, right? If you’re feeling fancy, you can even add a second layer for extra protection and shine. Just remember, patience is key!

Once everything’s dry, you’ll see your ombre nails come to life with that glossy finish. You’ll be ready to show off your gorgeous nails to everyone, and trust me, they’ll be impressed!

Maintain Your Ombre Look

How_to_Achieve_the_Perfect_Ombre_Nail_Look_0006.jpg

Maintaining your ombre look is essential for keeping those stunning colors vibrant and fresh. To start, you’ll want to avoid harsh chemicals when cleaning or doing dishes. Wearing gloves can save your nails from fading and help keep that beautiful gradient intact.

Regular touch-ups are also a great idea. If you notice any chips or dullness, don’t hesitate to apply a little polish to those areas. Just make sure to blend it well to maintain the ombre effect.

Hydration plays a key role too! Use cuticle oil regularly to keep your nails and skin healthy. This not only keeps your nails looking great, but it also helps the colors pop.

Oh, and don’t forget about your top coat! You applied it initially, but adding another layer every few days can really make a difference. It protects your design and gives it that extra shine.

Lastly, schedule a refresh every couple of weeks to keep your look fresh. Whether you’re doing it yourself or visiting a salon, a little upkeep goes a long way.

With these tips, you’ll keep your ombre nails looking fabulous and ready for compliments!

Conclusion

And there you have it! You’re all set to rock that perfect ombre nail look. Just remember, practice makes perfect, so don’t worry if it doesn’t turn out flawless the first time. Have fun experimenting with colors and styles! Your nails will be the talk of the town, and you’ll feel like a nail art pro. So grab your supplies, get creative, and let your fingertips shine like the stars! Happy painting!

Vintage Nail Designs Inspired by Hollywood Glamour

Vintage Nail Designs Inspired by Hollywood Glamour

Vintage nail designs inspired by Hollywood glamour are all about elegance! Picture classic red nails like Marilyn Monroe or chic nude tips like Audrey Hepburn. You can recreate styles from the 1920s to the ’60s by using bold colors and intricate patterns. Short, polished nails were a hit in the ’20s, while the ’50s brought in fierce reds. Try adding some sparkle with glitter or use nail art stickers for a quick fix. Remember, it’s crucial to care for your nails, too! So, grab your polish, and let’s get creative—you’ll discover all sorts of fun ideas ahead!

Iconic Nail Trends of the Era

Vintage_Nail_Designs_Inspired_by_Hollywood_Glamour_0001.jpg

Throughout the decades, nail trends have evolved dramatically, each era leaving its distinctive mark on style. From the bold reds of the 1950s to the funky designs of the 1980s, there’s a lot to explore.

In the 1920s, flappers rocked short, polished nails, often in bright colors. They knew how to make a statement!

Fast forward to the 1970s, and you’d see long, almond-shaped nails adorned with intricate designs, reflecting the free-spirited vibe of the time.

Then came the 1980s, where nail art took off with wild colors and patterns. Imagine neon pinks and blues, along with glitter that could blind you! You might think it’s just too much, but that’s what made it so fun.

As we moved into the 1990s, minimalism kicked in, with simple colors like nude and pale pink becoming the go-to choices. It’s funny how trends change, right?

Today, we blend all these styles, mixing vintage chic with modern flair. So, why not embrace some of these iconic trends? You can totally channel your inner diva through your nails, no matter what decade you love most!

Classic Color Palettes

Vintage_Nail_Designs_Inspired_by_Hollywood_Glamour_0002.jpg

When it comes to vintage nail designs, color palettes play a significant role in capturing the essence of each era. You can really bring those classic vibes to life with a few timeless colors. Think of deep reds, soft pinks, and elegant nudes, which were favorites in the glamorous Hollywood days.

These shades aren’t just pretty; they make your nails look classy and sophisticated, just like the starlets of yesteryear!

If you want to step it up a notch, consider adding some bold colors like rich burgundy or even a lovely lavender. These hues were often seen on the silver screen, making a statement while still feeling vintage.

And don’t forget about the iconic black polish! It’s perfect for adding a touch of drama to your look.

Mixing and matching these colors can create a unique style that’s all your own. You might even want to add a bit of sparkle or shine for a fun twist!

Techniques From the Golden Age

Vintage_Nail_Designs_Inspired_by_Hollywood_Glamour_0003.jpg

While you might think vintage nail designs are all about color, the techniques used during the Golden Age truly set them apart.

Back then, nail art was more than just slapping on some polish. You’d often find women using fine brushes to create intricate designs right on their nails. They’d paint tiny flowers, swirls, or even little patterns that looked like lace!

Another cool technique was the use of nail wraps. These were like stickers but way more stylish. You could find them with shimmering designs or even in fun shapes.

Applying these was a bit of an art, too. It took patience and a steady hand to get them just right.

Don’t forget about the power of a good manicure! Women would spend time shaping and buffing their nails to perfection.

The goal was to make them shine like diamonds!

Influential Hollywood Starlets

Vintage_Nail_Designs_Inspired_by_Hollywood_Glamour_0004.jpg

The art of vintage nail design wouldn’t have flourished without the influence of Hollywood starlets who captivated audiences with their glamour and style.

Think about it! When you picture iconic actresses like Marilyn Monroe or Audrey Hepburn, you can’t help but notice their stunning nails. These ladies knew how to make a statement, and their manicures reflected their fabulous personalities.

Marilyn Monroe often wore classic red nails that screamed confidence and allure. You can almost hear her say, “Diamonds are a girl’s best friend!”

Meanwhile, Audrey Hepburn’s elegant, understated looks, like her perfectly polished nude nails, showed that sometimes less is more.

As you get inspired by these starlets, consider how their choices can influence your own nail designs.

Want to channel a bit of that old Hollywood magic? Try a bold color or a chic French tip!

Retro Nail Art Tools

Vintage_Nail_Designs_Inspired_by_Hollywood_Glamour_0005.jpg

Vintage nail art tools can transform your manicure routine into a nostalgic experience, bringing the charm of yesteryears right to your fingertips.

Imagine using a crystal nail file, which glides smoothly, leaving your nails perfectly shaped. Or think about a classic wooden cuticle pusher, as it gently nudges your cuticles back. These tools not only look pretty; they work like magic!

Now, let’s not forget about nail polish applicators from the past. They often had unique brushes that made painting your nails feel like an art project. You’ll find that vintage tools are designed with care, making them easier to handle.

Plus, they often come in delightful colors and designs, bringing joy to your nail routine. You might even come across nail art stamps, which can create fabulous patterns. Just think about how fun it’d be to impress your friends!

So, whether you’re channeling your inner Hollywood starlet or just want to try something new, retro nail art tools can add a sprinkle of glamour to your life.

Modern Interpretations of Vintage Styles

Vintage_Nail_Designs_Inspired_by_Hollywood_Glamour_0006.jpg

Many modern nail artists draw inspiration from vintage styles, effortlessly blending classic designs with contemporary techniques. You might notice that retro styles like bold stripes, polka dots, and floral patterns are making a comeback. These designs not only look fabulous but also tell a story, connecting you to a glamorous past.

Imagine rocking a chic 1950s pin-up style with a twist! You can opt for bright colors paired with modern finishes like matte or glossy effects. Nail art stickers and stamping can help you achieve those intricate vintage designs without the fuss. Plus, they save time, so you can get back to binge-watching your favorite shows!

Another fun way to modernize vintage nail art is by mixing and matching different eras. Try combining the delicate lace designs of the Edwardian period with the bold colors of the 1980s. The possibilities are endless!

And don’t forget about nail shapes—think of classic almond or square tips, but in a trendy stiletto or coffin shape.

With a little creativity, you can turn your nails into a canvas that pays homage to the past while being totally in style today! So, grab your nail polish and get started!

Step-by-Step Nail Designs

Vintage_Nail_Designs_Inspired_by_Hollywood_Glamour_0007.jpg

Creating stunning nail designs at home is easier than you might think! You don’t need to be a professional to show off some fabulous vintage styles.

First, gather your supplies: nail polish in your favorite colors, a base coat, a top coat, and some nail art tools like dotting pens or brushes.

Start by applying a base coat to protect your nails. Once it’s dry, paint your nails with a vibrant color, like classic red or soft pink—very Hollywood chic! Let that dry completely.

Now, here comes the fun part! Use a dotting tool to create polka dots or flowers. For stripes, use tape to guide your brush, giving you that perfect vintage look. Remember, don’t stress if it’s not perfect; practice makes progress!

Once you’re happy with your designs, seal everything with a top coat. This not only adds shine but keeps your art safe from chips.

Caring for Vintage-Inspired Nails

Vintage_Nail_Designs_Inspired_by_Hollywood_Glamour_0008.jpg

Maintaining the allure of your vintage-inspired nails requires a bit of care and attention. First, make certain you’re using a high-quality base coat before applying your nail polish. This helps protect your nails from damage and guarantees your beautiful design lasts longer.

After you’ve painted your nails, seal the deal with a topcoat. It adds shine and keeps your vintage look intact.

Next, keep your nails hydrated! Use a good hand cream or cuticle oil daily. This prevents your nails from becoming dry and brittle, ensuring they stay as stunning as your favorite Hollywood star.

Also, be gentle when doing chores. Wear gloves while washing dishes or cleaning to avoid chipping or fading your fabulous designs.

If you notice any chips, don’t panic! Just use a small brush to touch up the area with polish.

Finally, remember to give your nails a break every once in a while. Let them breathe by going polish-free for a few days. Your nails will thank you, and you’ll be ready to flaunt your next vintage-inspired design with confidence!

Conclusion

So, there you have it! Vintage nail designs inspired by Hollywood glamour are fun and fabulous. You can mix classic colors, use cool techniques, and channel your inner starlet with every stroke. Remember, it’s all about having a blast while you create your own stunning looks. Whether you’re going for a classic red or a quirky design, let your nails shine like the stars of old. Now, grab your tools and get ready to dazzle!

Essential Tools for Perfecting Vintage Nail Art

Essential Tools for Perfecting Vintage Nail Art

To perfect vintage nail art, you’ll need some essential tools. Start with high-quality nail polishes in retro colors like deep reds and soft pastels. Don’t forget a base coat to protect your nails, and a top coat for that glossy finish! Grab detail brushes for intricate designs, dotting tools for fun dots, and striping tape to create sharp lines. Finally, keep nail polish remover handy for easy cleanup. With these tools, you’ll be well on your way to rocking those fabulous vintage looks. Stick around, and you might just discover some nifty tips and techniques to take your nail art to the next level!

Nail Polish Selection

Essential_Tools_for_Perfecting_Vintage_Nail_Art_0001.jpg

Choosing the right nail polish can make all the difference in your vintage nail art. You’ll want to start by picking colors that scream vintage, like soft pastels, deep reds, and creamy whites. These shades can transport you back in time, making your nails look like they belong in a classic film.

Think about the designs you want to create, too! Whether it’s polka dots or floral patterns, your polish should complement those ideas.

Don’t forget the finish! A glossy look is great for a retro vibe, while a matte finish can offer a modern twist on vintage styles. And hey, if you’re feeling adventurous, try some glitter or shimmer to give your nails a little sparkle. Just be careful not to overdo it; you want to channel vintage elegance, not a disco ball!

Lastly, check the formula. A polish that’s easy to apply and dries quickly is a must. You don’t want to be waiting forever for your masterpiece to set!

Base and Top Coats

Essential_Tools_for_Perfecting_Vintage_Nail_Art_0002.jpg

A good base and top coat can elevate your vintage nail art to the next level. Think of them as the superheroes of your manicure! The base coat protects your nails from stains and helps the polish stick better. You wouldn’t want your beautiful vintage colors to chip away, right? Applying a thin layer of base coat makes all the difference.

Now, let’s talk about the top coat. This shiny layer seals everything in, giving your nails that glossy finish that screams “look at me!” It also helps prevent chips and keeps your nail art looking fresh longer. Plus, some top coats even dry quickly, so you can get back to your day without worrying about smudging.

When you choose your base and top coats, look for ones that are labeled as fast-drying or long-lasting. You want the best for your nails!

And don’t forget to let each layer dry before moving on to the next. Trust me, your vintage nail art will thank you.

Nail Art Brushes

Essential_Tools_for_Perfecting_Vintage_Nail_Art_0003.jpg

Nail art brushes are essential tools that can transform your designs from simple to stunning. With the right brushes, you can create all sorts of unique styles, whether you’re aiming for delicate florals or bold geometric patterns.

Start with a few basic types: a detail brush for intricate designs, a flat brush for filling in color, and a striping brush for those cool lines.

When you pick up your brush, you’ll notice the difference in how easily you can apply nail polish. It’s like having a magic wand for your nails!

Don’t forget to clean your brushes regularly; it keeps them in top shape and helps them last longer. You wouldn’t want to paint a masterpiece with a dirty brush, right?

Experiment with different brushes to find what works best for you. Remember, practice makes perfect, so don’t be afraid to try new techniques. You might just discover your inner nail artist!

And if you make a mistake, it’s just nail polish—grab some remover and start again. So, grab your brushes and let your creativity flow! Your nails are your canvas, and it’s time to make them shine!

Dotting Tools

Essential_Tools_for_Perfecting_Vintage_Nail_Art_0004.jpg

With dotting tools in hand, you can easily elevate your nail art game. These little wonders are perfect for creating those charming vintage designs you love. They come in various sizes, which means you can make dots of all shapes and sizes. Whether you want tiny polka dots or big, bold ones, you’ve got it covered!

To use a dotting tool, simply dip it in your nail polish and gently press it onto your nail. You can create flowers, swirls, or even intricate patterns. The key is to practice a bit to get the feel for it. Don’t worry if your first tries aren’t perfect—nail art is all about having fun!

You can also mix and match colors for a more vibrant look. Imagine a classic white base with bright red and blue dots! It’s like a mini celebration on your nails.

Plus, dotting tools are super easy to clean. Just wipe them with polish remover, and they’re ready for your next masterpiece.

Nail Striping Tape

Essential_Tools_for_Perfecting_Vintage_Nail_Art_0005.jpg

Three simple strips of tape can transform your nail art into a professional-looking masterpiece. Nail striping tape is a must-have for anyone who loves adding detail to their designs. It’s thin, sticky, and super versatile, making it perfect for creating clean lines or geometric patterns. Just think of it as your secret weapon!

To use it, start by painting your nails a solid color. Once it’s dry, place the tape on your nails in any pattern you like. You can make stripes, zigzags, or even a cool checkerboard effect. After that, paint over the tape with a contrasting color.

Once the polish dries, carefully peel off the tape to reveal those sharp lines. Voila! You’ve got nail art that looks like you just walked out of a salon.

If you mess up, don’t worry! Just grab some polish remover and start again. Nail striping tape is forgiving, so you can experiment without fear.

Plus, it comes in different colors, so you can match it to any outfit or mood. Get creative and have fun; your nails are a canvas waiting for your artistic touch!

Stencils and Templates

Essential_Tools_for_Perfecting_Vintage_Nail_Art_0006.jpg

Stencils and templates can elevate your nail art game by providing a consistent and precise way to achieve intricate designs. Imagine effortlessly creating perfect patterns without the stress of freehand drawing.

With stencils, you can let your imagination run wild! These handy tools come in various shapes and designs, from flowers to geometric patterns, making it easy to find something that suits your style.

Using stencils is a breeze. Just place one on your nail, apply your polish, and peel it off to reveal a stunning design. You won’t have to worry about shaky hands or uneven lines.

Plus, they’re great for layering colors, which can add depth and flair to your vintage looks.

Templates are equally awesome. They can help you create specific shapes, like French tips or even intricate lace designs.

Just trace the outline, and voilà! You’ve got a fabulous nail design that’ll turn heads.

Vintage Nail Accessories

Essential_Tools_for_Perfecting_Vintage_Nail_Art_0007.jpg

Vintage nail accessories bring a touch of nostalgia and charm to your nail care routine. When you think about vintage, you might picture delicate lace, classic colors, or even funky patterns from the 60s. These accessories can really elevate your nail art game!

One must-have is a vintage nail file. You’ll love the feel of a wooden file with its smooth edges. It not only shapes your nails but also makes you feel like you’re in a glamorous old-fashioned salon.

Plus, don’t forget about vintage nail polish bottles! They come in beautiful designs that can make your nail station look like a mini museum.

Another fun accessory is a charming vintage cuticle pusher. These come in various materials, like metal or wood, and they make pushing back your cuticles feel like a luxurious experience.

And what’s a vintage nail look without some sparkly embellishments? Think rhinestones or tiny pearls that add that extra wow factor to your nails.

UV/LED Nail Lamp

Essential_Tools_for_Perfecting_Vintage_Nail_Art_0008.jpg

A UV/LED nail lamp is an essential tool for achieving a salon-quality finish at home. You’ll love how it helps your nail art dry quickly, so you won’t have to worry about smudges.

Imagine this: you just finished painting your nails, and then—bam! You slide your hand under the lamp, and it’s like magic. In just a few minutes, your nails are dry and ready to impress!

Using a UV/LED lamp is super simple, too. Just apply your favorite gel polish, place your hand inside, and choose the timer setting. Most lamps have various time options, usually ranging from 30 to 60 seconds.

The best part? You can even use it for curing nail art stickers and other embellishments, so those vintage designs really pop!

Now, don’t forget to keep your lamp clean. A quick wipe with rubbing alcohol after each use will help it last longer. Plus, you’ll avoid any sticky residue that could mess up your next masterpiece.

Nail Care Essentials

Essential_Tools_for_Perfecting_Vintage_Nail_Art_0009.jpg

Healthy nails are the foundation of any great manicure, and nail care essentials are key to achieving that perfect look.

First, you’ll want to keep your nails clean and trimmed. Invest in a quality nail clipper and a sturdy nail file. You don’t want to be that person with jagged edges, right?

Next, moisturizing is super important. Use a good cuticle oil to nourish your cuticles and prevent hangnails. Your hands deserve some love too, so keep a hand cream nearby. Applying it regularly will keep your skin soft and your nails happy.

Don’t forget about buffing! A nail buffer can help smooth the surface of your nails, giving them that salon-fresh shine without any polish. Plus, it’s kind of fun to use!

Conclusion

Now that you know the essential tools for perfecting your vintage nail art, you’re ready to release your creativity! With the right polish, brushes, and dotting tools, you can create stunning designs that’ll impress everyone. Don’t forget to take care of your nails, too – they deserve some love! So grab your supplies, put on a catchy tune, and get ready to have some fun while you make your nails look fabulous! Happy crafting!

Step-by-Step Guide to Creating Vintage Nail Art

Step-by-Step Guide to Creating Vintage Nail Art

Creating vintage nail art is super fun and simple! First, gather essential supplies like classic nail polish in soft pastel or deep red, a base coat, top coat, and nail art brushes. Then, prep your nails by cleaning them, trimming, and applying a base coat. Once that’s dry, you can choose your design, like classic French tips or playful polka dots. Use thin layers of polish for a flawless finish, and don’t forget to clean up the edges with a small brush. Feeling inspired? You might just want to explore more tips and tricks for that perfect vintage look!

Essential Materials Needed

StepbyStep_Guide_to_Creating_Vintage_Nail_Art_0001.jpg

To create stunning vintage nail art, you’ll need a few essential materials to set the stage for your creative expression. First up, grab some high-quality nail polish in classic colors like soft pastels, deep reds, or even creamy whites. These shades give your nails that charming retro vibe you’re after.

Don’t forget a base coat and top coat; they’re like the unsung heroes of nail art, keeping your design safe and shiny!

Next, you’ll need some nail art brushes. These fine-tipped tools help you create those intricate designs, like polka dots or delicate flowers. If you want to go the extra mile, consider nail stickers or decals for quick and easy designs that scream vintage.

A good pair of tweezers will come in handy for applying those stickers, too.

And let’s not skip over the all-important nail file; it helps shape your nails and keep them looking fab.

Finally, have some cotton balls and nail polish remover ready for any little oops moments.

With these materials in hand, you’re all set to plunge into the delightful world of vintage nail art! Let’s get creative!

Preparing Your Nails

StepbyStep_Guide_to_Creating_Vintage_Nail_Art_0002.jpg

After gathering your materials, it’s time to prepare your nails for the vintage art you’ll create. First, you’ll want to start with clean, dry nails. Wash your hands thoroughly and remove any old polish. You don’t want remnants of last week’s nail art crashing your vintage party, right?

Next, trim and shape your nails to your desired length. If you’re feeling fancy, you can even file them into a classic oval or square shape.

Once they’re all set, it’s time to push back those cuticles. Gently use a cuticle stick or a soft tool to push them back. This step helps give your nails a clean look, so they’re ready for some fabulous designs.

Now, apply a base coat. This step isn’t just for fun; it protects your nails and helps your polish stick better. Plus, it makes your nails look smooth and shiny.

Let it dry completely before you plunge into the exciting part—painting your vintage nail art! Remember, taking these steps helps guarantee your gorgeous designs last longer. Trust me, you’ll thank yourself later when your nails are the talk of the town!

Vintage Nail Art Techniques

StepbyStep_Guide_to_Creating_Vintage_Nail_Art_0003.jpg

Embracing vintage nail art techniques opens up a world of creativity and charm.

You’ll find that these methods aren’t only fun but also a great way to express your unique style. One popular technique is the classic French tip. It’s simple yet elegant, creating a timeless look. Just use a nude base and paint the tips white for that chic finish.

Another technique to try is the polka dot design. Grab a dotting tool or even a bobby pin! Dip it in polish and create dots in various colors. This playful style is reminiscent of the 1950s and brings a burst of joy to your nails.

You can also experiment with stripes. Use tape to section off parts of your nail and paint them in contrasting colors. When you peel off the tape, you’ll reveal sharp, clean lines that scream vintage glamour.

Lastly, don’t forget about floral designs! Use a small brush to paint delicate flowers on your nails. This technique adds a touch of romance and can be customized in countless ways.

Design Inspiration and Ideas

StepbyStep_Guide_to_Creating_Vintage_Nail_Art_0004.jpg

Finding design inspiration for vintage nail art can be as enjoyable as creating the art itself. You can look to various sources to spark your creativity. Start by exploring vintage fashion magazines or online photo collections. You’ll find beautiful colors, patterns, and styles that can inspire your next nail design.

Think about the different eras, like the roaring twenties, the fabulous fifties, or the groovy seventies. Each period has its unique flair! For instance, you might love polka dots or pastel colors from the fifties. Or maybe you’re drawn to the intricate floral designs of the seventies.

Don’t forget to check your grandma’s jewelry box! Vintage rings or brooches can give you amazing ideas. You can also find inspiration in nature—flowers, leaves, and even the sky can help you create stunning nail art.

Another fun tip? Look at your favorite old movies. The characters often sport fabulous nails. Jot down any designs you fall in love with!

With all these ideas swirling in your head, you’re ready to create some fabulous vintage nail art that showcases your personality and style. Happy painting!

Tips for a Flawless Finish

StepbyStep_Guide_to_Creating_Vintage_Nail_Art_0005.jpg

Achieving a flawless finish in vintage nail art is essential for making your designs truly stand out. To start, prep your nails by cleaning and trimming them. Don’t skip this step! A clean canvas makes all the difference.

Next, apply a base coat. It not only protects your nails but also helps your polish stick better.

When you’re ready to paint, use thin layers of polish. It’s better to apply two or three thin coats than one thick one. This way, you’ll avoid those annoying bubbles. Remember to let each layer dry completely before moving on. Patience is key, and hey, it gives you a moment to sip your favorite drink!

After your colors are on, clean up the edges with a small brush dipped in polish remover. This little trick makes your nails look super neat.

Conclusion

Now you’re all set to rock your vintage nail art! Remember, practice makes perfect, so don’t be afraid to try different designs and techniques. Have fun experimenting with colors and patterns that make you smile. Your nails are like a little canvas, ready for your creative touch. So grab those brushes and get started—your fabulous vintage nails are just a few strokes away! Happy painting, and may your nails shine as bright as your personality!

Iconic Vintage Nail Colors and Patterns

Iconic Vintage Nail Colors and Patterns

Iconic vintage nail colors and patterns are all about fun and creativity! Think classic red shades, which scream confidence and come in everything from bright cherry to deep burgundy. Pastel hues like baby pink and lavender add a soft touch, while bold black and white patterns, like stripes and polka dots, make your nails pop. Don’t forget the timeless French manicure, where you can play with colors and cool tips. Plus, floral designs bring a vibrant touch to any style. Excited to see how these trends can brighten up your nail game? Keep going, and you might find your next go-to look!

Classic Red Nail Shades

Iconic_Vintage_Nail_Colors_and_Patterns_0001.jpg

There’s something timeless about classic red nail shades that never goes out of style. Whether you’re getting ready for a fancy event or just want to feel a little more fabulous on a regular day, a coat of red polish can do wonders. It’s bold, it’s vibrant, and guess what? It makes your hands look even more elegant!

When you think of red nails, you might picture glamorous movie stars or vintage pin-up girls. That’s because red has been a favorite for ages! It comes in so many shades, from bright cherry to deep burgundy, so there’s a perfect hue for everyone.

You can even mix and match with fun patterns or nail art. Ever tried polka dots or stripes? They can make your red nails pop even more!

Plus, red nails aren’t just pretty; they’re also a statement. They say you’re confident and ready to take on the world.

Timeless Pastel Hues

Iconic_Vintage_Nail_Colors_and_Patterns_0002.jpg

While you might think of bold colors for a statement, timeless pastel hues offer a soft yet elegant alternative that never fails to impress.

These gentle shades, like baby pink, mint green, and lavender, bring a fresh, dreamy vibe to your nails. They’re perfect for any occasion, whether it’s a casual day out or a fancy dinner.

Pastels aren’t just pretty; they’re also versatile. You can wear them alone for a classic look or mix and match them for a fun, playful design.

For example, try a soft yellow with a delicate floral pattern, or a pale blue paired with a little sparkle. The options are endless!

You might think pastels are just for spring, but they can brighten up any gloomy day, making you smile.

Plus, they work well with your wardrobe, so you won’t have to worry about clashing colors.

Bold Black and White Patterns

Iconic_Vintage_Nail_Colors_and_Patterns_0003.jpg

Why settle for ordinary when bold black and white patterns can transform your nails into a striking statement? These eye-catching designs aren’t only stylish but also super fun to create. You can mix and match patterns like stripes, polka dots, and chevrons, giving your nails a unique flair.

Imagine walking into a room and everyone notices your fabulous nails. It’s a great way to show off your personality!

You don’t need to be a nail artist to achieve these bold looks. Start with a solid black or white base coat, then use a small brush or nail stickers to add your favorite patterns. If you make a mistake, don’t worry! Nail polish remover is your best friend.

For a little extra fun, try adding a touch of glitter or some shiny topcoat. This can make your black and white patterns pop even more. Plus, it’ll keep your nails looking fresh and chic.

Vintage French Manicure Styles

Iconic_Vintage_Nail_Colors_and_Patterns_0004.jpg

Often regarded as a timeless classic, vintage French manicure styles bring an elegant touch to your nails that never goes out of fashion. You can’t go wrong with this chic look, whether you’re heading to a fancy dinner or just hanging out with friends. The classic French manicure features a pale pink or nude base with white tips, and it’s super easy to create!

To give your vintage French manicure a twist, try using pastel colors for the tips. Soft blues, pinks, or even mint greens can add a fun pop while still keeping that classy vibe. You might also consider adding tiny designs, like polka dots or stripes, to make your nails stand out.

If you’re feeling extra creative, experiment with different shapes for the tips. Instead of the usual straight edge, try a rounded or even a diagonal line!

Keep in mind that practice makes perfect, so don’t stress if it doesn’t turn out flawless the first time. Just remember, having fun with your nails is what it’s all about. So grab your polish, and let’s get those nails looking fabulous!

Iconic Floral Nail Designs

Iconic_Vintage_Nail_Colors_and_Patterns_0005.jpg

Embracing the beauty of nature, iconic floral nail designs add a vibrant touch to your manicure that’s perfect for any occasion. Whether you’re headed to a picnic or a party, a fresh flower pattern can brighten your day. You can choose from tiny daisies to big, bold roses, or even mix them all up for a fun garden look.

Creating floral designs isn’t as tricky as it seems. You can start with a base color that makes your flowers pop, like a soft pastel or a bright hue. Then, using a thin brush or a dotting tool, you can paint on your flowers.

Don’t worry if they don’t look perfect—nature isn’t perfect either! You might even want to add some green leaves for that extra touch.

For a more playful vibe, try using stickers or nail wraps with floral patterns. They’re super easy to apply and can save you time. Plus, if you mess up, you can just peel them off and start again.

With floral nail designs, you’ll always feel cheerful and ready to embrace the beauty around you! So go ahead, let your nails bloom!

Retro Glitter and Metallic Looks

Iconic_Vintage_Nail_Colors_and_Patterns_0006.jpg

There’s something undeniably enchanting about retro glitter and metallic looks that can instantly elevate your nail game. Imagine flashing those sparkly nails at your friends, leaving them in awe.

Retro styles bring a fun twist, combining shiny metallics with glitter that looks like it belongs on a disco ball!

To rock this look, start with a solid base color like classic red or deep blue. Once that’s dry, you can add a layer of glitter polish; think gold or silver for that extra sparkle.

Don’t be afraid to mix and match! You could even create a fun gradient effect by blending two glitter shades.

Metallic nail polish is another great option. It gives a smooth, shiny finish that catches the light beautifully. You could paint your entire nail or just add some metallic tips for a chic twist.

And here’s a little tip: make sure to seal your design with a topcoat. This not only protects your nails but also makes the glitter pop even more.

Conclusion

Now that you’ve explored these iconic vintage nail colors and patterns, it’s time to get creative! Whether you’re rocking classic red or trying out some funky floral designs, your nails can be a fun way to show your personality. Don’t be afraid to mix and match—after all, nail art is all about having a good time! So grab your polish, channel your inner vintage diva, and let those nails shine like it’s the good old days!

Rhinestone Nail Art for Beginners

Rhinestone Nail Art for Beginners

Rhinestone nail art is a fantastic and easy way to add some sparkle to your fingertips! To get started, you’ll need a few tools like a nail file, base coat, top coat, and tweezers. First, prep your nails with a base coat. Then, use tweezers to pick up rhinestones and place them where you want. You can create fun designs like an accent nail or a sparkly border. To make them last longer, seal everything with a top coat and avoid water for a day. Stick around, and you’ll find even more tips to shine bright!

Understanding Rhinestones

Rhinestone_Nail_Art_for_Beginners_0001.jpg

When it comes to nail art, rhinestones can elevate your design to a whole new level. These sparkling gems add a touch of glam and personality to your nails, making them stand out. You might think rhinestones are just for fancy occasions, but you can use them every day! They come in different shapes, colors, and sizes, so you can mix and match to create your unique look.

Understanding rhinestones is simple. They’re usually made from glass or plastic, and they catch the light beautifully. You can find them in craft stores or online, and they’re super affordable.

When you choose rhinestones, think about the style you want. Do you want a bold, eye-catching design, or something more subtle?

Applying rhinestones is just as fun! You can place them in patterns, create little designs, or even use them to highlight your nail art. Just remember to use a good nail glue or top coat to keep them in place.

And hey, if they come off at a party, just consider it a chance to start a new trend! So, go ahead and get creative with those sparkly little beauties.

Essential Tools for Nail Art

Rhinestone_Nail_Art_for_Beginners_0002.jpg

Mastering nail art requires having the right tools at your fingertips. You’ll want to gather a few essentials to make your rhinestone nail art journey fun and easy.

First on the list is a good nail file. It helps shape your nails and prepare them for the design. Next, grab a base coat to protect your nails and make your art last longer.

You’ll also need a top coat; this seals everything in and gives your nails that glossy finish.

Now, don’t forget a pair of tweezers or a dotting tool! Tweezers help you pick up those tiny rhinestones without turning your fingers into a sticky mess. A dotting tool can create small dots or help apply rhinestones precisely.

Basic Techniques to Apply Rhinestones

Rhinestone_Nail_Art_for_Beginners_0003.jpg

Now that you’ve gathered your tools, it’s time to learn how to apply rhinestones effectively. First, start with your prepared nails. You can use a base coat or polish to create a sticky surface. This will help your rhinestones stay put.

Next, pick up a rhinestone using a dotting tool or tweezers. If you’re feeling fancy, you can even use a toothpick! Gently place the rhinestone onto your nail, pressing down slightly. Don’t worry if it’s not perfect; you can adjust it before it sets.

If you’re using nail glue, put a tiny drop on the spot where you want the rhinestone. Then, use the tool to pick up the stone and place it right on the glue. After placing all your rhinestones, let them dry for a few minutes. It might feel like waiting for a pot of water to boil, but it’s worth it!

Step-by-Step Design Ideas

Rhinestone_Nail_Art_for_Beginners_0004.jpg

Creating stunning rhinestone designs can elevate your nail art game, and there are plenty of simple ideas to get you started.

One fun design is the classic accent nail. Paint all your nails a solid color, then choose one nail on each hand to cover with rhinestones. You can create a gradient effect by starting with larger stones at the base and moving to smaller ones at the tip.

Another easy idea is the rhinestone border. After applying your favorite nail polish, place a line of rhinestones along the cuticle area. This gives your nails a chic look without being overwhelming.

Don’t forget about the starburst design! Start by placing a larger rhinestone in the center of your nail, then arrange smaller stones around it like rays of sunshine.

For a playful twist, try adding rhinestones to a simple nail art design, like polka dots or stripes. Just dot a little clear polish where you want to place them.

Tips for Long-lasting Results

Rhinestone_Nail_Art_for_Beginners_0005.jpg

To achieve long-lasting rhinestone nail art, preparation is key. First, make sure your nails are clean and dry. Remove any old polish and push back your cuticles. This’ll create a smooth canvas for your design.

Next, apply a base coat. Not only does it protect your nails, but it also helps the polish stick better.

When you choose your rhinestones, go for high-quality ones. Cheap rhinestones might look sparkly at first, but they can lose their shine or fall off quickly.

Once you’ve placed your rhinestones, seal them with a top coat. This step is essential! A good top coat will keep your bling intact and add shine, making your nails look salon-fresh for longer.

Avoid soaking your nails in water for the first 24 hours after applying the top coat. Water can loosen the rhinestones, and we definitely don’t want that!

Finally, if you’re doing dishes or cleaning, wear gloves. Your nails deserve a little pampering, right?

Follow these tips, and you’ll be rocking those stunning rhinestone nails for days. Happy decorating!

Conclusion

Now that you know the basics of rhinestone nail art, it’s time to get creative! Remember, practice makes perfect, so don’t worry if your first try isn’t Pinterest-perfect. Have fun experimenting with different designs and colors. With these tips and techniques, your nails will sparkle like a disco ball in no time! So grab your tools, let your imagination run wild, and enjoy the process. You’ve got this—your fabulous nails are just a rhinestone away!

Striped Nail Designs Inspired by Fashion Trends

Striped Nail Designs Inspired by Fashion Trends

Striped nail designs are super fun and totally in style right now! You can rock classic black and white stripes for a timeless look or go wild with bold, bright colors like vibrant pinks and sunny yellows. Want something softer? Try pastel stripes for a dreamy vibe that fits perfectly with spring outfits. Don’t forget about adding some glitter or gems for that extra sparkle! Seasonal colors can also inspire your designs. Think warm burgundies for autumn or cool metallics for winter. Get ready to express yourself, because there’s so much more to discover on striped nails!

Current Fashion Color Trends

Striped_Nail_Designs_Inspired_by_Fashion_Trends_0001.jpg

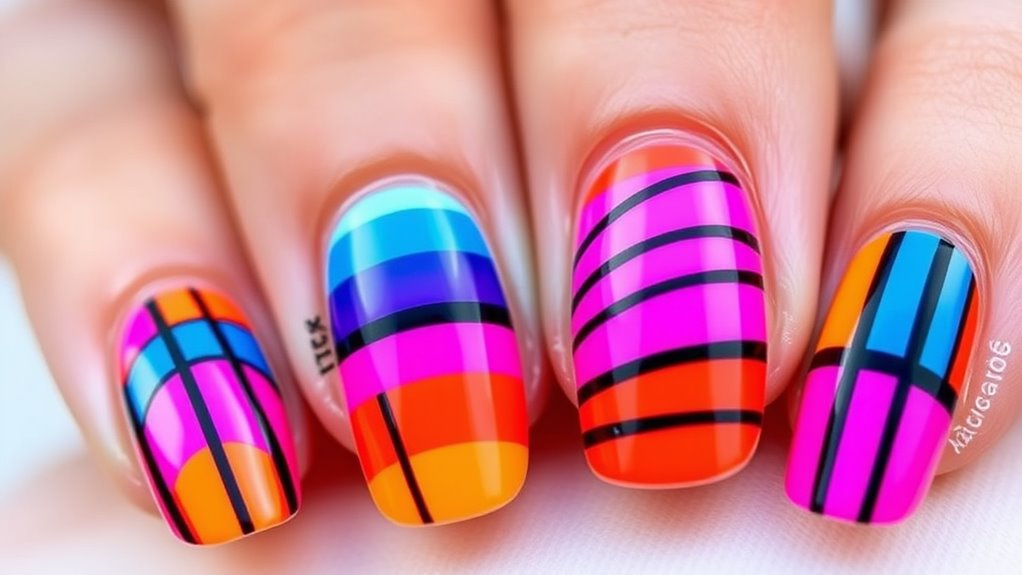
When it comes to nail art, color trends can make or break your design. You might be wondering what colors are in right now, and that’s a great question! Vibrant shades like electric blue, bright coral, and bold green are taking center stage this season. These colors can really make your nails pop and grab attention.

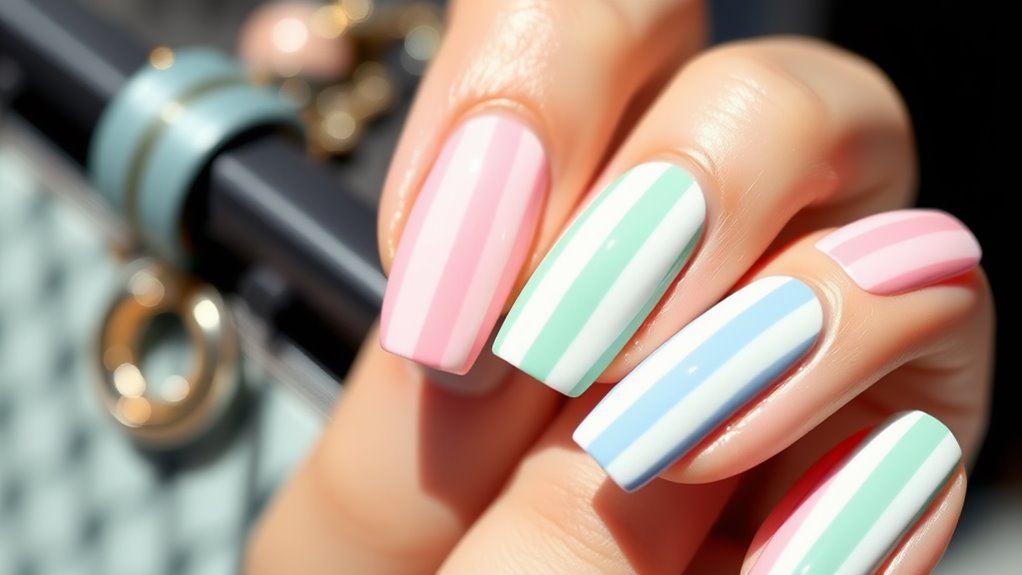
Pastel colors aren’t going anywhere either. Soft lavender, mint green, and baby pink are perfect if you want a more subtle look. They’re like a gentle whisper, bringing a touch of elegance to your style. Plus, they can be mixed with brighter shades for a fun twist!

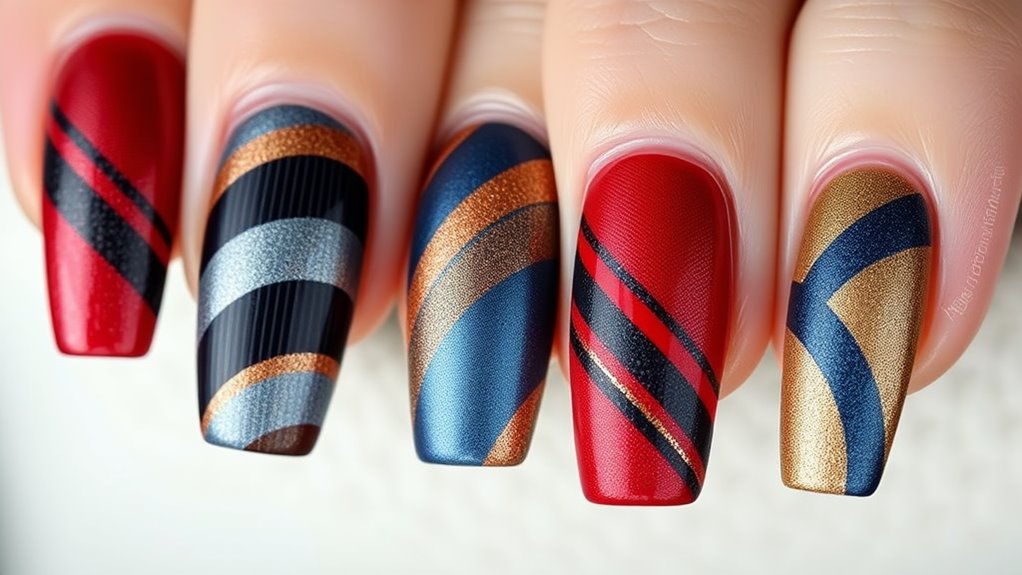
Metallics are also making waves. Think shiny golds or silvers that catch the light and sparkle like your favorite disco ball. You can easily incorporate these into your striped designs for a little extra glam.

Don’t forget about earth tones! Rich browns and deep reds can add warmth to your nails, making them feel cozy and inviting.

Classic Black and White Stripes

Striped_Nail_Designs_Inspired_by_Fashion_Trends_0002.jpg

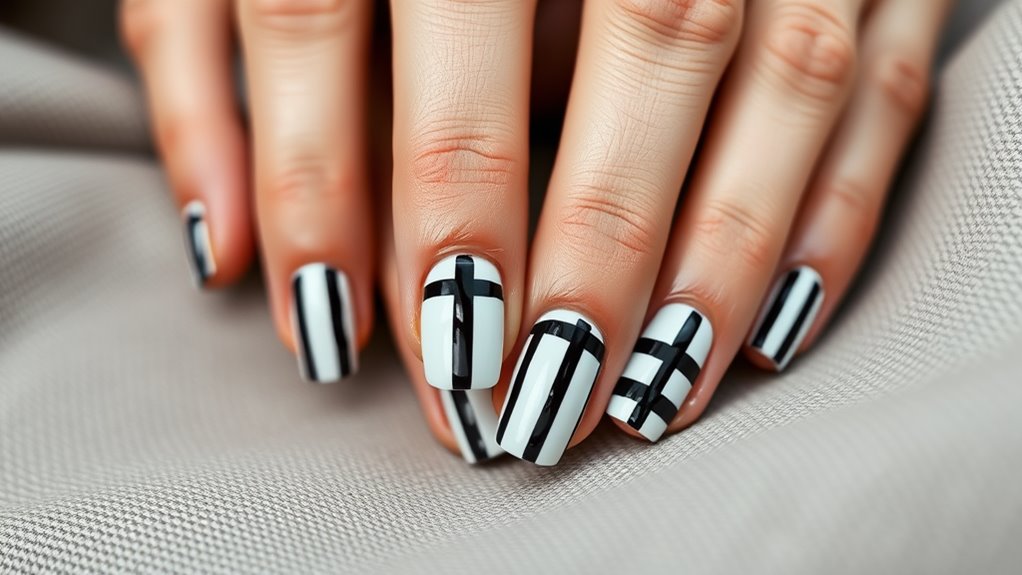
Black and white stripes are a timeless nail art choice that never goes out of style. They’re super easy to create and look fabulous for any occasion. You can rock them at a fancy party or just while hanging out with friends. With a little practice, you’ll have them down in no time!

To start, you’ll need some basic supplies: a good black and white nail polish, striping tape, and a top coat.

First, paint your nails with a white base coat. Once that’s dry, place the striping tape in the pattern you want, whether it’s thin or thick stripes. Next, paint over the tape with black polish. When you peel off the tape, you’ll reveal those crisp lines that look like you just walked out of a salon.

Don’t forget to finish with a shiny top coat to seal everything in place! If you want to add a little flair, consider adding a tiny gem or glitter to one nail for a fun twist.

Bold and Bright Color Combinations

Striped_Nail_Designs_Inspired_by_Fashion_Trends_0003.jpg

Bold and bright color combinations can instantly elevate your nail game and make a statement. Think vibrant pinks paired with sunny yellows, or electric blues mixed with fiery oranges! These eye-catching combinations aren’t just fun; they let your personality shine through.

When you’re ready to create your striped nail design, start with a base coat in one of your bold colors. Let it dry completely—nobody likes smudged nails!

Next, grab some striping tape or a thin brush. You can create vertical, horizontal, or even diagonal stripes. The key is to have fun and experiment!

Don’t worry if your lines aren’t perfect; that’s part of the charm. You can also mix and match different colors on each finger for a playful look.

Want to add some sparkle? A glitter top coat over your stripes can give your nails a dazzling finish.

Pastel Stripes for a Soft Look

Striped_Nail_Designs_Inspired_by_Fashion_Trends_0004.jpg

If you’re looking to soften your nail art while still making an impression, pastel stripes are the way to go. These gentle hues create a lovely, dreamy vibe that’s perfect for any occasion. Imagine your nails dressed in soft pinks, blues, and purples, giving off a sweet and delicate look. It’s like wearing cotton candy on your fingertips!

To get started, choose a few pastel colors that you love. You can pick three or four shades that complement each other. Once you have your colors, paint your base coat in a light pastel or nude shade.

After that’s dry, grab a striping brush or tape to create those chic stripes. You can go for thin, delicate lines or bolder stripes, depending on your mood.

Don’t worry if your lines aren’t perfect; that’s part of the charm! The beauty of pastel stripes is their laid-back vibe. Plus, they’ll match just about any outfit you wear, from jeans to dresses.

Textured Stripes With Nail Art Techniques

Striped_Nail_Designs_Inspired_by_Fashion_Trends_0005.jpg

Textured stripes can elevate your nail art game to a whole new level. Imagine your nails rocking a fun mix of colors and textures that catch everyone’s eye! You can create these textured stripes using different techniques.

One popular method is to use a sponge. Simply dab a sponge in your chosen polish and gently press it onto your nails. This creates a cool, gradient effect that feels super stylish!

Another fun technique is using a nail art brush. You can draw thin, wavy lines or thick, bold stripes to mix things up. Try different brush strokes to see what you like best.

And don’t forget about adding some glitter or matte topcoat! Glitter can add sparkle and shine, while a matte finish gives an elegant touch.

You could also experiment with textures like sand or velvet. Just apply a textured polish, and watch how it transforms your design. It’s like giving your nails a tiny makeover!

Geometric Patterns and Stripes

Striped_Nail_Designs_Inspired_by_Fashion_Trends_0006.jpg

Get ready to transform your nails with eye-catching geometric patterns and stripes! These designs aren’t just fun; they’re a great way to express your personality.

Imagine bold lines, triangles, and squares dancing across your fingertips. You can go wild with colors or stick to a classic black and white combo.

Start by choosing a base color. Once that’s dry, grab some tape to create clean, straight lines. You can make stripes of different widths, too!

Want to get fancy? Try layering shapes like triangles or diamonds. Just remember to let each layer dry before adding another.

If you’re feeling extra creative, mix in some dots or other shapes to really make your nails pop. You could even match your nail art to your outfit, making you look super stylish.

And don’t worry if it doesn’t look perfect—nail art is about having fun!

Seasonal Striped Nail Inspirations

Striped_Nail_Designs_Inspired_by_Fashion_Trends_0007.jpg

As the seasons change, so can your nail designs, offering a fresh canvas for striped inspirations that reflect the beauty of each time of year.

In spring, think pastel colors like soft pinks and mint greens. You can create delicate stripes that mimic blooming flowers. A little sparkle can add a fun touch, just like the sun breaking through the clouds!

When summer rolls around, vibrant hues come into play. Picture bright yellows, ocean blues, and fiery oranges. You might want to try bold, thick stripes that pop against your skin, making your nails look as lively as a beach party.

As autumn arrives, warm colors like deep burgundy and mustard yellow take over. You can design your nails with stripes that resemble falling leaves, using a mix of both horizontal and vertical lines.

Celebrity-Inspired Striped Nail Designs

Striped_Nail_Designs_Inspired_by_Fashion_Trends_0008.jpg

When searching for nail design inspiration, seek no more than your favorite celebrities. They often rock fabulous striped nail designs that you can totally recreate!

Think about how Billie Eilish paired bold green and black stripes with her edgy style. You can try this combo too! Just grab some nail polish in those colors and get creative.

Or maybe you love the glam of Kylie Jenner. She often sports chic, minimalist stripes that look super classy. You could use nude and white polish for a sophisticated vibe. It’s perfect for any occasion!

Don’t forget about Ariana Grande, who sometimes goes for pastel stripes that are fun and playful. Imagine using soft pink and lavender, giving your nails a sweet look.

Adding a touch of glitter can also elevate your design, like how many celebs do on the red carpet.

Conclusion

Striped nail designs can be super fun and stylish, just like the latest fashion trends. Whether you stick to classic black and white or go wild with bright colors, your nails can really pop! Don’t forget to try out different patterns and textures, too. So grab your nail polish, release your creativity, and let your nails shine! After all, who needs a runway when you’ve got fabulous nails?