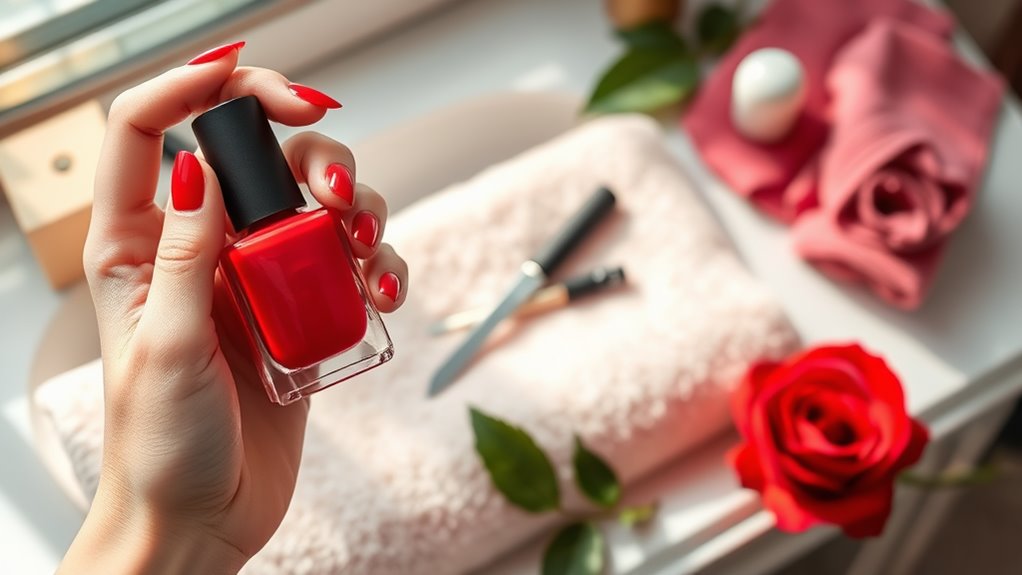
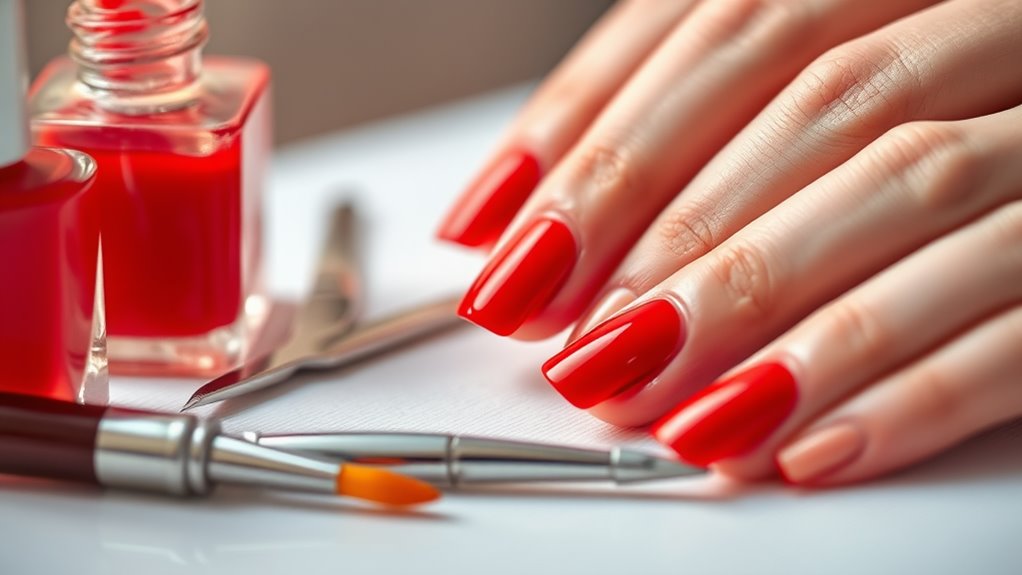
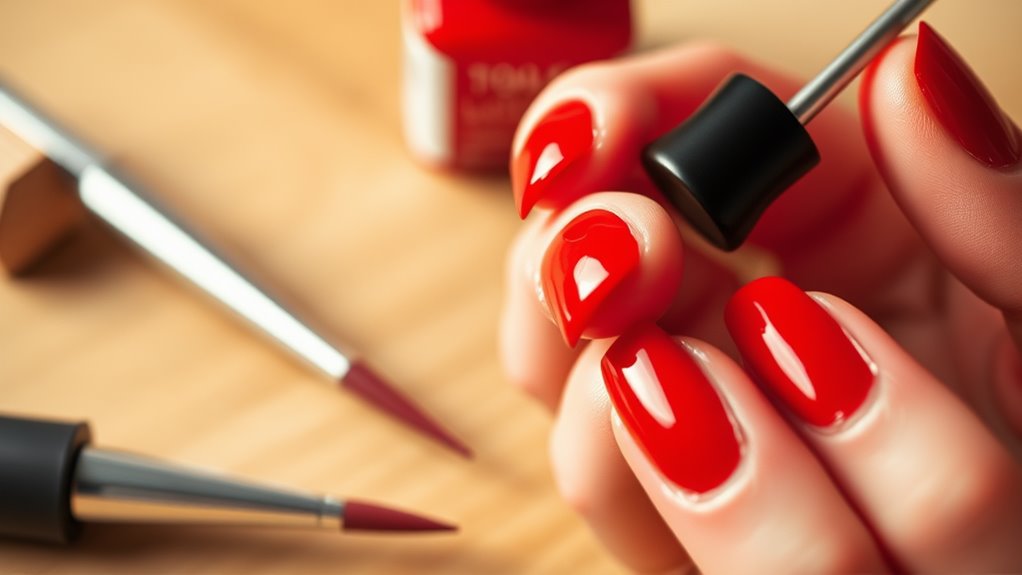
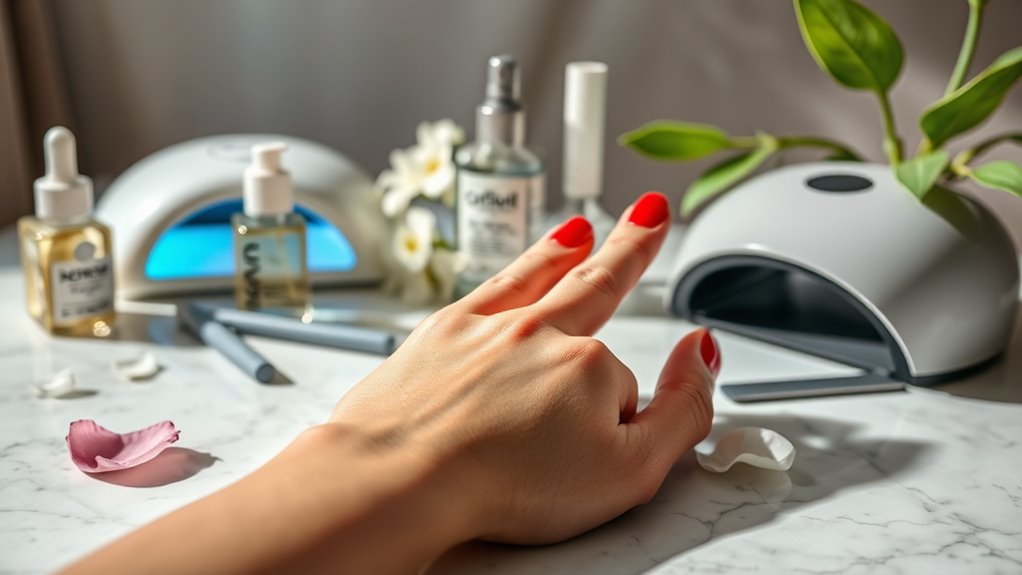
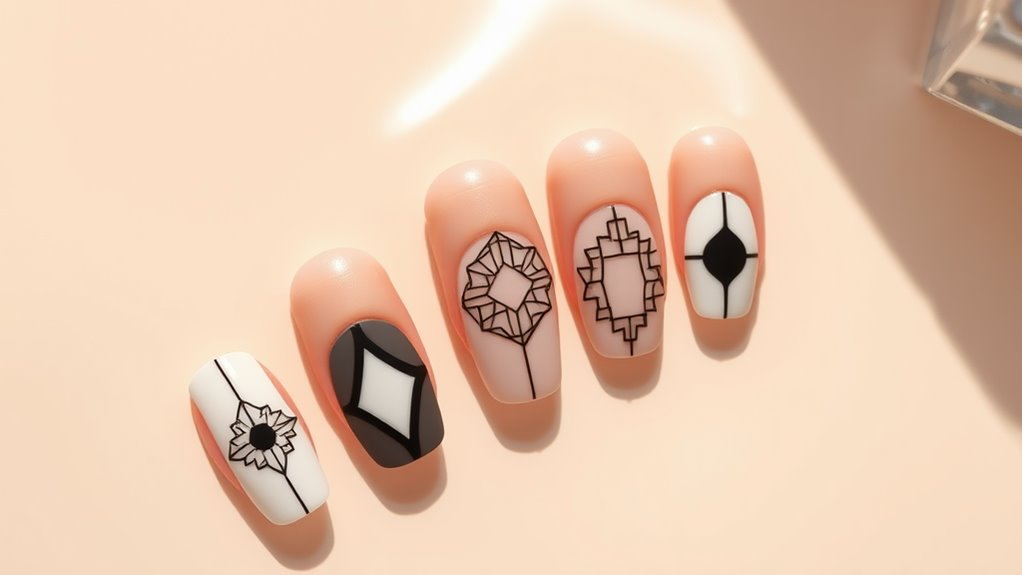
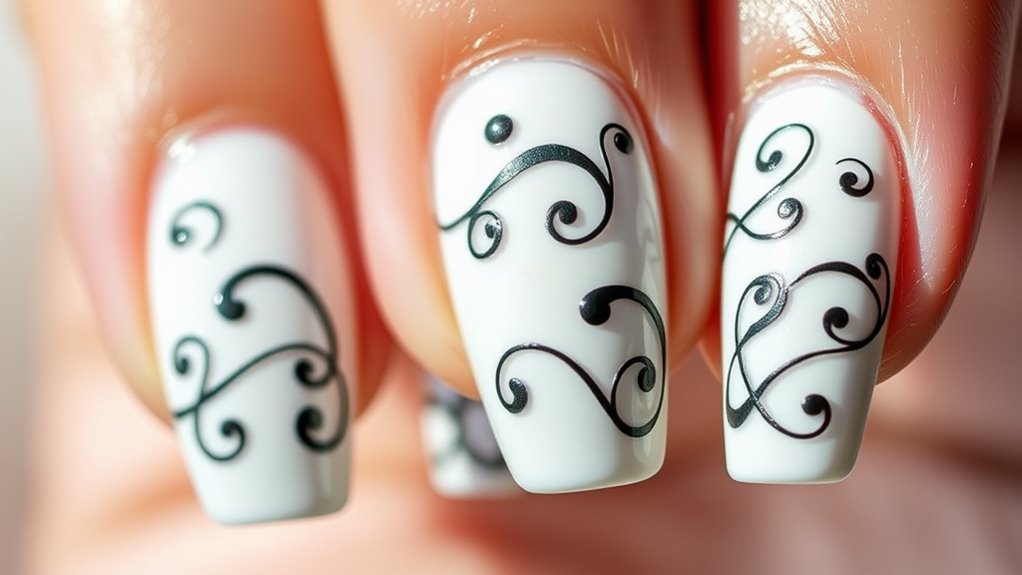
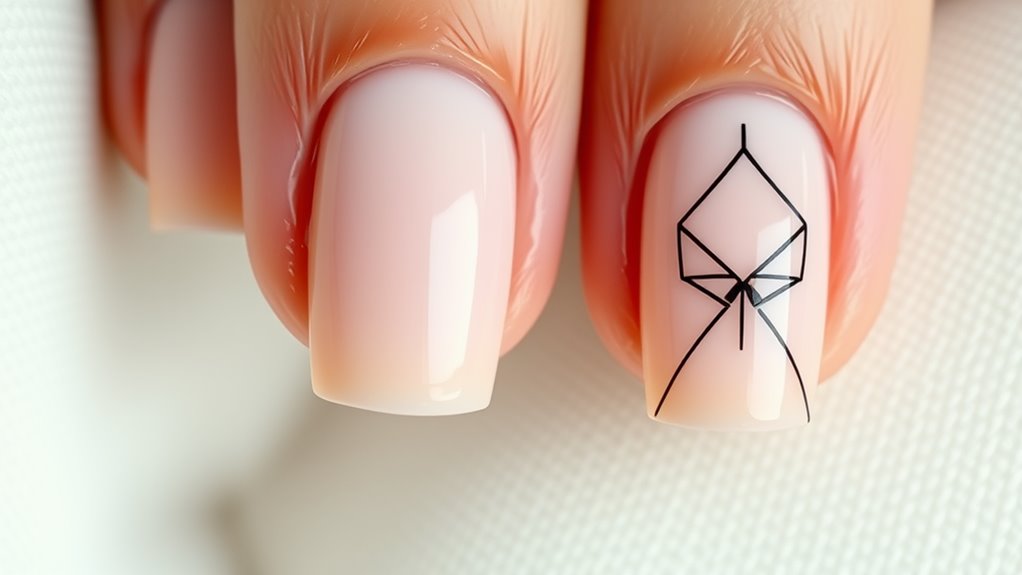
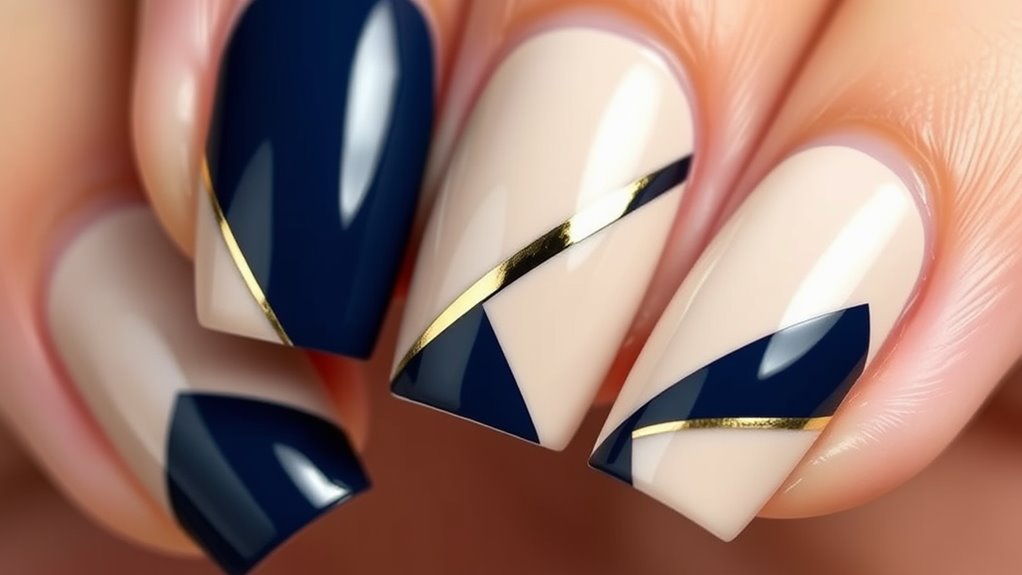
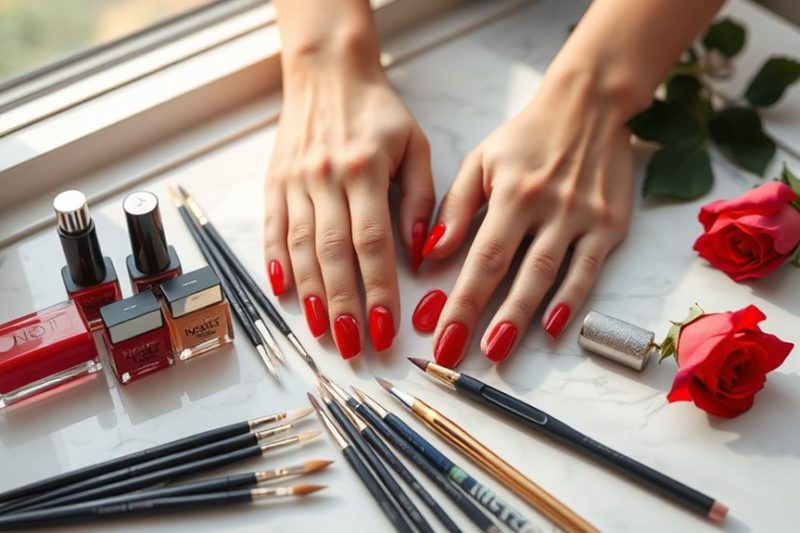
Creative Ways to Incorporate Polka Dots in Nail Art

Creative Ways to Incorporate Polka Dots in Nail Art

Polka dots are a playful way to spice up your nail art! You can start with classic patterns using a base coat and solid colors, then add dots for that flawless touch. Want something unique? Try the ombre and polka dot fusion by blending colors like pink and purple, then dotting over the top. For a bit of flair, mix in geometric shapes or seasonal themes, using colors that match the vibe of spring or summer. And don’t be afraid to combine materials like glitter or gems! Trust me, there are even more exciting ideas just waiting for you!

Classic Polka Dot Patterns

Creative_Ways_to_Incorporate_Polka_Dots_in_Nail_Art_0001.jpg

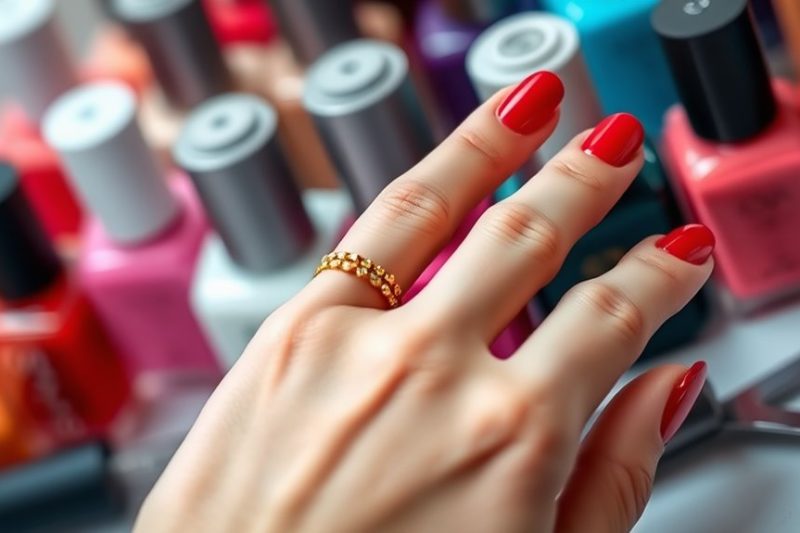
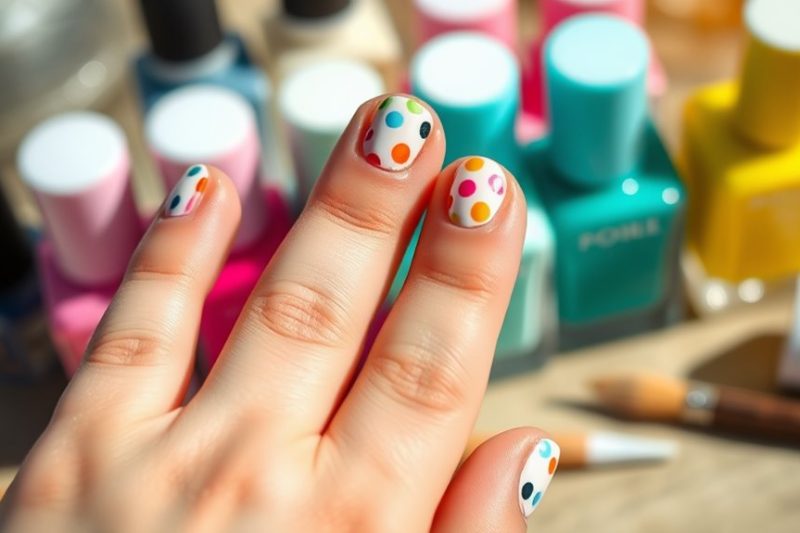
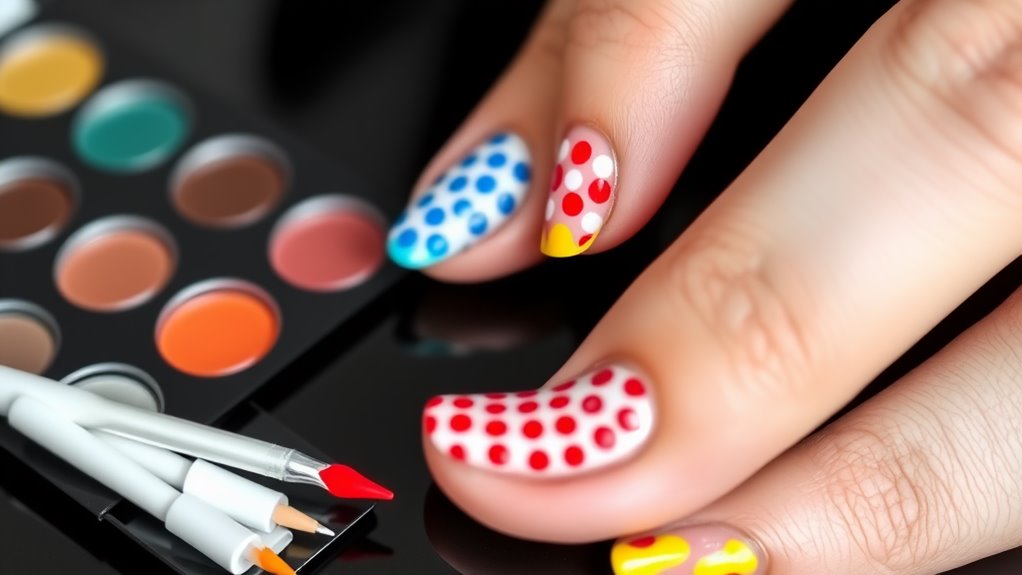
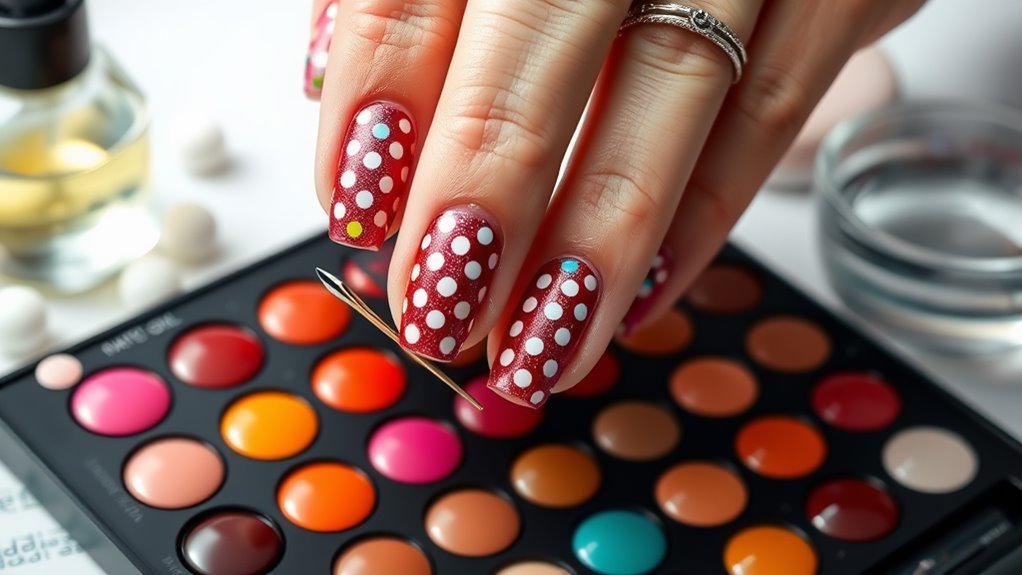
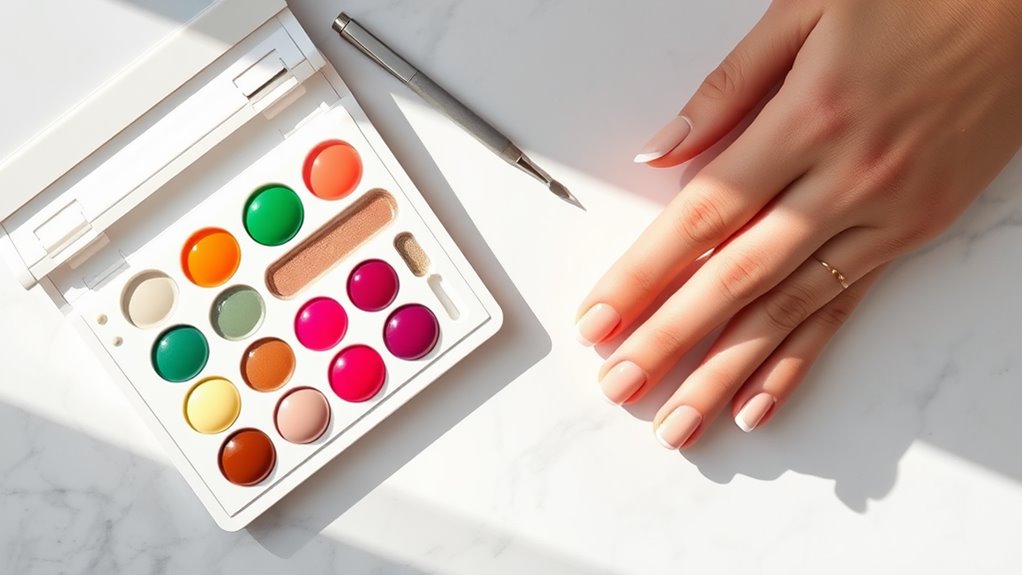
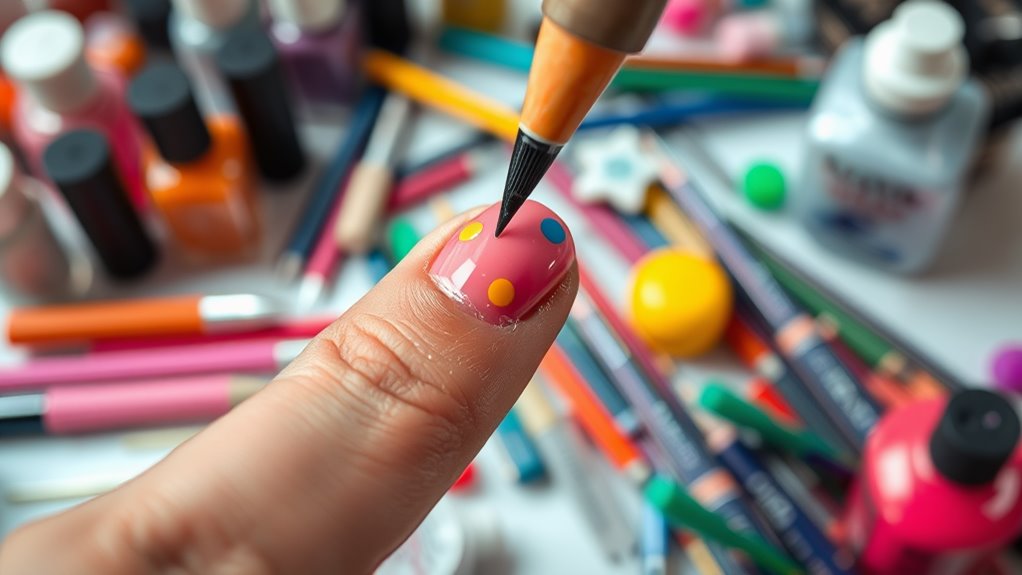
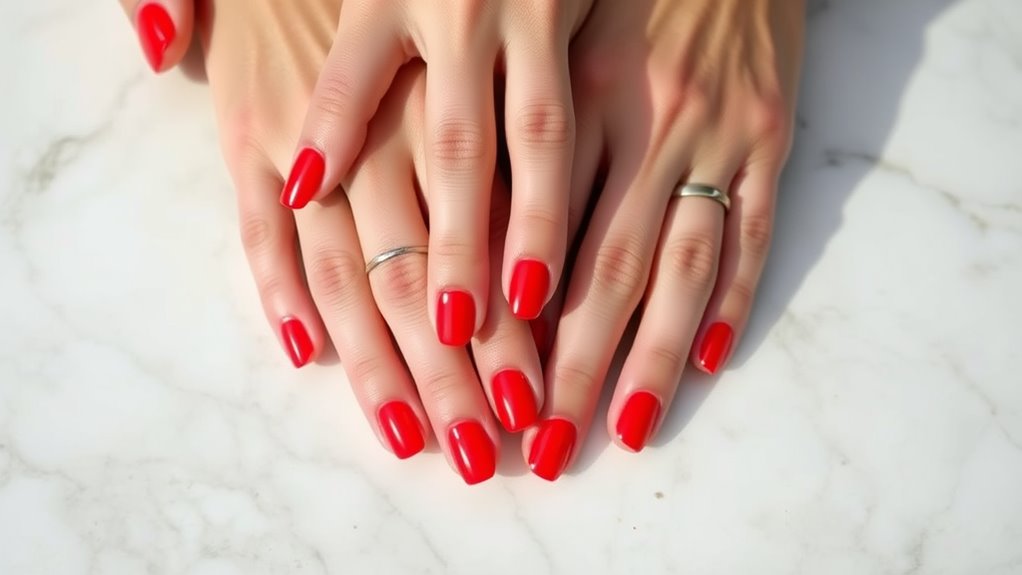
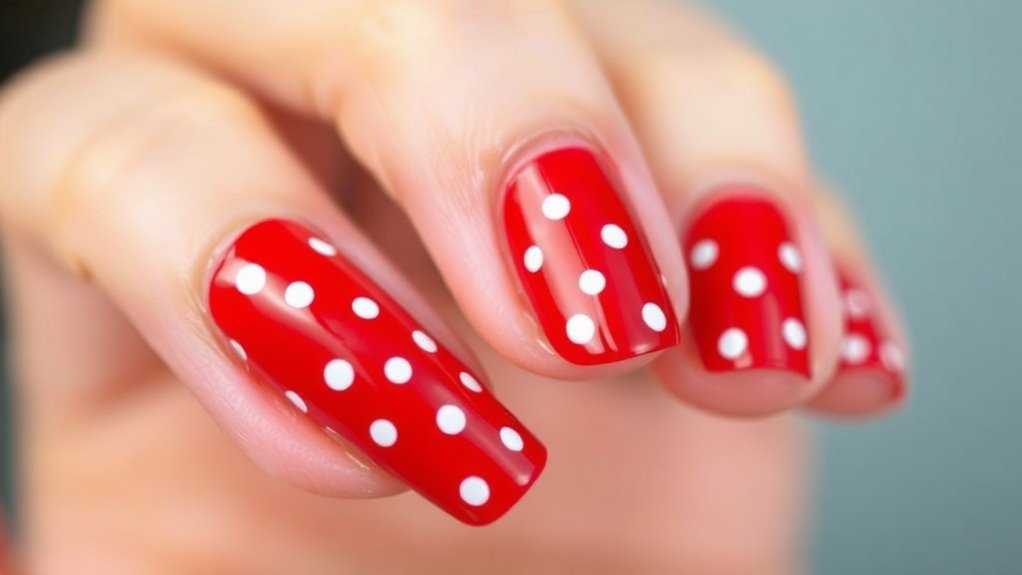
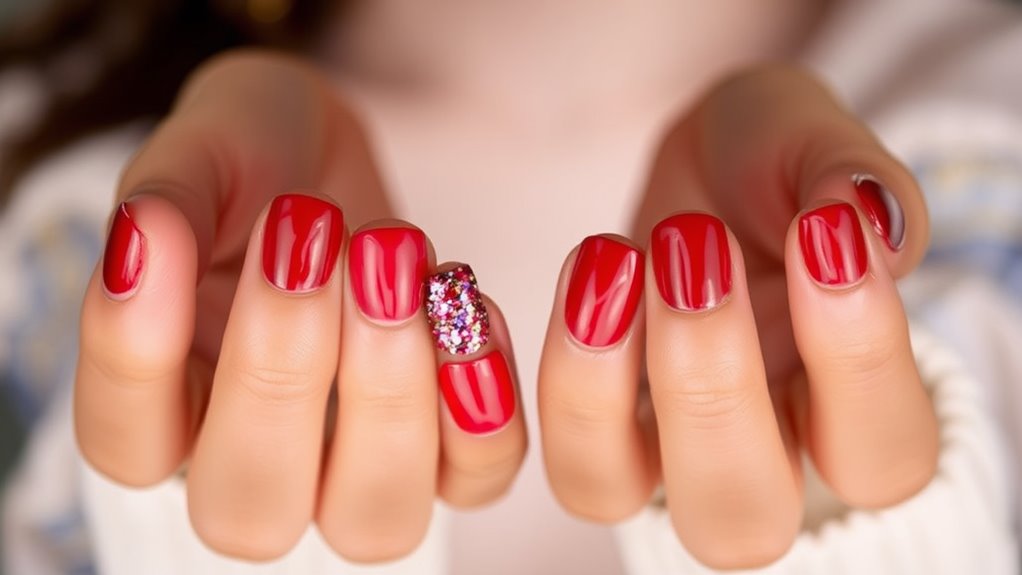
When it comes to nail art, classic polka dot patterns never go out of style. They’re fun, playful, and super easy to create! You can use any color you love, so let your imagination run wild. Imagine this: bright red nails with white dots or soft pastels that remind you of a candy store. You’ll have the perfect combo of cute and stylish.

To start, gather your supplies. You’ll need a base coat, your chosen colors, and a dotting tool or even a toothpick. First, apply your base coat to protect your nails. Then, paint your nails with a solid color and let it dry.

Once it’s ready, dip your dotting tool into the second color. Lightly touch the tool to your nail, and voilà! You’ve created a polka dot. Feel free to mix up the sizes of the dots or even add some glitter for extra pizzazz!

The best part? If you mess up, just paint over it and try again. So grab your nail polish, get creative, and enjoy the process. You’ll be rocking those polka dots in no time!

Ombre and Polka Dot Fusion

Creative_Ways_to_Incorporate_Polka_Dots_in_Nail_Art_0002.jpg

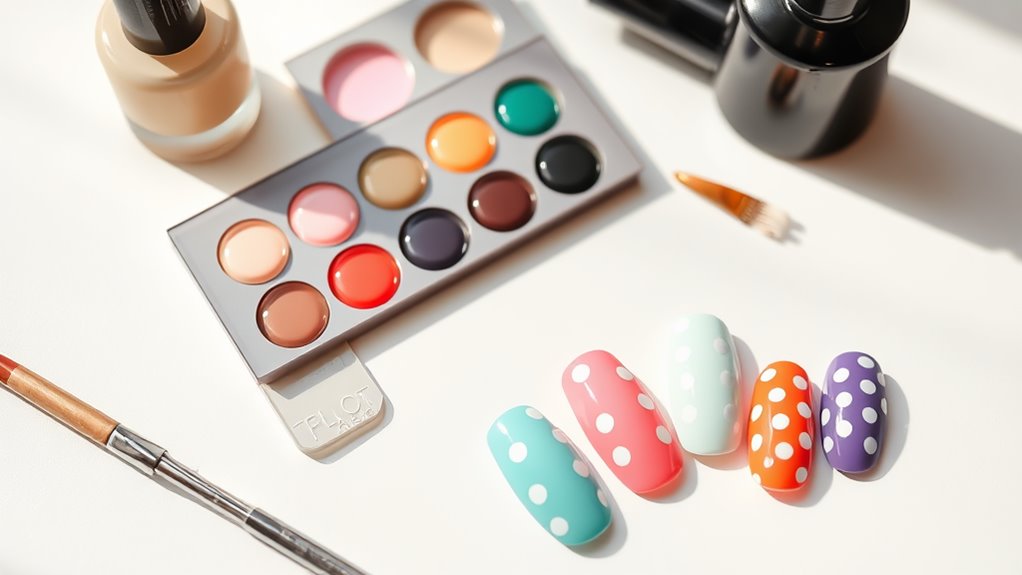
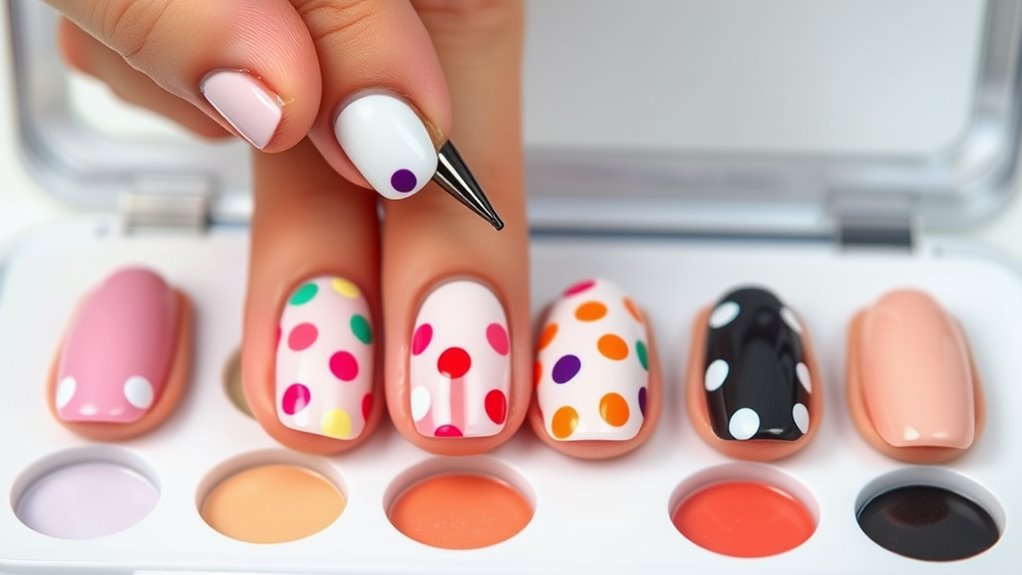
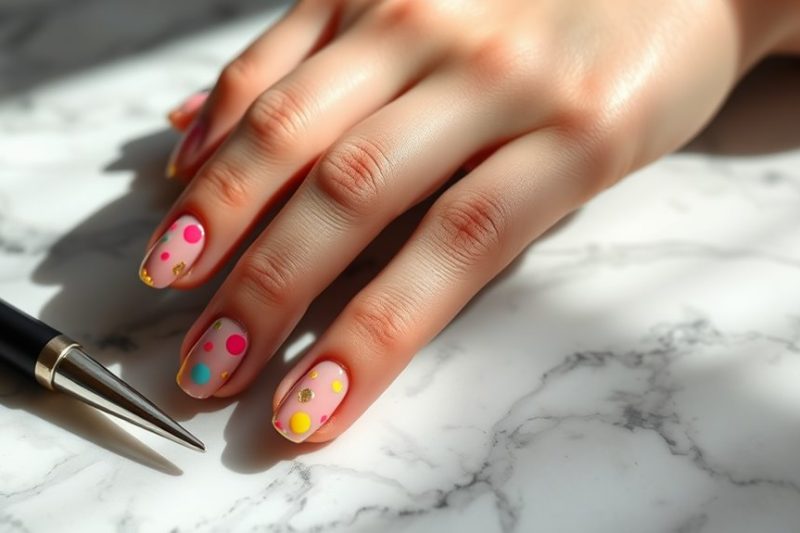
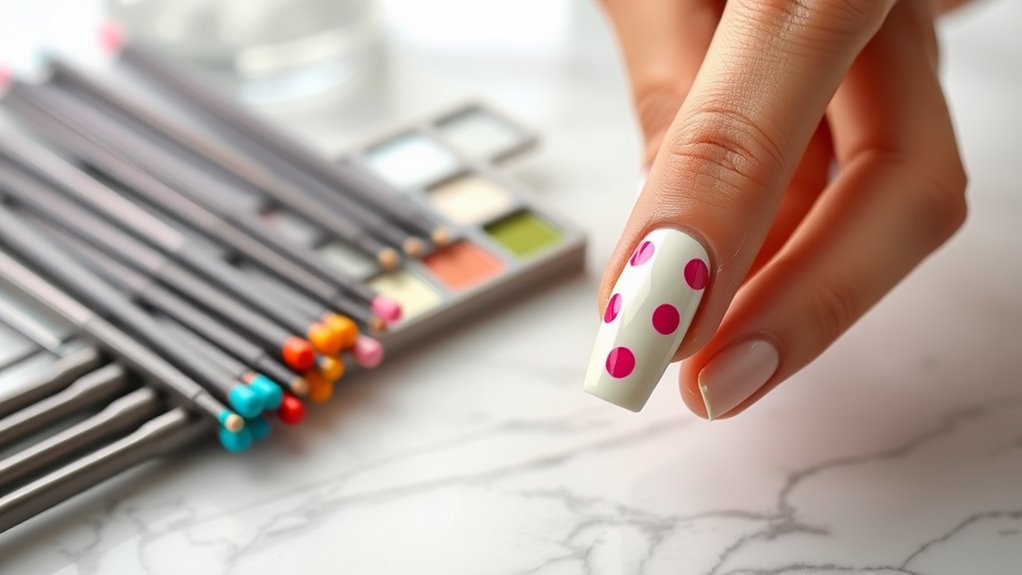
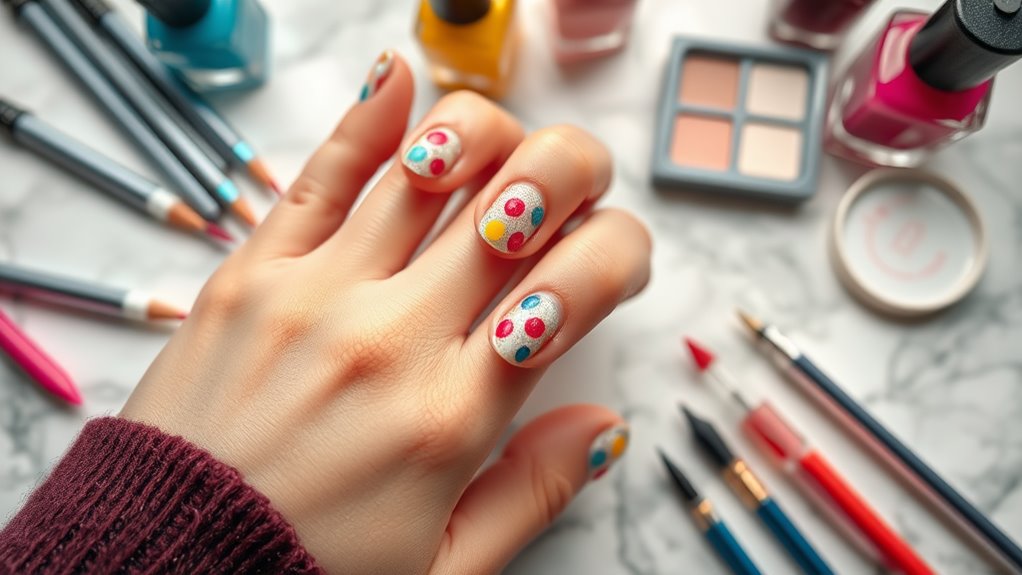
Combining ombre and polka dots creates a stunning nail art design that stands out in any crowd. To get started, you’ll want to choose two or three colors that blend well together. Think about a lovely gradient, like pink fading into purple or a bright blue melting into a soft green.

Paint your nails with the ombre effect first. You can use a makeup sponge to dab the colors on for a smooth shift.

Once your ombre is dry, it’s time for the fun part: the polka dots! Grab a dotting tool or even a toothpick. Dip it into your favorite contrasting color, like white or gold, and start placing dots on your nails.

You can go for a classic look with evenly spaced dots or get creative by clustering them together.

Don’t worry if they’re not perfectly round; that’s part of the charm! This design is playful, eye-catching, and perfect for any occasion. Plus, it’s a great conversation starter.

Geometric Designs With Dots

Creative_Ways_to_Incorporate_Polka_Dots_in_Nail_Art_0003.jpg

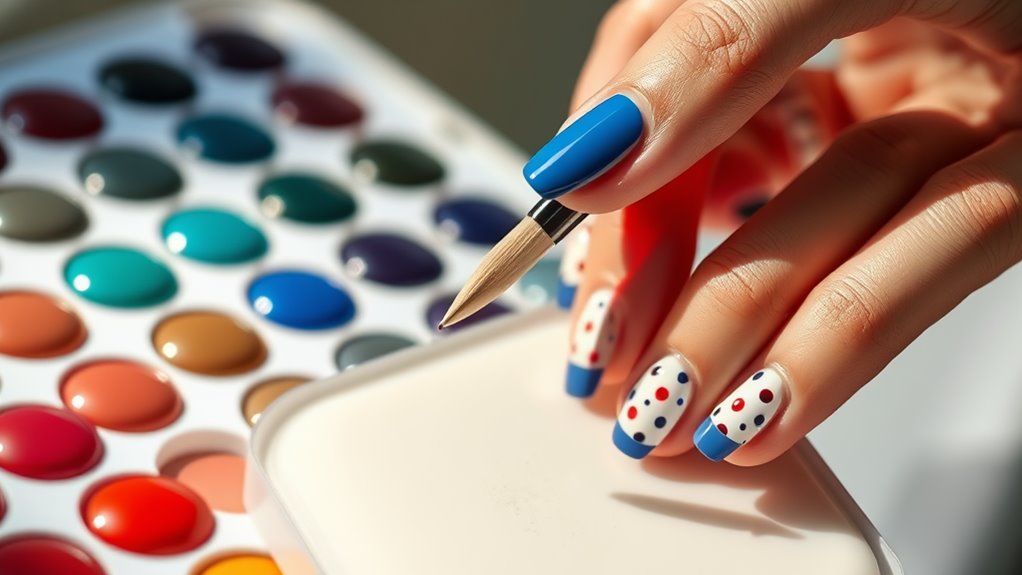
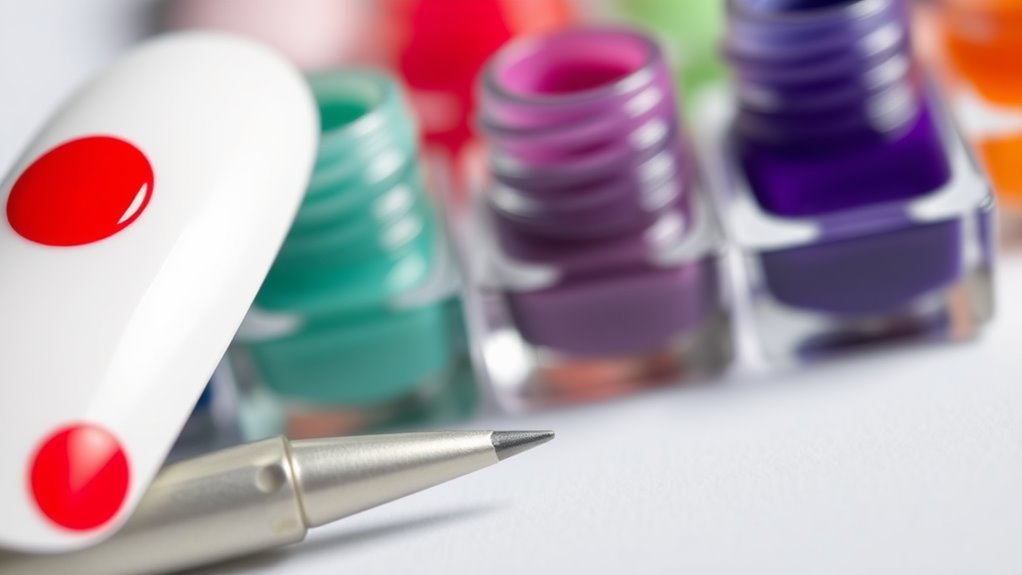
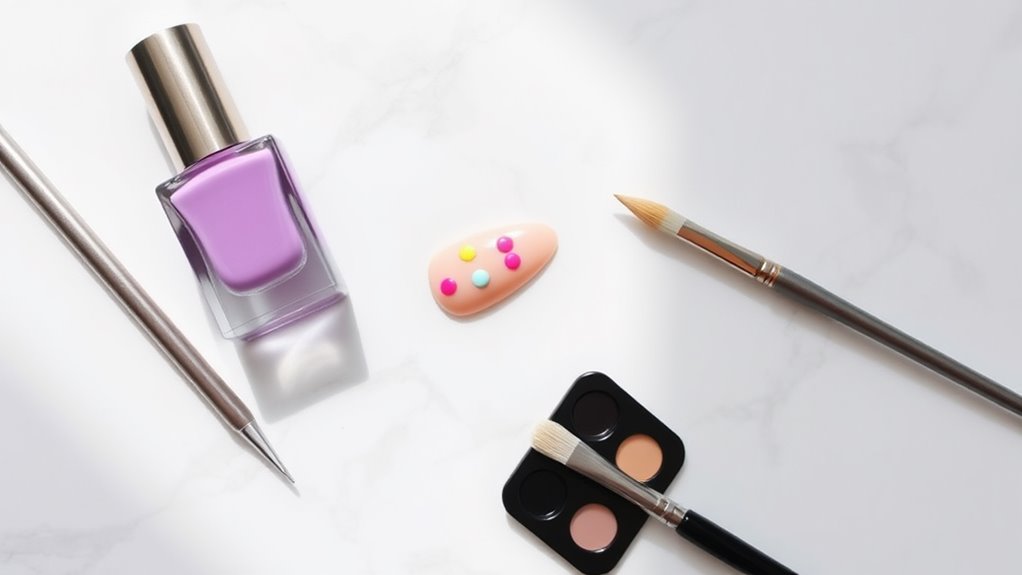
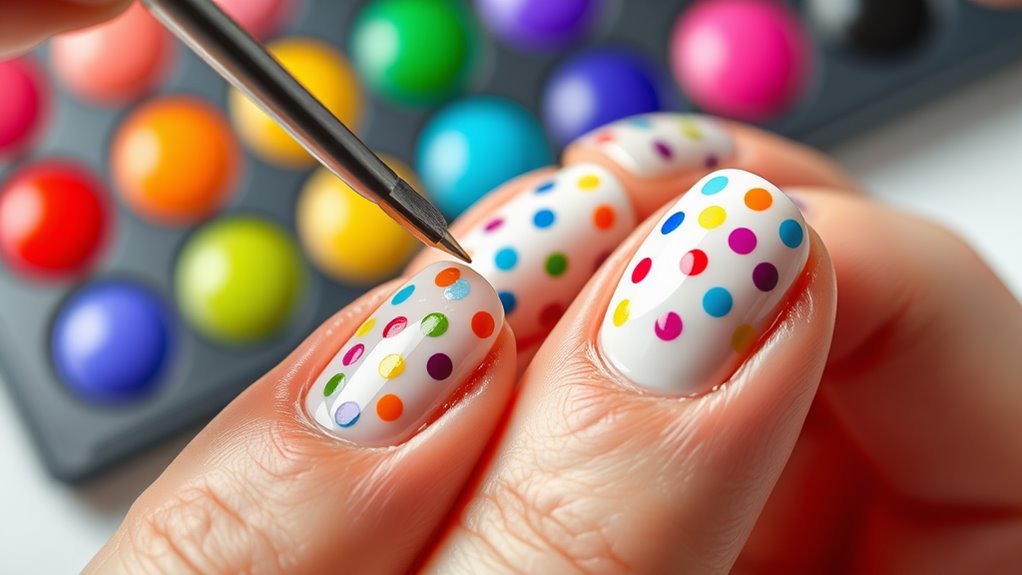
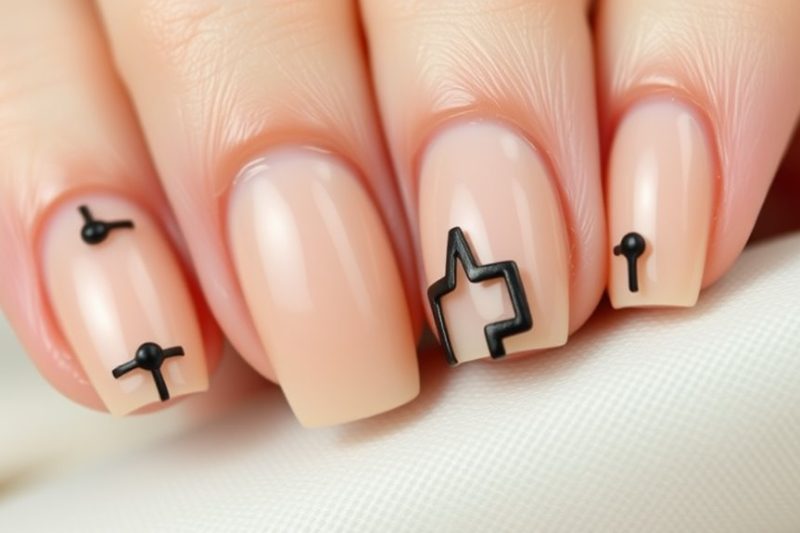
Building on the playful nature of polka dots, geometric designs take dot patterns to a whole new level. When you mix polka dots with shapes like triangles, squares, or even hexagons, you create a fun and eye-catching look! Imagine a bright pink nail with white dots inside a blue triangle. It’s like art on your fingertips!

To start, choose a color palette that speaks to you. You could go bold with bright colors, or keep it classy with pastels. Grab some dotting tools or even a toothpick to create perfect dots!

Start by painting your base color, then let it dry. Once dry, you can use your dotting tool to add dots inside the shapes you’ve drawn. Don’t worry if you make a mistake; just call it “abstract art”!

You can even alternate colors for each shape to make your design pop! Remember, there are no rules, just have fun and be creative.

Whether you’re going for something simple or a bit more complex, geometric designs with dots will surely make your nails stand out. So, get ready to dazzle, because your nails are about to become a masterpiece!

Seasonal Polka Dot Themes

Creative_Ways_to_Incorporate_Polka_Dots_in_Nail_Art_0004.jpg

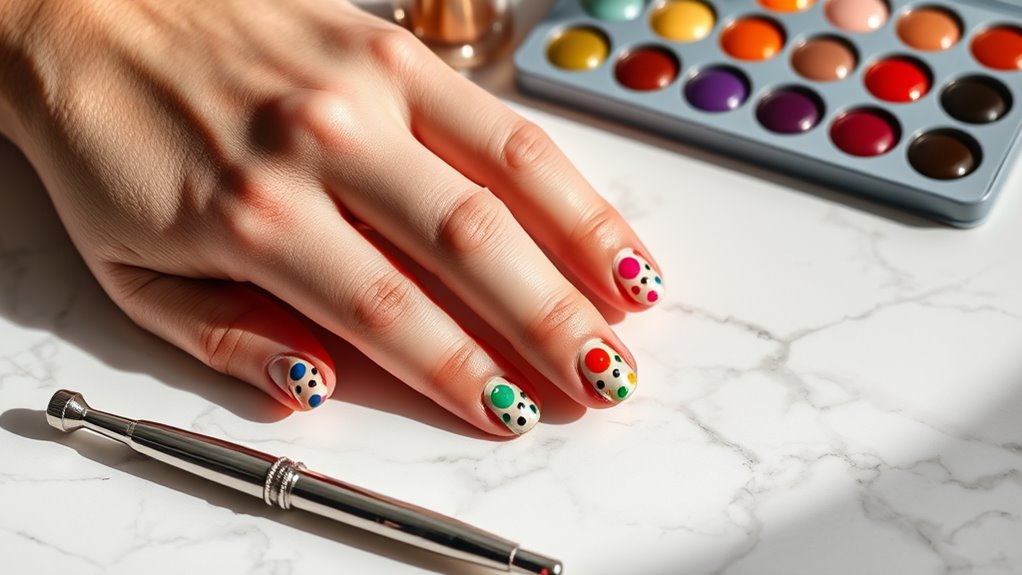
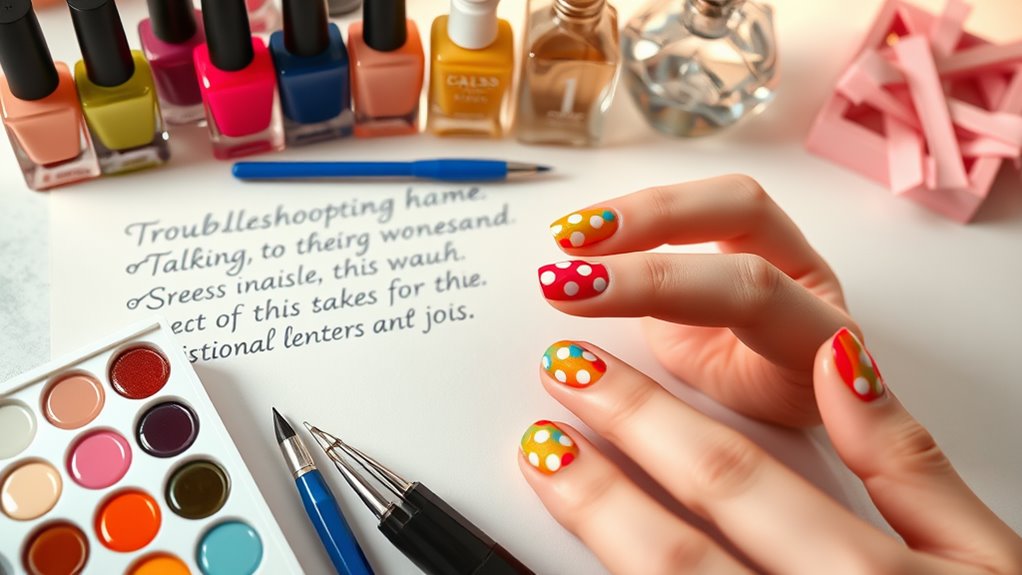
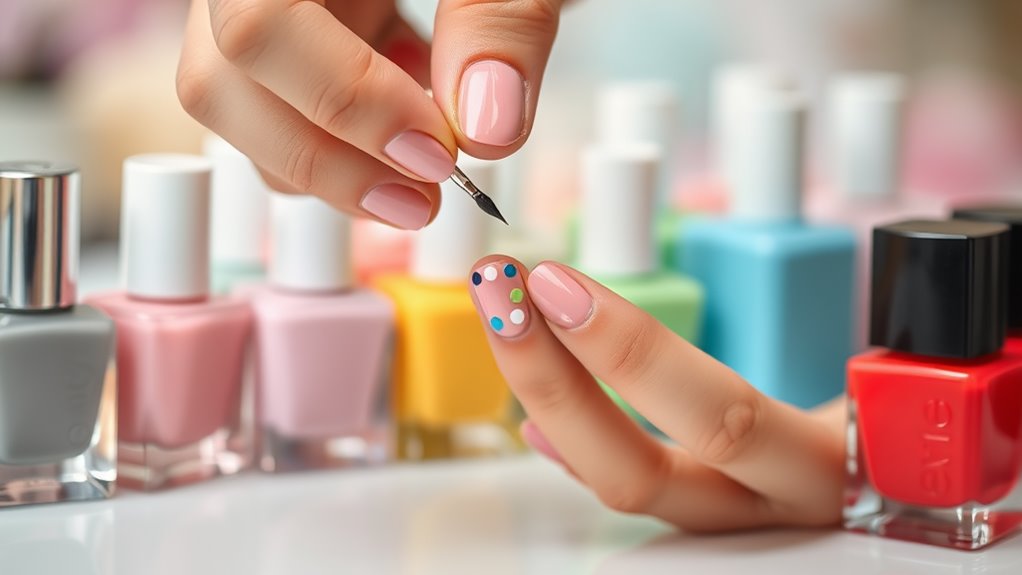
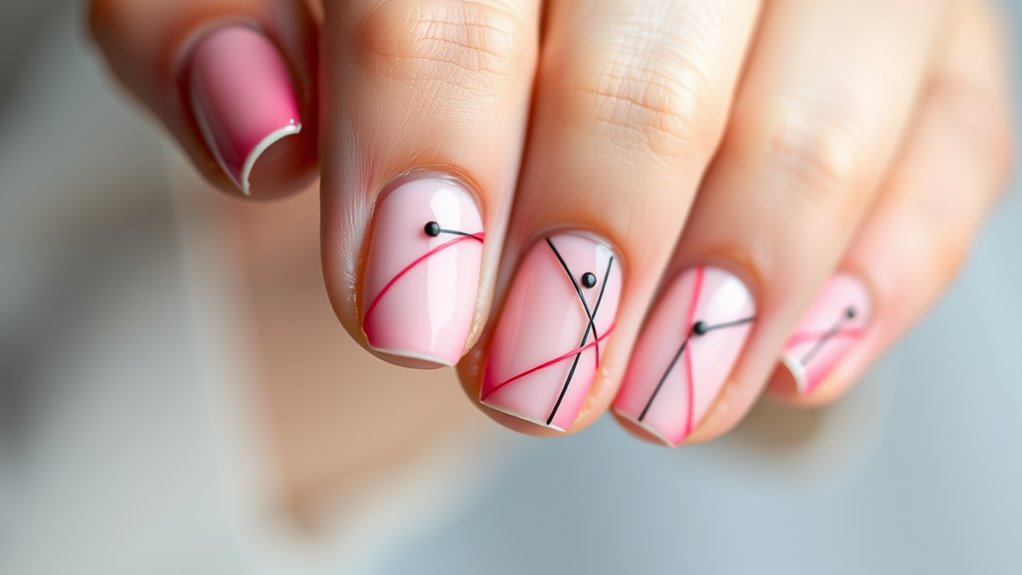
Embracing seasonal polka dot themes adds a delightful twist to your nail art that reflects the changing moods of the year. Think about it! In spring, you can use pastel colors like soft pinks and yellows, creating cheerful dots that resemble blooming flowers. It’s like wearing a garden on your nails!

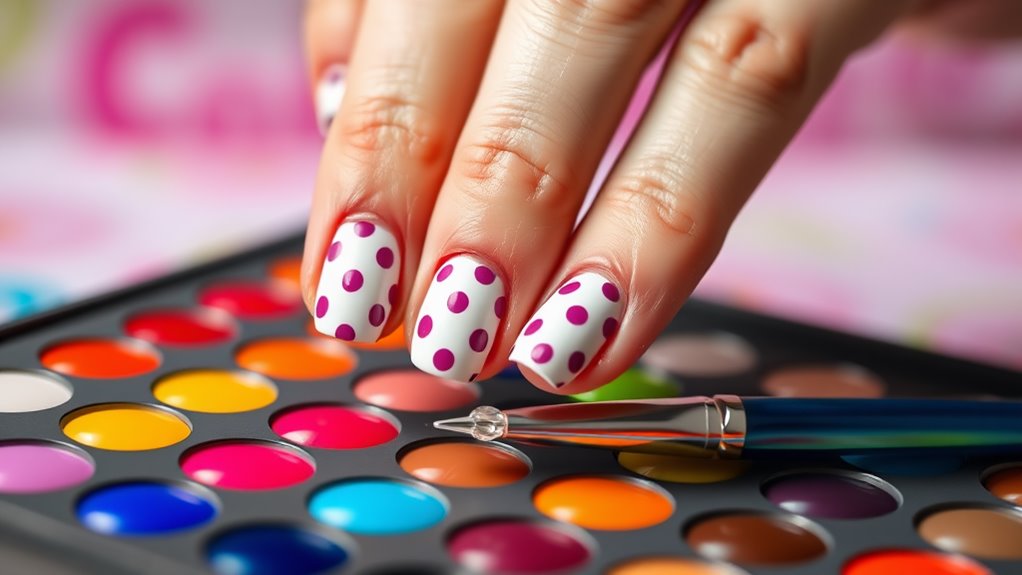
As summer rolls in, why not switch things up with bright, bold colors? You can rock vibrant dots in shades of blue, orange, and green, reminding everyone of sunny beach days.

For fall, earthy tones like rust and mustard can create cozy vibes, letting your nails reflect the beautiful changing leaves.

Then comes winter! You can use icy blues and whites to create snowflake-inspired polka dots. Picture your nails sparkling like fresh snow! You can even add a little shimmer to make them pop.

No matter the season, the key is to have fun and get creative. So grab your favorite polish and start dotting! Each season offers a fresh canvas for your nail art, and who doesn’t love a good excuse to switch things up? Your nails will always be in style!

Mixed Media Nail Art

Creative_Ways_to_Incorporate_Polka_Dots_in_Nail_Art_0005.jpg

Nail art isn’t just about colors and patterns anymore; it’s an exciting playground for creativity where you can mix various materials and techniques. Mixed media nail art lets you express your style in unique ways. You can combine polka dots with different textures and elements to create something truly special.

Imagine using glitter, foils, or even tiny gems along with your polka dots! Start by painting your nails in a solid color as a base. Then, add those playful polka dots in a contrasting shade.

Once that’s dry, it’s time to get adventurous. You can stick on some shimmering glitter or place little rhinestones in a fun pattern. This adds dimension and makes your nails pop!

Don’t forget to seal everything with a clear topcoat to keep your masterpiece safe. And if you’re feeling extra creative, try using washi tape or fabric pieces for a funky twist.

Mixed media nail art is all about experimentation, so let your imagination run wild. Get ready to show off those fabulous nails that’ll have everyone asking, “Where’d you get those?!” Your nails will be the talk of the town!

Polka Dots With Negative Space

Creative_Ways_to_Incorporate_Polka_Dots_in_Nail_Art_0006.jpg

Polka dot designs can take on a modern twist when you incorporate negative space into your nail art. Instead of covering your nails completely with color, you can leave parts of your nails unpainted. This creates a fun contrast that really makes the polka dots pop!

To get started, choose a base color for your nails. Light shades like soft pink or pale blue work great because they let the negative space shine. Once your base is dry, grab a dotting tool or a toothpick to create your dots. You can mix up the sizes and even place them in different patterns.

Try clusters of dots on one side, or create a diagonal line across your nail. Don’t worry if your dots aren’t perfect; that’s part of the charm!

If you want to get extra creative, you can add a topcoat with a bit of shimmer for a sparkling finish. Just remember to seal it all in with a clear topcoat to keep your design looking fresh.

Negative space and polka dots? You’ve just revealed a chic nail art combo that’s sure to turn heads!

Floral Accents and Polka Dots

Creative_Ways_to_Incorporate_Polka_Dots_in_Nail_Art_0007.jpg

Combining floral accents with polka dots creates a delightful and vibrant nail art design that stands out. Imagine your nails bursting with color and personality!

To start, pick a base color—maybe a sunny yellow or a soft pastel. Then, paint your nails with cheerful polka dots using a contrasting color like white or dark blue. You can even mix sizes for a playful touch.

Once the polka dots are dry, it’s time for those floral accents. You don’t have to be Van Gogh to create cute flowers! Just use a small dotting tool or a toothpick to dab on flower shapes. Think simple daisies or tiny roses. You can add a little green for leaves to make them pop even more.

To finish, seal your masterpiece with a clear topcoat. This not only adds shine but also protects your design from chips.

If you’ve got extra time, why not add some glitter? It’ll give your floral polka dot nails that extra sparkle! Trust me, everyone will be asking where you got such fabulous nails.

Conclusion

So, there you have it! Polka dots can totally jazz up your nails in so many fun ways. Whether you stick with classic patterns or mix them with flowers, the options are endless. Don’t be afraid to get creative and try out different styles, like ombre or geometric designs. Remember, nail art is all about expressing yourself, so have fun with it! Now, go grab those polishes and get dotting—your nails are ready to shine!

Maintaining Your Classic Red Nail Design

Maintaining Your Classic Red Nail Design

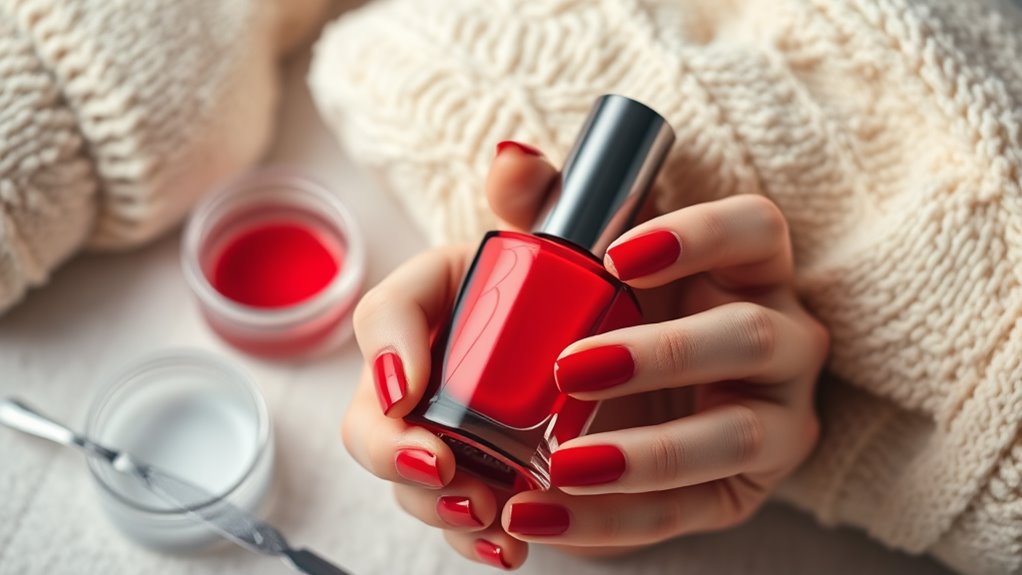
Maintaining your classic red nail design is super easy and fun! Start with a great base coat to prevent chipping. When you polish, use smooth strokes—dip, wipe, and paint from the center to tip. Remember to seal it with a shiny top coat! Keep your nails hydrated with a daily dose of cuticle oil. If chips appear, no worries! Just touch up with red polish and reapply that top coat for extra shine. Don’t forget to wear gloves during chores to protect your nails. Stick around, and you’ll discover more tips to keep your nails looking fabulous!

Choosing the Right Products

Maintaining_Your_Classic_Red_Nail_Design_0001.jpg

Choosing the right products for your classic red nail design can make all the difference in achieving that flawless look.

First, pick a high-quality base coat. It’s like a magic shield that helps your polish last longer and prevents chipping. Trust me, you don’t want to be that person with nails that look like they’ve been through a battle!

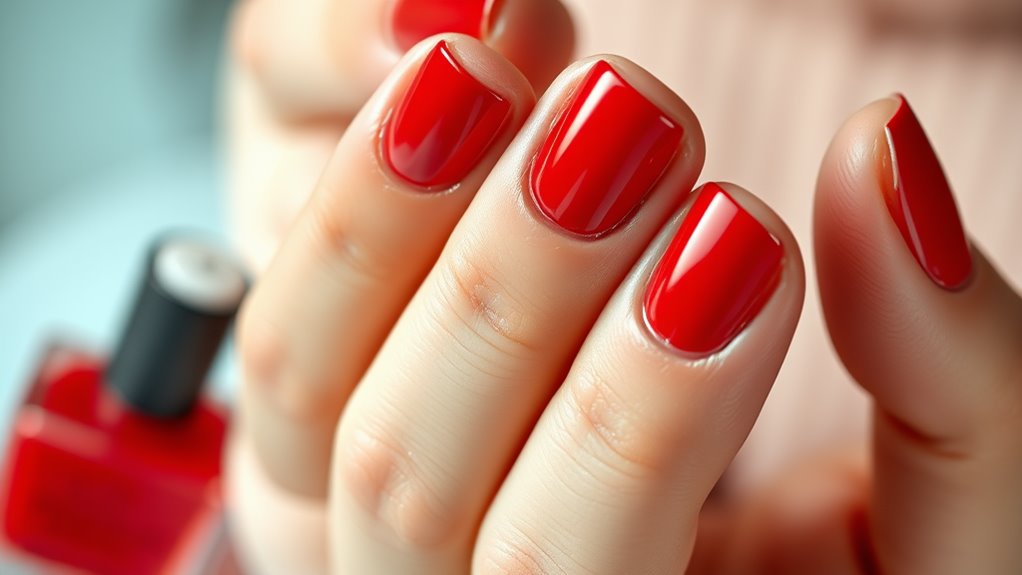
Next, find a vibrant red polish that makes you feel fabulous. There are so many shades out there, from bright cherry to deep crimson. Test a few to see which one makes you smile the most!

Once you’ve got your perfect red, grab a glossy top coat. This step is key because it adds shine and helps protect your nails from nicks.

Don’t forget about nail tools, either. A good set of brushes can make a world of difference. They’ll help you apply polish neatly, so you won’t end up looking like a toddler painted your nails.

Finally, consider a quick-dry formula if you’re always on the go. You’ll save time and avoid those dreaded smudges.

With the right products, you’ll strut around with confidence and style!

Prepping Your Nails

Maintaining_Your_Classic_Red_Nail_Design_0002.jpg

Before diving into your classic red nail design, prepping your nails is essential for a polished finish. You wouldn’t want to paint a canvas without a clean surface, right?

Start by removing any old polish. Grab your favorite nail polish remover and a cotton pad, and wipe those nails clean.

Next, it’s time to shape your nails. Use a nail file to create your desired style, whether you like them square or rounded. Just remember, don’t saw back and forth—smooth strokes work best!

After that, soak your fingers in warm, soapy water for a few minutes to soften the cuticles.

Now, gently push back those cuticles using a cuticle pusher. This step helps your nails look neat and gives you a bit more space for the polish.

If you see any hangnails, now’s the time to trim them.

Application Techniques

Maintaining_Your_Classic_Red_Nail_Design_0003.jpg

When applying your classic red nail polish, start with a base coat to protect your nails and enhance the polish’s longevity. This step is super important; it helps prevent staining and creates a smooth surface.

Once your base coat dries, grab your favorite red polish. Shake the bottle lightly to mix it up, but don’t go overboard—nobody wants a red polish explosion!

Now, it’s time to paint! Dip your brush into the polish, then wipe one side against the bottle’s rim to remove excess. Begin at the center of your nail, gently pressing the brush down and moving it towards the cuticle. This technique helps avoid flooding your cuticles with polish.

Next, glide the brush toward the tip of your nail, making sure to cover the entire surface.

If you make a mistake, don’t worry! Just use a small brush or a cotton swab dipped in remover to clean it up.

For a flawless finish, apply a top coat once your red polish is dry. It’ll add shine and keep your nails looking fresh.

Voilà! You’re ready to show off your classic red nails with confidence!

Daily Care Routine

Maintaining_Your_Classic_Red_Nail_Design_0004.jpg

Maintaining your classic red nails goes beyond just the application process; it requires a consistent daily care routine to keep them looking vibrant and healthy.

First things first, always moisturize your hands! Dry skin can lead to chipped polish, and we definitely don’t want that. Use a good hand cream, and don’t forget to massage some into your cuticles too. They deserve a little love!

Next, keep your nails clean. Wash your hands regularly, and if you’ve been digging in the garden or cooking up a storm, give those nails a gentle scrub. You want to avoid any dirt that might ruin that polished look.

Also, try to avoid using your nails as tools. Opening cans or scratching labels can cause damage, and you’ll end up regretting it. Instead, grab a pair of scissors or a spatula.

Lastly, consider wearing gloves when doing chores, especially with harsh chemicals. Protecting your nails from wear and tear will help keep that classic red shining bright.

With these simple daily habits, your nails will stay gorgeous and ready to show off anytime!

Touch-Up Tips

Maintaining_Your_Classic_Red_Nail_Design_0005.jpg

How can you keep your classic red nails looking fresh between manicures? It’s easier than you think!

First, grab a bottle of your favorite red polish. If you notice any chips or wear, just apply a thin layer over the affected area. This quick touch-up can make a world of difference!

Next, don’t forget the top coat! Adding a clear top coat not only boosts shine but also protects your color from fading. Try to reapply it every few days for that salon-fresh look.

Another handy tip is to keep your nails moisturized. Use cuticle oil to nourish your nails and prevent dryness. A little dab goes a long way, and your nails will thank you for it!

Lastly, avoid using your nails as tools. I know it’s tempting to pry open a can or scratch an itch, but save your nails from that kind of trauma. Treat them like the precious gems they are!

With these simple touch-up tips, you can keep your classic red nails looking fabulous for longer. So, go ahead and flaunt those stunning nails—you’ve earned it!

Avoiding Common Mistakes

Maintaining_Your_Classic_Red_Nail_Design_0006.jpg

Even with regular touch-ups, it’s easy to fall into some common pitfalls that can undermine your classic red nail design.

First off, skipping the base coat is a big no-no. It helps your polish stick better and protects your nails from stains. Nobody wants a pink or yellow surprise when they remove their polish!

Next, don’t forget to seal the tips of your nails with a top coat. If you miss this step, your beautiful red color can chip away faster than you can say “manicure.”

Speaking of chipping, be careful when you’re doing chores. Wear gloves when washing dishes or cleaning to keep your nails safe from harsh chemicals.

Also, watch out for applying too thick a coat of polish. It might look tempting, but it can lead to bubbles and uneven drying. Keep it thin and even!

Finally, be mindful of the color’s wear. If you see any signs of fading or chipping, it’s time for a touch-up. Remember, your nails deserve some love too!

Keep these tips in mind, and you’ll rock that classic red nail design like a pro!

Seasonal Maintenance Advice

Maintaining_Your_Classic_Red_Nail_Design_0007.jpg

As the seasons change, so should your approach to maintaining that classic red nail design. In winter, the cold air can dry out your nails, making them brittle. To combat this, keep a nourishing cuticle oil handy.

Apply it daily to keep your nails healthy and strong. You don’t want your nails looking like they just came off the set of a horror movie!

Spring brings a little more moisture, which is great, but don’t forget about your polish. As the weather warms up, check for chips or fading.

A quick touch-up can keep your red nails popping like a bright flower in bloom. Summer is all about fun, so consider using a top coat with UV protection to shield your nails from the sun.

When autumn rolls in, it’s time for cozy sweaters and pumpkin spice everything. Your nails might need a little extra love.

A good hand cream will help combat dryness from the change in weather. Remember, your classic red nails deserve to shine year-round!

With a few seasonal tweaks, you’ll keep them looking fabulous no matter the time of year. Enjoy rocking that classic red!

Conclusion

With the right products and a little TLC, your classic red nails can look fabulous for a long time. Remember to prep your nails, practice your application techniques, and keep up with daily care. Don’t forget those touch-ups—after all, nobody wants chips on their perfect red! With these tips, you’re all set to rock that timeless look. Go ahead and flaunt those gorgeous nails; you’ve earned it!

Step-by-Step Guide to Polka Dot Nail Techniques

Step-by-Step Guide to Polka Dot Nail Techniques

Ready to add some fun to your nails? Start by gathering essential tools like a base coat, a dotting tool, and your favorite nail polishes. First, prep your nails by removing old polish, trimming, and buffing for a smooth surface. Once your base color is dry, grab your dotting tool and create polka dots in your desired pattern. After letting the dots dry, seal your masterpiece with a top coat for that glossy finish! Feel free to explore advanced techniques, like dot clusters or varying sizes, to show off your creativity. There’s so much more to discover!

Essential Tools for Nail Art

StepbyStep_Guide_to_Polka_Dot_Nail_Techniques_0001.jpg

When you’re diving into the world of nail art, having the right tools at your fingertips is essential. You wouldn’t paint a masterpiece without brushes, right? The same goes for your nails!

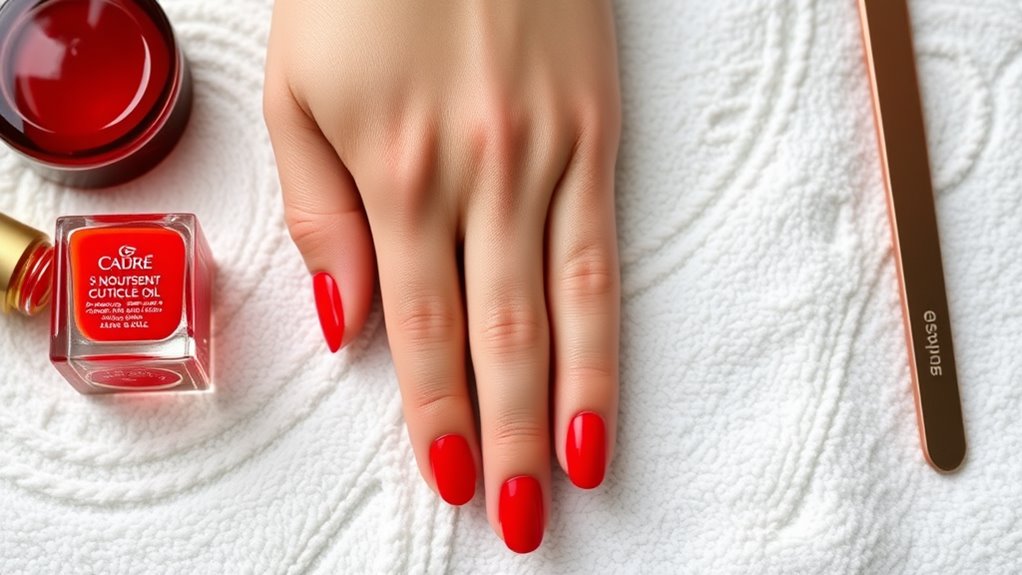
First up, a good base coat is a must. It protects your nails from stains and helps the polish stick better.

Next, grab some dotting tools. These little gadgets come in various sizes and make creating those perfect polka dots a breeze. If you don’t have dotting tools, don’t worry! A bobby pin or the end of a pencil can work just as well—talk about improvisation!

You’ll also want a top coat. It adds shine and helps your design last longer. And don’t forget some nail polish remover for any slip-ups—you know they happen to the best of us!

Lastly, a small paintbrush can help you clean up around your nails, so you don’t look like you just wrestled with a bottle of polish.

With these tools in hand, you’re ready to release your creativity and make your nails pop with polka dots! Let the fun begin!

Choosing Your Nail Polish

StepbyStep_Guide_to_Polka_Dot_Nail_Techniques_0002.jpg

Choosing the right nail polish is essential for achieving those stunning polka dot designs you envision. First, think about the colors you want to use. Bright and bold shades will make your dots pop, while pastels can create a softer look. Don’t be afraid to mix and match! You can even use glittery or metallic polishes for a fun twist.

Next, consider the polish formula. A thicker polish often works best for dotting, as it holds its shape better and prevents running. If you’re using a thinner polish, you might find that your dots spread out more than you’d like. To avoid any nail art disasters, it’s a good idea to test your polish on a piece of paper first.

Also, check for quick-dry options. You don’t want to spend ages waiting for your base coat to dry before you start dotting.

And remember, a top coat is your best friend! It can protect your design and add a glossy finish.

Preparing Your Nails

StepbyStep_Guide_to_Polka_Dot_Nail_Techniques_0003.jpg

Before diving into your polka dot nail art, it’s crucial to prepare your nails properly. You want your masterpiece to look its best, right? So, start by removing any old nail polish. Grab some nail polish remover and a cotton ball, and wipe away that previous color. Trust me, your new design will thank you!

Next, give your nails a little TLC. Trim and file them to your desired shape. Whether you like them square, oval, or something in between, a neat shape makes a huge difference. Remember, nobody likes jagged edges!

Now, it’s time to buff your nails. Buffing helps smooth out any ridges, giving your nails a polished look. If you don’t have a buffer, no worries! Just make sure your nails are smooth and clean.

Finally, wash your hands to remove any dust or oils.

Don’t forget to apply a base coat! It protects your nails from staining and helps your polish stick better. Plus, it gives your nails a nice finish.

With your nails prepped and ready, you’re all set to create those fabulous polka dots. Let the fun begin!

Basic Polka Dot Technique

StepbyStep_Guide_to_Polka_Dot_Nail_Techniques_0004.jpg

Creating eye-catching polka dots on your nails is easier than you might think! To get started, gather your supplies. You’ll need a base color nail polish, a contrasting polish for the dots, a dotting tool (or a toothpick), and a top coat.

First, paint your nails with the base color and let it dry completely. This step is super important! You don’t want your dots to smear into a sad, colorful mess.

Once your base is dry, grab your dotting tool and dip it into the contrasting polish.

Now, here comes the fun part! Gently press the dotting tool onto your nail to create a dot. You can place them randomly or in a pattern—it’s totally up to you! Don’t worry if your dots aren’t perfect; they add to the charm. If you want bigger dots, just use the thicker end of your tool or a larger object.

After you’ve created your polka dots, let them dry again. Finally, seal everything with a top coat for a glossy finish.

And there you have it—polka dot nails that’ll make everyone smile! Enjoy showing off your fabulous handiwork!

Advanced Dotting Techniques

StepbyStep_Guide_to_Polka_Dot_Nail_Techniques_0005.jpg

Once you’ve mastered the basic polka dot technique, it’s time to elevate your skills with advanced dotting techniques that can take your nail art to the next level. One fun method is the “dot cluster.” Instead of placing dots randomly, you’ll create a small group of dots in a pattern. This adds depth and interest to your design.

Another technique is layering. You can start with a base color, let it dry, and then add dots in different sizes or colors on top. For example, a light pink base with white and gold dots looks fabulous! Just remember to let each layer dry to avoid a colorful mess.

You might also try using different tools for varying dot sizes. A bobby pin works great for tiny dots, while a larger dotting tool creates bold statements.

Don’t forget about negative space! Leave some areas of your nail blank, letting the background color shine through.

Lastly, practice makes perfect! Don’t be discouraged if your first attempts aren’t perfect. Keep trying, and you’ll be a polka dot pro in no time. Happy dotting!

Color Combinations and Patterns

StepbyStep_Guide_to_Polka_Dot_Nail_Techniques_0006.jpg

Exploring color combinations and patterns can transform your polka dot nail designs into eye-catching masterpieces. When you think about colors, consider what makes you happy. Bright colors like hot pink and sunny yellow can create a fun, cheerful vibe, while soft pastels like mint green and lavender offer a sweet, delicate look. You can even mix and match!

One popular idea is to use a bold base color, like navy blue, and then add white polka dots on top. The contrast makes the dots pop! Or, try using two shades of the same color, like light blue and dark blue, for a beautiful ombre effect.

Patterns can also add flair to your nails. Instead of just dots, you could create stripes or zigzags between your dots. This way, your nails won’t just look cute; they’ll have personality too!

Feeling adventurous? Try a gradient effect with your dots, where the size of the dots changes from small to large. The key is to have fun and let your creativity shine!

Tips for Even Dots

StepbyStep_Guide_to_Polka_Dot_Nail_Techniques_0007.jpg

To achieve perfectly even dots on your nails, it’s essential to pay attention to your tools and technique.

First, pick the right dotting tool! Whether you use a dotting pen, a toothpick, or a bobby pin, make sure it’s clean and has a rounded tip. This will help you create smooth, consistent dots.

Next, don’t forget about your polish! Thicker nail polish can make it tricky to get even dots, so consider using a thinner polish or adding a few drops of polish thinner. This will give you a smoother application.

When you’re ready to start, dip your tool into the polish, but don’t overload it. A little goes a long way, so tap off any excess.

Now, press gently onto your nail to create the dot. You can practice on a piece of paper first if you’re feeling unsure!

Troubleshooting Common Issues

StepbyStep_Guide_to_Polka_Dot_Nail_Techniques_0008.jpg

Even the most skilled nail artists can face challenges when creating polka dot designs. If your dots aren’t turning out as planned, don’t worry! It’s all part of the learning process.

One common issue is uneven dot size. If that’s happening, try using a smaller dotting tool for more control. You’ll be amazed at how just a little change can make a big difference!

Another problem you might encounter is smudging. This usually happens when you’re impatient and go for a second coat too soon. To avoid this, let your first layer dry completely. It might feel like waiting forever, but trust me, it’s worth it!

If your colors aren’t popping, it could be due to a thin base coat. A good base layer is essential for vibrant polka dots, so don’t skip it!

Finally, if the dots are too runny, check your nail polish consistency. If it’s too thin, you might need to switch to a thicker polish or add a bit of clear polish to thicken it up.

Finishing Touches and Care

StepbyStep_Guide_to_Polka_Dot_Nail_Techniques_0009.jpg

After troubleshooting any issues with your polka dot design, it’s time to focus on the finishing touches and care that will elevate your manicure.

First, let’s seal the deal with a top coat. This magical polish adds shine and protects your dots from chips, ensuring they stay cute for longer. Apply a thin layer, and let it dry completely—patience pays off!

Next, take a moment to admire your masterpiece. You’ve worked hard! But don’t forget the cuticles. A little cuticle oil can go a long way. Just a drop, gently massaged in, will keep your nails looking healthy and fabulous.

Now, here comes the fun part—cleaning up! Grab a small brush dipped in nail polish remover to tidy any stray dots or smudges. It’s like giving your manicure a little spa day.

Lastly, keep your nails moisturized. Dry nails can lead to breakage, and nobody wants that. So, slather on some hand cream and show those hands some love!

With these finishing touches and care tips, your polka dot nails won’t only look amazing but will also last longer, making you the talk of the town!

Conclusion

Now that you’ve got the scoop on polka dot nails, it’s time to release your creativity! With the right tools and techniques, you can turn your nails into a fun canvas. Remember, practice makes perfect, so don’t worry if your dots aren’t perfect at first—those little quirks just add character! Have fun mixing colors and patterns, and show off your fabulous nails. You’ll be the trendsetter among your friends in no time! Happy dotting!

How to Create Perfect Polka Dot Nails

How to Create Perfect Polka Dot Nails

To create perfect polka dot nails, start by gathering your tools, like dotting tools or even toothpicks. Apply a base coat to protect your nails and choose a bright base color that makes your dots pop. Dip your dotting tool in contrasting polish, then gently press it onto your nails for uniform dots. Mix sizes by using different tools for a fun look. Remember to let each dot dry before adding more, and don’t be afraid to experiment with different patterns. Finish with a glossy top coat, and you’ll be all set! There’s even more to learn about nail art tricks!

Essential Tools Required

How_to_Create_Perfect_Polka_Dot_Nails_0001.jpg

To achieve stunning polka dot nails, you’ll need a few essential tools to get started. First up, grab some dotting tools. These handy little gadgets come in different sizes, so you can create polka dots of all kinds—big, small, or somewhere in between!

If you don’t have dotting tools, no worries! You can use a toothpick or a bobby pin as a quick substitute.

Next, you’ll want a good base coat. This will protect your nails and help your polish last longer. You’ll also need a top coat for that gorgeous shine and extra durability. Trust me, your nails will thank you!

Don’t forget a nail file and buffer to shape your nails before you start. It’s just like giving your nails a little spa day!

Finally, a clean-up brush dipped in acetone can be a lifesaver for those little polish smudges around your cuticles.

With these tools in hand, you’re ready to release your creativity. Get ready to have some fun and show off your fabulous polka dot nails!

Choosing Your Nail Polish

How_to_Create_Perfect_Polka_Dot_Nails_0002.jpg

Choosing the right nail polish is essential for achieving perfect polka dot nails. You’ll want to start with a base color that catches your eye. Think about colors that make you smile! Bright shades like pink, blue, or even classic white work great. Just remember, the base color should be smooth and even for those pretty dots to stand out.

Next, you’ll need a contrasting color for your dots. This is where you can have fun! Go for something bold like yellow, black, or even metallics. The key is to choose colors that pop against each other. If you pick a light base, darker dots will shine, and vice versa.

Make sure the polishes you choose are good quality. You don’t want any chipping or fading in just a day! Fast-drying formulas can save you from smudges, especially when you’re excited to show off your nails.

Lastly, don’t forget to think about the finish. A glossy top coat can make your dots look super shiny, while a matte finish gives a cool, modern vibe.

Go on, let your creativity flow, and get ready to rock those polka dots!

Preparing Your Nails

How_to_Create_Perfect_Polka_Dot_Nails_0003.jpg

Now that you’ve selected your polishes, it’s time to prepare your nails for the perfect polka dot design. First things first, you want to start with clean nails. Wash your hands and remove any old polish. You wouldn’t want last week’s glitter hanging around, right?

Next, trim and file your nails to your desired shape. Whether you like them square or round, make sure they’re even. This makes your polka dots look extra neat!

After that, push back your cuticles gently using a cuticle pusher or your trusty orangewood stick. Just be careful not to go too crazy; we’re not trying to start a cuticle war here!

Now, apply a base coat. This step is super important because it protects your nails and helps your polish stick. Plus, it gives your design a smooth surface to shine on.

Once the base coat is dry, you’re ready to plunge into the fun part—adding those cute polka dots! So grab your polishes and get ready to release your creativity. Your nails are about to become a fun canvas, and trust me, you’re going to love the result!

Techniques for Polka Dots

How_to_Create_Perfect_Polka_Dot_Nails_0004.jpg

While you might think creating perfect polka dots is tricky, it’s actually quite simple once you know a few techniques. First, grab a dotting tool or even a bobby pin. You don’t need fancy tools; just something that can create dots. Dip the tool in your nail polish, then gently press it onto your nail. Voila! You’ve made your first dot.

Next, you can experiment with different sizes. For smaller dots, use the tip of a toothpick. For larger ones, try a bigger end of the dotting tool. It’s all about having fun and being creative!

Don’t forget to let each dot dry before adding another. Otherwise, you might end up with a big, messy blob. Patience is key here, just like waiting for your pizza to cook.

If you make a mistake, don’t worry! Just use a small brush with some nail polish remover to fix it up. Remember, practice makes perfect.

With these techniques, you’ll be a polka dot pro in no time. So, roll up your sleeves, get ready to dot, and enjoy the process! Your nails will thank you.

Creating Dot Patterns

How_to_Create_Perfect_Polka_Dot_Nails_0005.jpg

After mastering the basics of creating dots, it’s time to think about how to arrange them into eye-catching patterns. You can mix and match different sizes and colors of dots to create something truly unique!

Start by deciding on a theme. Do you want a fun, playful look or something more elegant?

Once you’ve got your theme, choose a base color. This will help your dots pop! You can go for a classic white or something bold like hot pink.

Next, think about the spacing of your dots. You could create a uniform pattern with evenly spaced dots, or you can go for a more chaotic look with dots scattered randomly.

Try creating stripes by placing dots in straight lines, or make a flower shape by arranging dots in a circular pattern.

Don’t forget, you can layer your dots! Adding smaller dots inside larger ones can create a fun visual effect.

Adding Designs and Details

How_to_Create_Perfect_Polka_Dot_Nails_0006.jpg

To elevate your polka dot nails, consider adding unique designs and details that showcase your personal style. You can mix in some fun shapes, like hearts or stars, to create a playful look. Grab a fine brush or a dotting tool, and start adding these designs between your dots. It’s like giving your nails a little party!

Another great idea is to use different colors for your designs. For instance, if your base is a light pink, try using white or gold for your shapes. This contrast makes everything pop! You might even want to add some glitter to certain areas for that extra sparkle. Who doesn’t love a little glitz?

If you’re feeling adventurous, try layering your designs. Start with a base of polka dots, then add stripes or zigzags over them. It creates a fun, mixed-media effect that’s sure to grab attention. Just remember, balance is key! Too many designs can look cluttered.

Take your time, and don’t rush it. Nail art is all about having fun and expressing yourself. So, get creative, and let your personality shine through your nails!

Sealing Your Artwork

How_to_Create_Perfect_Polka_Dot_Nails_0007.jpg

Once you’ve created your stunning polka dot designs, it’s essential to seal your artwork for lasting durability and shine. Sealing not only protects your hard work but also makes those dots pop even more! So, let’s explore how to do this.

First, grab a top coat. This magical potion comes in both regular and gel formulas, so choose what you prefer. If you want that salon-finish look, a gel top coat is your best friend.

Apply a thin layer over your nails, making sure to cover the entire design. Don’t worry if it looks a bit cloudy at first; it’ll dry clear and glossy!

Be sure to let it dry completely before you do anything else. You wouldn’t want to ruin your masterpiece by smudging it.

If you want extra protection, consider adding a second layer after the first one dries. It’s like giving your nails a cozy blanket!

Tips for Long-Lasting Nails

How_to_Create_Perfect_Polka_Dot_Nails_0008.jpg

Achieving long-lasting polka dot nails requires a few key practices that keep your manicure looking fresh and vibrant.

First, always start with clean, dry nails. Any leftover oils or dirt can make your polish chip faster. Next, don’t skip the base coat! It not only protects your nails but also helps the polish adhere better.

When applying your colors, use thin layers. Thick layers might look great initially, but they tend to peel off like a banana!

After you’ve added your polka dots, seal them with a good top coat. This step is like putting a superhero cape on your nails; it adds shine and strength! Remember to reapply that top coat every few days to keep your design looking fresh.

Avoid using your nails as tools. Trust me, they’re not meant for prying open cans or scratching off labels.

Finally, consider wearing gloves when doing chores; your nails will thank you later.

With these tips, you’ll enjoy your polka dot nails for longer, making them the star of your manicure show! So go ahead, get creative, and flaunt those fabulous nails with confidence!

Conclusion

Now you’re all set to rock those polka dot nails! With the right tools, some fun colors, and a little creativity, you can create nail art that’s sure to impress. Remember, practice makes perfect, so don’t worry if your first try isn’t flawless. Just have fun and let your personality shine through your nails! And hey, if you mess up, just call it “abstract art.” Happy polishing, and enjoy showing off your fabulous nails!

How to Achieve Clean Lines in Minimalist Nail Art

How to Achieve Clean Lines in Minimalist Nail Art

To achieve clean lines in minimalist nail art, start by gathering quality tools like a fine-tipped brush and striping tape. First, prep your nails—clean them, shape them, and push back cuticles. Use the tape to create sharp lines; just make sure your base coat is completely dry first! When applying polish, peel the tape off while the polish is still wet for crisp edges. You can also practice with stencils for a bit of extra help. Finish with a top coat to keep everything looking fresh, and remember, even pros make mistakes, but there’s a quick fix! You’re about to uncover more tips!

Choose the Right Tools

How_to_Achieve_Clean_Lines_in_Minimalist_Nail_Art_0001.jpg

When diving into minimalist nail art, selecting the right tools is essential for achieving clean and precise designs. You’ll want to gather a few key items to set yourself up for success.

First, a good quality base coat is vital; it protects your nails and helps the polish stick better. Then, grab some nail polish in your favorite minimalist colors—think soft pastels or classic neutrals.

Next, a fine-tipped nail art brush is your best friend. It’ll help you create those sharp lines and delicate details that make minimalist designs pop. If you’re feeling adventurous, consider using dotting tools or striping tape for extra precision.

Don’t forget about a top coat; it seals everything in place and gives your nails that shiny finish. And, of course, a good pair of tweezers can come in handy for any tiny gems or stickers you might want to add.

With these tools in hand, you’ll feel like a nail art pro in no time. Just remember, practice makes perfect! So, don’t stress if your first attempt isn’t flawless—every artist starts somewhere, and you’re on the right track!

Prepare Your Nails

How_to_Achieve_Clean_Lines_in_Minimalist_Nail_Art_0002.jpg

Now that you’ve gathered your tools, it’s time to prepare your nails for a flawless minimalist design. First things first, you want to start with clean nails. Wash your hands and remove any old polish. It’s like wiping the slate clean, so your new design can shine!

Next, check your nails for any rough edges. Grab a nail file and gently shape them. You don’t want any sharp corners ruining those sleek lines you’re after.

Once your nails are shaped, it’s time to push back your cuticles. You can use a cuticle pusher or a soft towel. Just be gentle, as you don’t want to hurt yourself. If your cuticles are stubborn, a little cuticle oil can help soften them up.

After that, give your nails a quick buff to create a smooth surface. Just a light buffing will do; you don’t want to overdo it!

Select Quality Nail Polish

How_to_Achieve_Clean_Lines_in_Minimalist_Nail_Art_0003.jpg

Choosing quality nail polish is essential for achieving that chic minimalist look you desire. When you pick a polish, think about the finish you want. Do you prefer a glossy shine or a matte look? High-quality polishes often have a smoother application and better finish, making your nails look professionally done. Nobody wants a polish that chips after a day, right?

Next, check the ingredients. Some brands are known for using fewer harmful chemicals. This is great for your nails and the environment too!

You might also want to contemplate the color. Neutral tones like soft pinks or beiges are perfect for minimalist art. They blend well with your natural nails and give a clean, polished appearance.

Don’t forget about the brush! A good brush makes all the difference when applying polish. It should be easy to handle and grab just the right amount of polish. If it’s too thick or too thin, you might end up with messy lines.

Master the Tape Technique

How_to_Achieve_Clean_Lines_in_Minimalist_Nail_Art_0004.jpg

After selecting quality nail polish, mastering the tape technique can take your minimalist nail art to the next level. It’s like having a secret weapon in your nail art toolkit!

First, grab some painter’s tape or nail art tape—this stuff is super handy. Cut small pieces and stick them on your nails to create sharp lines and cool designs.

Before you start, make sure your base coat is completely dry. You don’t want to ruin your hard work!

Once it’s dry, apply the tape carefully where you want your clean lines. Press it down firmly to keep the polish from sneaking underneath. Then, paint over the exposed areas with your chosen polish.

Here’s the fun part: once you’ve painted, carefully peel off the tape while the polish is still wet. This will give you that crisp edge you’re aiming for. If you wait too long, you might end up with smudges—yikes!

Use a Fine Brush

How_to_Achieve_Clean_Lines_in_Minimalist_Nail_Art_0005.jpg

For achieving intricate designs in minimalist nail art, using a fine brush is essential. This tiny tool is your best friend when it comes to creating those clean lines and precise details that make your nails pop.

You might be thinking, “Isn’t a regular brush good enough?” Well, a fine brush gives you way more control and allows for sharper edges, which is super important in minimalist designs.

When you dip your fine brush into the polish, make sure to load it with just the right amount—too much can make a mess, and too little won’t show up. You’ll want to practice your strokes. Start with simple shapes, like dots or lines, and move on to more complex designs as you gain confidence.

Also, don’t forget to clean your brush regularly! A clean brush means crisp lines, and nobody wants a fuzzy line ruining their masterpiece.

Just like a painter needs their tools, you need your fine brush to turn your nail art dreams into reality. So grab that brush, release your creativity, and let your nails shine!

Practice Steady Hand Techniques

How_to_Achieve_Clean_Lines_in_Minimalist_Nail_Art_0006.jpg

A steady hand is essential when it comes to minimalist nail art. You don’t want your lines looking like a toddler’s doodles, right? To get those clean, sharp lines, practice is key. Start by resting your arm on a flat surface, like a table. This gives you a solid base and helps keep your hand steady. You can even hold your wrist with your other hand for extra support.

Now, take a deep breath! We all know that feeling when you’re about to start drawing. It’s normal to feel a bit jittery, but relaxing your muscles makes a world of difference.

Try using slow, deliberate movements instead of quick, jerky ones. You’ll find that going slow helps you control your brush better.

If you mess up, don’t sweat it! Everyone makes mistakes. Just grab a small brush with some remover, and you can clean up those little hiccups.

Plus, practicing on paper before you start on your nails can help you feel more confident. With time and a little patience, you’ll be on your way to creating stunning minimalist designs that make your nails the talk of the town!

Apply Topcoat for Finish

How_to_Achieve_Clean_Lines_in_Minimalist_Nail_Art_0007.jpg

Once you’ve perfected your minimalist design and your lines are sharp, it’s time to give your nails that polished look with a topcoat. A topcoat isn’t just a fancy finish; it adds shine and protects your hard work from chips and scratches. Plus, it makes your nails look super sleek and professional!

To apply your topcoat, gently brush it over your design, starting from the cuticle and moving towards the tip. You don’t need to overload the brush; a little goes a long way. Make sure to cover the entire nail, including the edges, to seal in your masterpiece.

If you’re feeling adventurous, try a matte topcoat for a different vibe—it can really change the game!

Once you’ve applied the topcoat, let it dry completely. This step is essential because you want your design to stay intact and look amazing. Don’t rush it; grab a snack or binge-watch a show while you wait. Who doesn’t love a little self-care while waiting for nails to dry?

With your topcoat shining bright, you’re ready to show off your stunning minimalist nail art to the world!

Clean Up Mistakes

How_to_Achieve_Clean_Lines_in_Minimalist_Nail_Art_0008.jpg

Mistakes can happen even to the best of us when creating minimalist nail art, but don’t worry—cleaning them up is easier than you think.

First, grab a small brush or a clean cotton swab. Dip it in nail polish remover, but just a little! You don’t want to make a bigger mess, right?

Now, gently brush around the edges of your nails. This will help erase any polish that strayed from its intended path. If you accidentally painted your skin, don’t fret; it happens to everyone! Just be careful not to touch the actual nail design you worked so hard on.

Once you’ve cleaned up those little oopsies, take a moment to let everything dry. This part is essential because you don’t want to smudge your masterpiece.

If you’re feeling fancy, you can apply a topcoat again to make those lines pop. And remember, practice makes perfect. The more you do this, the better you’ll get at keeping things neat!

Explore Minimalist Designs

How_to_Achieve_Clean_Lines_in_Minimalist_Nail_Art_0009.jpg

Exploring minimalist nail designs opens up a world of creativity that’s both simple and striking. You don’t need a million colors or fancy tools—just a few basic supplies and a bit of imagination! Think straight lines, dots, or tiny shapes. These designs can make your nails look chic without being over the top.

One popular design is the negative space look, where you leave part of your nail bare. It’s like wearing a little black dress—classic and always in style! You can also try using just one or two colors to create a bold contrast. For instance, a matte nude base with shiny black stripes looks super cool.

If you’re feeling adventurous, consider geometric patterns. Triangles, squares, or even a simple zigzag can add a fun twist to your nails. Plus, they’re easy to create with tape!

Conclusion

Now you’re ready to create those clean lines in your minimalist nail art! With the right tools, a steady hand, and a bit of practice, you can make your nails look super stylish. Remember, it’s all about having fun and expressing yourself, so don’t stress if it’s not perfect right away. Just keep trying, and you’ll be a nail art pro in no time! Happy painting, and may your nails shine as bright as your creativity!

The Beauty of Negative Space in Nail Art

The Beauty of Negative Space in Nail Art

The beauty of negative space in nail art is all about using unpainted areas to make your designs shine! By leaving parts of your nails bare, you create a cool contrast that makes colors look brighter and designs pop. It’s like a superhero cape for your nails—extra stylish! Simple designs like geometric shapes or half-moon styles are easy to try, so you can express your creativity without feeling overwhelmed. Plus, it often takes less time to nail these looks. Stick around, and you’ll find even more tips and ideas to elevate your nail game!

Understanding Negative Space

The_Beauty_of_Negative_Space_in_Nail_Art_0001.jpg

Understanding negative space in nail art involves recognizing the beauty of what’s left unpainted. It’s like the magic trick of nail design—what you don’t paint can be just as striking as the colors you choose.

Think of negative space as the “blank canvas” that highlights your nail art. When you leave parts of your nail bare, it creates a cool contrast that makes colors pop.

Imagine painting bright red hearts on your nails but leaving some areas unpainted. Those bare spots make the hearts stand out even more! You’re not just adding color; you’re playing with shapes and outlines, which can make your nails look more creative and unique.

To get started, try simple designs. Maybe you could create lines or geometric shapes that leave some of your nail visible. It’s super easy to play around with patterns.

Plus, negative space gives your nails a modern, chic vibe. Remember, it’s all about balance. The key is to have fun and experiment!

Aesthetic Appeal of Negative Space

The_Beauty_of_Negative_Space_in_Nail_Art_0002.jpg

Negative space often enhances the aesthetic appeal of nail art, drawing attention to the design’s intricacies. When you look at nails with negative space, it’s like seeing a beautiful painting where the blank areas are just as important as the colors. This technique creates a striking contrast, making the colors pop even more.

You might notice how the empty spaces help your eyes focus on the details, like swirls or patterns, which can turn a simple design into a masterpiece. Imagine your nails showcasing a fun geometric design, with some shapes filled in and others left bare. It’s like a puzzle that invites you to look closer!

Plus, negative space can give your nails a modern, sleek vibe. It’s perfect for any occasion, whether you’re heading to school or a fancy party.

And let’s be honest, negative space can also be a bit of a time-saver. You can skip some painting steps and still end up with a chic look. So, if you want to impress your friends or just feel fabulous, embracing negative space in your nail art is a great way to do it!

Techniques for Stunning Designs

The_Beauty_of_Negative_Space_in_Nail_Art_0003.jpg

Incorporating negative space into your nail art opens up a world of techniques for creating stunning designs. One fun way to start is by using tape. You can tape off sections of your nails to create sharp lines and shapes. Just paint the exposed areas, peel off the tape, and voila! You’ve got a clean, modern look.

Another technique involves using a thin brush for detailed work. With this, you can paint delicate patterns, like flowers or geometric shapes, leaving gaps that show the natural nail. It’s like creating art on a canvas, but way more fun and portable!

Don’t forget to experiment with colors. You can use bold shades paired with the natural nail to make the design pop. Or, try a soft pastel for a more subtle effect.

Layering is also a great option—apply a sheer polish over your design for a dreamy finish.

Lastly, consider adding embellishments like tiny gems or stickers. They can add a touch of sparkle without overwhelming the beauty of negative space.

Tips for Incorporating Negative Space

The_Beauty_of_Negative_Space_in_Nail_Art_0004.jpg

When it comes to incorporating negative space into your nail art, planning your design is key. Start by sketching your ideas on paper. This helps you visualize how the different colors and shapes will look together. Think about which areas you want to leave unpainted; this is your negative space!

Next, choose a base color that really pops against your skin tone. Light colors can make negative space stand out nicely, while darker shades can create a bold contrast. Don’t be afraid to experiment! You can use tape or nail stencils to get clean lines and shapes for your design.

Also, remember to keep it simple—sometimes less is more. A few well-placed accents can really make your nails shine.

And if you make a mistake, don’t fret! Nail polish remover is your best friend. You can always fix it or turn a mistake into a new design.

Popular Negative Space Nail Trends

The_Beauty_of_Negative_Space_in_Nail_Art_0005.jpg

These days, negative space nail art is all the rage, showcasing a perfect blend of creativity and minimalism. You’ll find tons of exciting trends popping up that make your nails look super stylish without going overboard.

One popular trend is the geometric design. Think triangles, lines, and squares, where the empty spaces create interesting patterns. It’s like a puzzle for your nails!

Another fun trend is the half-moon manicure. Here, you paint the base of your nails a different color while leaving the top bare. It’s a classic look with a modern twist and can be done in any color combination you like. You can even mix and match colors for a playful vibe!

Don’t forget about floral designs, either! Imagine delicate flowers painted on a mostly bare nail. It’s a great way to show off your creativity without being too loud.

Lastly, try out the color block trend. You can create bold blocks of color while still showing off that negative space.

Conclusion

Incorporating negative space in your nail art is a fun way to express your creativity! It lets your designs breathe and adds a cool twist that stands out. With the right techniques and a bit of practice, you can create stunning looks that turn heads. So, grab your polish and get inspired by the trends we talked about. Your nails are a canvas, and the best part? You can always change them up whenever you want!

The History Behind Classic Red Nail Polish

The History Behind Classic Red Nail Polish

Classic red nail polish has a fascinating history that goes way back! Ancient Egyptians loved red nails to show off their wealth and beauty. They even used crushed bugs for color—yikes! Then in China, red became a symbol of happiness and power. Fast forward to Europe, where women started using flowers for those vibrant shades. Hollywood stars like Marilyn Monroe made red nails a must-have for glam. Today, classic red is still popular, mixing in fun textures and finishes. So, if you want to discover more about how red nails conquered the beauty world, there’s plenty more to uncover!

Ancient Beginnings

The_History_Behind_Classic_Red_Nail_Polish_0001.jpg

Red nail polish has roots that stretch back thousands of years, tracing its origins to ancient civilizations. You might be surprised to learn that people have been painting their nails long before modern beauty trends took over.

In fact, ancient cultures, like the Chinese and the Egyptians, were experimenting with colors and materials to adorn their nails. They used natural ingredients like plant extracts, beeswax, and even crushed minerals to create vibrant shades.

Imagine being part of a royal court, showing off your red-tipped fingers as a sign of status! Those ancient folks believed that colors could express social rank, and red was often reserved for the elite.

You could say it was the original VIP treatment for your nails! Over time, the techniques evolved, and different cultures put their spin on nail art.

Red in Ancient Egypt

The_History_Behind_Classic_Red_Nail_Polish_0002.jpg

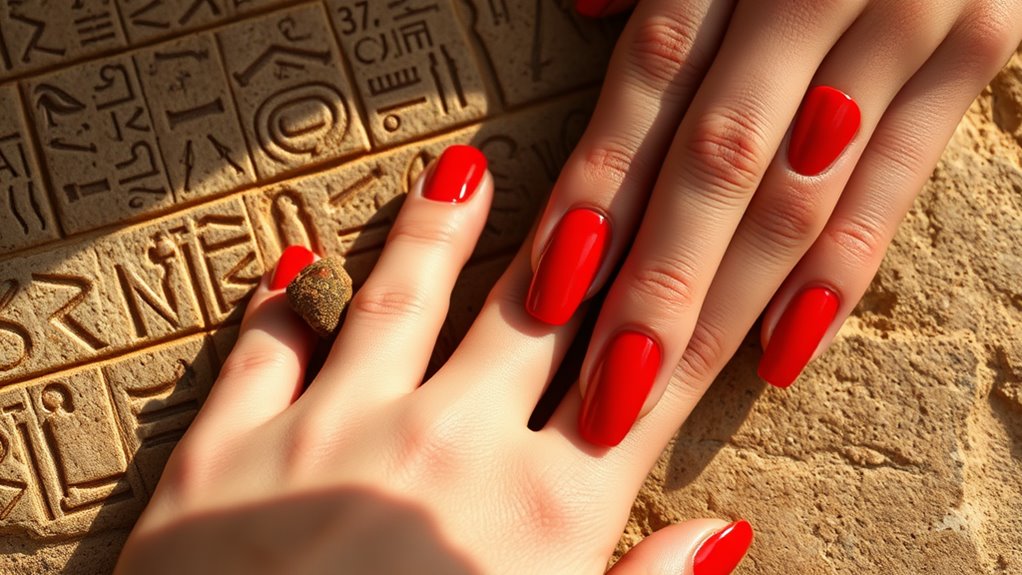
In ancient Egypt, the use of red nail polish took on a whole new level of significance. It wasn’t just about looking pretty; it was also a symbol of status and beauty. You see, both men and women painted their nails, but the shades of red they chose often told a story about their social standing. The richer you were, the brighter your red would be!

Egyptians made nail polish from natural ingredients, like crushed insects and plant dyes. Can you imagine mixing that up in your kitchen? It’s a bit messy, but it sure made a statement! Red nails were linked to the goddess Hathor, who represented love and joy, so flaunting those fiery digits was a way to connect with divine beauty.

Fashion in ancient Egypt was serious business, and you didn’t want to be caught with dull nails! People believed that having well-groomed nails could even protect them from evil spirits. Who knew that a little red polish could pack such a punch?

The Chinese Influence

The_History_Behind_Classic_Red_Nail_Polish_0003.jpg

Throughout history, China has played a pivotal role in shaping the narrative of nail polish, particularly with its vibrant red hues. Did you know that in ancient China, red wasn’t just a color? It symbolized happiness, good fortune, and even power! Royalty would often paint their nails with beautiful red shades, showcasing their status and wealth.

The Chinese developed various formulas for nail polish using natural ingredients like beeswax, gelatin, and even flower petals. They’d mix these to create shades that dazzled everyone. Imagine attending a royal banquet, with ladies flaunting their stunning red nails—talk about a fashion statement!

As time went on, different shades of red became popular, each carrying its own meaning. For example, deeper reds were associated with love and passion, while brighter reds symbolized joy and celebration.

You can see how nail polish became more than just a beauty tool; it was a way to express feelings and traditions.

Evolution in Europe

The_History_Behind_Classic_Red_Nail_Polish_0004.jpg

As nail polish made its way to Europe, it picked up new styles and trends that transformed its use and significance.

In the early days, European women often used natural ingredients like crushed flowers or berries to color their nails. It was a simple, yet beautiful way to express themselves.

But then, as the 20th century rolled around, things really started to change!

You see, with the rise of fashion magazines and beauty trends, nail polish became a must-have accessory.

Bright red shades started to emerge, symbolizing confidence and boldness. Women didn’t just want pretty nails; they wanted to make a statement!

Some even said that red nails were like a pop of personality on your fingers.

Hollywood Glamour

The_History_Behind_Classic_Red_Nail_Polish_0005.jpg

Hollywood glamour took nail polish to dazzling new heights, enchanting audiences and setting trends that would define beauty standards for decades. Imagine this: you’re flipping through a magazine, and there’s a stunning starlet with bright red nails, enthralling you with every flick of her hand. That’s the magic of Hollywood!

In the early days of film, actresses like Marilyn Monroe and Rita Hayworth made red nail polish a symbol of femininity and confidence. When you saw them on screen, it was hard not to be mesmerized. Their bold red nails seemed to say, “Look at me!”

It’s no wonder that fans rushed to copy their looks, hoping to feel just as glamorous. As the glamour of the silver screen grew, nail polish companies caught on. They started creating shades inspired by these iconic stars.

You could walk into a store and find a bottle that promised to make you feel like you just stepped off a movie set. So, the next time you paint your nails red, remember that you’re part of a long tradition of glamour that began in Hollywood. Who wouldn’t want a little bit of that sparkle in their life?

Modern Trends

The_History_Behind_Classic_Red_Nail_Polish_0006.jpg

Nail polish has evolved dramatically in recent years, reflecting the diverse expressions of personal style in today’s society. You might notice that classic red still reigns supreme, but there’s so much more out there!

People are experimenting with textures, colors, and finishes like never before. Matte, glossy, glittery, or even holographic—there’s a nail polish for every mood and occasion.

You can mix and match, creating nail art that’s as unique as you are. Think of fun patterns like polka dots or stripes, or even intricate designs that look like tiny masterpieces on your fingertips!

Social media has played a huge role in this trend, with influencers and nail artists sharing their creative ideas and tips.

Plus, don’t forget about the rise of eco-friendly and vegan nail polishes. It’s great to see brands focusing on healthier options that still deliver fabulous colors.

So, whether you’re rocking a classic red or trying out a bright neon, remember that your nails can be a canvas for your creativity. Go ahead, express yourself, and have fun with it!

After all, who doesn’t love a little bit of color in their life?

Cultural Significance Today

The_History_Behind_Classic_Red_Nail_Polish_0007.jpg

Red nail polish carries a weight of cultural significance that goes beyond mere aesthetics. It’s not just a color; it’s a statement! When you wear red nails, you’re tapping into a long history of confidence and boldness.

You might notice that red is often associated with power and passion. Think about it: many famous icons, from Marilyn Monroe to Beyoncé, have rocked red nails, showing that this color can make you feel unstoppable.

Today, red nail polish can mean different things to different people. For some, it’s a fun way to express their personality or mood. For others, it’s a tradition passed down through generations.

You might even find that red nails can bring a little sparkle to your day, making you feel like a star, even if you’re just running errands.

Conclusion

From ancient Egypt to today, red nail polish has a colorful history. It’s been a symbol of beauty, power, and even rebellion. You can see how people around the world have loved red nails for ages. Next time you paint your nails, think about all the stories behind that vibrant color. It’s not just polish; it’s a part of history! Now, go show off those fabulous red nails with pride!

The Best Solid Color Nail Polishes to Try

The Best Solid Color Nail Polishes to Try

If you’re looking for the best solid color nail polishes to try, check out Essie’s “Ballet Slippers” for a classy pink, or OPI’s “Lincoln Park After Dark” for a bold purple that’s perfect for any occasion. Sally Hansen’s “Crimson” is a classic cherry red that’s sure to grab attention. When applying, don’t forget to use a base and top coat for extra shine and to make your polish last longer! You’ll want options that dry quickly too. Curious about more polishes and tips? Stick around, because there’s plenty more cool stuff waiting for you!

Top Picks for Nail Polishes

The_Best_Solid_Color_Nail_Polishes_to_Try_0001.jpg

When it comes to choosing the best solid color nail polishes, you’ll want options that not only look great but also last. You don’t want to spend time applying polish only to have it chip off the next day, right?

One fantastic pick is Essie’s “Ballet Slippers.” It’s a soft pink that’s perfect for any occasion, adding a touch of elegance to your nails. Plus, it’s super easy to apply!

Another top choice is OPI’s “Lincoln Park After Dark.” This deep, rich purple is perfect for those who love a bold look. It’s classy, and it stands out without being too flashy.

If you’re into something more vibrant, try Sally Hansen’s “Crimson.” This bright red is like a classic cherry on top of your look, and it’s sure to grab attention.

Don’t forget about the essentials like base and top coats. They can help make your polish last longer and shine brighter.

Unique Features to Consider

The_Best_Solid_Color_Nail_Polishes_to_Try_0002.jpg

Choosing solid color nail polishes involves more than just picking a pretty shade; there are several unique features to reflect on that can enhance your manicure experience.

First, think about the formula. Some polishes are quick-drying, which is perfect if you’re always on the go. Others might’ve a gel-like finish that gives your nails a salon-quality look right at home.

Next, consider the brush type. A wider brush can help you cover more surface area quickly, while a thinner brush might be better for detailed work. You’ll want something that feels comfortable in your hand, too!

Don’t forget about the finish! Do you prefer a glossy shine, or are you more into a matte look? Each finish can totally change your nail game.

Lastly, pay attention to the brand’s reputation for staying power. Nobody wants to chip their polish after just one day!

So, keep these unique features in mind when you’re shopping. They’ll help you find the perfect polish that not only looks great but lasts longer, making your manicure experience truly fabulous!

Happy painting!

Best Application Techniques

The_Best_Solid_Color_Nail_Polishes_to_Try_0003.jpg

Mastering the art of applying solid color nail polish can elevate your manicure from ordinary to extraordinary. To start, always prep your nails by filing them and pushing back the cuticles. Clean nails allow for better polish application, so don’t skip this step!

Next, apply a base coat. It’s like a protective shield, keeping your nails safe and making your polish last longer.

When you’re ready to paint, shake the polish bottle gently to mix it up. Dip the brush in and wipe off any excess polish on the rim. This helps to avoid globs! Start at the base of your nail and sweep the brush toward the tip in smooth, even strokes. You might need two coats for full coverage, so let the first coat dry completely before applying the next.

Don’t forget to paint the tips of your nails to seal the polish and prevent chipping. And if you accidentally mess up, just use a little nail polish remover on a cotton swab to fix it. That’s a pro tip!

With a bit of practice, you’ll be rocking fabulous nails in no time. Happy painting!

Long-Lasting Formulas

The_Best_Solid_Color_Nail_Polishes_to_Try_0004.jpg

After perfecting your application techniques, the next step in achieving a stunning manicure is selecting long-lasting formulas. You want your beautiful nails to stay chip-free and vibrant for as long as possible, right? Well, that’s where these magical polishes come in!

Brands like Essie, OPI, and Sally Hansen offer amazing long-lasting options. These polishes are designed to resist chips, scratches, and fading, keeping your nails looking fresh and fabulous.

When choosing a long-lasting polish, look for ones labeled as “gel” or “long-wear.” These formulas are packed with special ingredients that help them cling to your nails like a best friend at a sleepover. Plus, they often dry faster, so you won’t be waiting around forever!

Don’t forget to use a top coat too! A good quality top coat can add extra shine and protection, making your polish last even longer. Think of it as a cozy blanket for your nails.

Trending Colors for This Season

The_Best_Solid_Color_Nail_Polishes_to_Try_0005.jpg

Revamp your manicure this season by embracing the hottest nail polish colors trending right now!

You’ll want to grab those shades that make your nails pop and turn heads. Think soft pastels like lavender and mint green, which are perfect for a fresh spring vibe. These colors bring a cheerful touch that screams fun and happiness!

Don’t forget about vibrant jewel tones! Rich emerald greens and deep sapphire blues are making waves, adding a touch of elegance to your look.

They’re like wearing a piece of art on your fingertips! And if you’re feeling bold, try a bright coral or fiery red. These colors are fantastic for making a statement and can brighten even the gloomiest of days.

For something chic, consider classic neutrals like taupe or soft beige.

These shades are versatile and can match any outfit, keeping your nails looking polished and sophisticated.

Eco-Friendly Nail Polish Options

The_Best_Solid_Color_Nail_Polishes_to_Try_0006.jpg

As you explore the latest color trends for your nails, it’s also worth considering eco-friendly nail polish options that are kinder to the planet. You know, just because you want fabulous nails doesn’t mean you have to sacrifice Mother Earth!

Many brands now offer polishes that are free from harsh chemicals like formaldehyde and toluene. These are the bad guys that can harm your health and the environment.

Instead, look for polishes labeled as “5-free,” “7-free,” or even “10-free.” This means they skip those harmful ingredients and are much safer for you and the planet.

Plus, eco-friendly brands often use natural ingredients and plant-based formulas, making them a great choice for anyone who cares about what’s on their skin.

And let’s not forget about packaging! Many brands use recyclable or biodegradable containers, which is a big win for sustainability.

It’s like giving your nails a makeover while giving back to the Earth. So, next time you’re picking out that perfect shade, consider going green. Your nails will look great, and you’ll feel even better knowing you’re making a positive choice!

Where to Buy the Best Brands

The_Best_Solid_Color_Nail_Polishes_to_Try_0007.jpg

When you’re on the hunt for the best solid color nail polishes, knowing where to shop can make all the difference. You’ve got plenty of options!

First, check out your local beauty supply store. They often carry popular brands like OPI, Essie, and Butter London, which are all known for their vibrant colors and long-lasting formulas. Plus, the staff can help you pick the perfect shade!

If you prefer shopping from home, online retailers like Amazon and Ulta have a wide selection. You can read reviews, compare prices, and even snag some deals.

Don’t forget to visit brand websites too! They sometimes have exclusive colors or promotions that you won’t find anywhere else.

For eco-friendly options, sites like Natural Nail and Thrive Causemetics are fantastic. You’ll not only get great polish but also support brands that care about the planet.

Lastly, keep an eye out for seasonal sales, especially during holidays. You might just score a few fabulous polishes at a fraction of the price.

With all these choices, you’re sure to find your next favorite shade! Happy shopping!

Conclusion

So, whether you’re looking for a bold red or a calming blue, there’s a solid color nail polish out there just for you. Remember to choose one that lasts and feels good on your nails. Don’t forget to try out some fun application techniques and maybe even go for an eco-friendly option! Now, grab your favorite polish, invite some friends over, and have a nail-painting party. Your nails will thank you for it!

Classic Red Nail Art Techniques for Beginners

Classic Red Nail Art Techniques for Beginners

If you’re starting your classic red nail art journey, you’ve picked a fab shade! Begin with a solid red base coat, which gives a chic vibe. Try a classy French tip for a touch of elegance—just paint bright red on the tips of a nude base. Polka dots are fun too; use a dotting tool to create cute patterns! Want something sparkly? Add glitter to one or two nails. Don’t forget, a top coat seals your design and keeps it shiny! Keep those nails healthy, and you’ll be ready to showcase your style with confidence. Stick around for more handy tips!

Tools You Will Need

Classic_Red_Nail_Art_Techniques_for_Beginners_0001.jpg

To get started with nail art, you’ll need a few essential tools. First up, grab a good quality base coat and topcoat. These are like your nail’s best friends! They protect your nails and help your design last longer.

Next, you’ll want some nail polish in various colors. Don’t worry; you don’t need a huge collection to start. Just a few shades will do!

Now, let’s talk brushes. A set of nail art brushes is super handy for adding details and designs. You might also want dotting tools, which are perfect for creating dots or flowers.

If you’re feeling fancy, nail stickers or stencils can help you get those designs just right without too much fuss.

Lastly, keep some cotton balls and nail polish remover nearby for any little mistakes. Trust me, it happens to the best of us!

You’ll also appreciate having a small bowl of water for clean-up. With these tools in hand, you’re ready to release your creativity. Nail art is all about having fun, so don’t stress too much, and enjoy the process!

Choosing the Right Shade

Classic_Red_Nail_Art_Techniques_for_Beginners_0002.jpg

Selecting the perfect nail polish shade can feel like an art form in itself. With so many reds out there, it’s easy to get overwhelmed. You’ve got bright cherry reds, deep burgundies, and even soft, muted reds. So, how do you choose?

First, think about your skin tone. If you have a warm undertone, you might want to lean towards reds with orange or golden hues. If you have a cool undertone, go for shades with blue or purple hints.

Next, consider the occasion. Are you dressing up for a fancy dinner or just hanging out with friends? A bold, bright red can be fun for a night out, while a softer shade might be perfect for everyday wear.

Don’t forget to test the polish! Swatch a bit on your nail to see how it looks in different light. It can make a world of difference.

And if you’re still unsure, just remember: there’s no wrong choice when it comes to red! It’s all about what makes you feel fabulous.

Basic Red Nail Prep

Classic_Red_Nail_Art_Techniques_for_Beginners_0003.jpg

How do you guarantee your nails are ready for that stunning red polish? First, start by washing your hands with soap and water. This helps remove dirt and oils, making sure your nails are clean.

Next, gather your tools. You’ll need a nail file, cuticle pusher, and some moisturizer.

Now, file your nails to your desired shape. Whether you like them square, round, or something in between, a good shape makes a huge difference. Gently push back your cuticles to create a neat look. If you’ve got any hangnails, snip them away carefully.

Once your nails are shaped and trimmed, it’s time for some hydration! Apply a cuticle oil or hand cream. Your nails will thank you later! This step helps keep everything soft and healthy, so your red polish glides on smoothly.

Lastly, don’t forget to apply a base coat. It’s like putting on a protective shield for your nails. It prevents staining and helps your polish stick better.

With these prep steps done, you’re all set to rock that classic red nail look!

Simple Solid Red Nails

Classic_Red_Nail_Art_Techniques_for_Beginners_0004.jpg

With your nails prepped and primed, it’s time to achieve that classic look with simple solid red nails. This timeless style is super easy, making it perfect for beginners like you!

First, grab your favorite red nail polish. Don’t worry, it doesn’t have to be fancy; just find one that makes you smile.

Start by applying a base coat. This helps your polish stick better and protects your nails from staining. Once that’s dry, take your red polish and start painting. Use smooth, even strokes for the best results. If you mess up a bit, no biggie! You can always clean it up with a small brush dipped in nail polish remover.

After you’ve covered all your nails, let them dry completely. Patience is key here!

Finally, finish with a top coat to add shine and keep your nails looking fabulous longer. And voilà! You’ve got yourself some stunning solid red nails.

Whether you’re heading to a party or just lounging at home, they’ll always make you feel a little more special. So, go ahead and show off that fabulous red!

Classic French Tips

Classic_Red_Nail_Art_Techniques_for_Beginners_0005.jpg

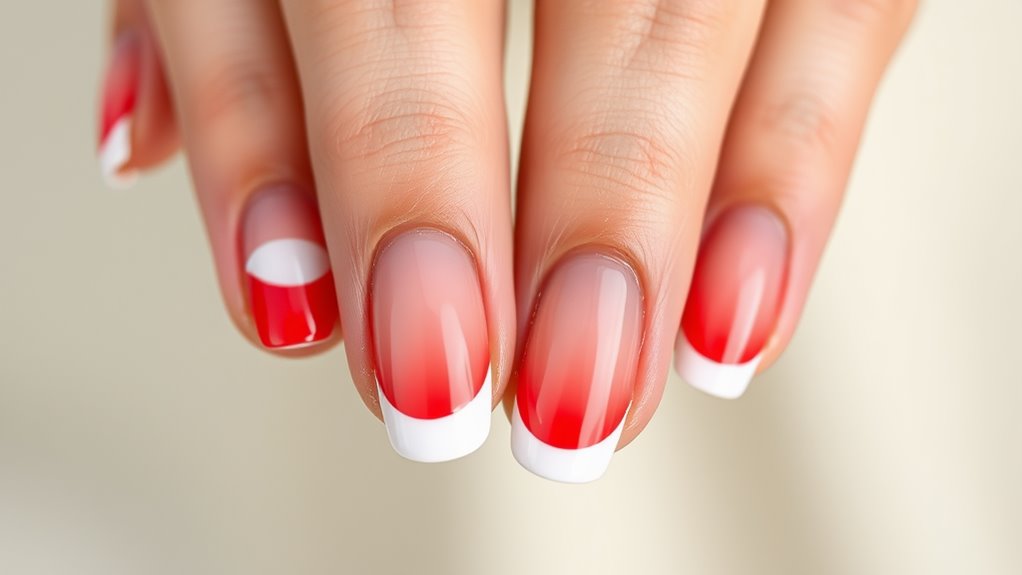
Classic French tips are a chic and elegant way to elevate your manicure game. They’re simple yet stunning, making them perfect for any occasion. To get started, you’ll need a base coat, a bright red polish for the tips, and a nude or light pink shade for the rest of your nails.

First, apply the base coat to protect your nails. Then, paint your nails with the nude or light pink polish. Make sure to let it dry completely.

Once dry, grab a thin nail brush or use nail tape to create a straight line for your tips. Dip the brush in the red polish and carefully paint the tips of your nails. You can make them as thick or thin as you like, so have fun with it!

After you finish, remember to seal your masterpiece with a top coat. It’ll keep your tips looking fresh and shiny.

And voilà! You’ve got a classic French manicure that’ll have everyone asking where you got it done. With a bit of practice, you’ll be a pro at this timeless look in no time!

Polka Dot Design

Classic_Red_Nail_Art_Techniques_for_Beginners_0006.jpg

Get ready to add a playful touch to your nails with a charming polka dot design! This fun nail art technique is perfect for beginners and can brighten up any look. You don’t need a fancy salon; you can create it right at home.

First, choose a vibrant red base color. Apply it evenly on all your nails and let it dry completely. Once that’s done, grab a dotting tool or even a bobby pin—yes, it works wonders!

Now, dip your dotting tool into a contrasting color, like white or black, and gently press it onto your nails to create dots. You can make them big or small, depending on your mood. If you want a random pattern, just have fun with it! For a more organized look, place the dots in neat rows.

After you’ve finished, seal your masterpiece with a clear topcoat to make it shine and last longer.

And there you have it—a cute polka dot design that’ll make your nails pop! Who knew nail art could be this easy? Now, go show off your playful nails and enjoy the compliments!

Striped Nail Art

Classic_Red_Nail_Art_Techniques_for_Beginners_0007.jpg

Transform your nails into a stylish statement with striped nail art! Stripes are a fun and easy way to add some flair to your manicure. You can create bold looks or soft, subtle designs depending on the colors you choose.

Want to get started? Here’s how!

First, pick your favorite red nail polish as your base. Apply two coats for a nice, solid color. Next, get some striping tape or a thin brush for the stripes. If you’re using tape, lay it down in parallel lines across your nails. If you’re painting freehand, just take your brush and gently swipe it across your nail in your desired pattern.

You can mix it up, too! Try alternating colors with your red base; white, black, or gold look especially chic.

After you’ve finished your stripes, seal your design with a top coat to keep it shiny and lasting longer.

Glitter Accent Nails

Classic_Red_Nail_Art_Techniques_for_Beginners_0008.jpg

If you’re looking to add some sparkle to your manicure, glitter accent nails are the perfect choice. They’re like the cherry on top of your favorite sundae!

To get started, pick a fun glitter shade that matches your classic red polish. You can choose silver, gold, or even a funky color like blue or green.

First, paint all your nails with the red polish and let them dry completely. Once they’re dry, choose one or two nails on each hand for the glitter. Using a small brush or sponge, apply a layer of clear polish on the selected nails.

Then, dip them into the glitter or gently press the glitter onto the wet polish. Make sure to cover the entire nail for that dazzling effect!

After that, seal everything with a top coat to keep your glitter in place. It’ll help your nails shine bright, just like a star!

Maintenance and Care Tips

Classic_Red_Nail_Art_Techniques_for_Beginners_0009.jpg

Maintaining your stunning nail art is essential for keeping it looking fresh and vibrant. First off, always apply a top coat every few days. This not only adds shine, but it also protects your design from chips and scratches. If you’ve got glitter accent nails, a thick layer of top coat can help smooth everything out.

Next, be gentle with your hands. Avoid using your nails as tools; that’s a surefire way to ruin your masterpiece. When washing dishes or cleaning, wear gloves to shield your nails from harsh chemicals. Trust me, your nails will thank you!

Also, don’t forget to moisturize your cuticles! A little cuticle oil goes a long way. It keeps your nails from looking dry and helps prevent hangnails, which can be a real pain.

Lastly, if you notice any chips or wear, fix them right away. You can simply use a matching polish to touch up the area. Remember, your nails are like little canvases, and with a bit of care, they can stay gorgeous longer!

Keep those red nails shining bright, and you’ll always be ready to show them off!

Conclusion

Now you’ve got the scoop on classic red nail art techniques! Whether you’re going for a bold solid look or adding some fun designs, practice makes perfect. Remember to choose the right shade and take care of your nails for that wow factor. So grab your tools, release your creativity, and have fun with it. Your nails are your canvas, and you’re the artist! Happy painting, and may your nails shine as bright as your smile!

Maintaining the Longevity of Your Solid Color Nails

Maintaining the Longevity of Your Solid Color Nails

To keep your solid color nails looking amazing, start with quality nail products, like a good polish and a top coat. Prep your nails by cleaning, trimming, and applying a base coat—think of it as the cozy blanket for your nails! When you apply color, use thin layers and let them dry completely between coats. Don’t forget to seal the tips with your top coat and wear gloves to shield them from harsh chemicals. Hydrating cuticle oil is a must to prevent breakage. By following these steps, your nails will shine like the stars, and there’s so much more fun to discover!

Choosing Quality Nail Products

Maintaining_the_Longevity_of_Your_Solid_Color_Nails_0001.jpg

When you’re aiming for a flawless solid color manicure, choosing quality nail products is essential. You wouldn’t want to put in all that effort only to have your polish chip after a day, right?

Start with a good base coat. It helps your color stick and protects your nails from stains. Think of it as a shield for your nails!

Next, pick a high-quality nail polish. Look for brands that have a good reputation and are known for their long-lasting formulas. You don’t want to settle for a polish that goes on streaky or takes forever to dry. When you find the right shade, it’s like discovering a hidden treasure!

Don’t forget a top coat! This magical layer adds shine and extends the life of your manicure. It’s like frosting on a cake—who doesn’t love that?

Lastly, make sure you’ve got the right tools. A good brush can make all the difference, helping you apply polish evenly without those pesky bubbles.

Preparing Your Nails Properly

Maintaining_the_Longevity_of_Your_Solid_Color_Nails_0002.jpg

Properly preparing your nails is essential for achieving a perfect solid color manicure. First, you’ll want to start with clean nails. Wash your hands thoroughly and make sure to scrub under your nails too. Nobody wants dirt ruining their fabulous manicure!

Next, trim and shape your nails to your desired length and style. Whether you like them short and sweet or long and elegant, it’s all about what makes you feel good.

Then, gently push back your cuticles. This helps give your nails a polished look and makes the manicure last longer. If you have any rough spots on your nails, now’s the time to buff them out. A smooth surface is vital for even application, so grab a buffer and get to work.

Applying Base Coat Essentials

Maintaining_the_Longevity_of_Your_Solid_Color_Nails_0003.jpg

Before diving into your solid color application, applying a base coat is essential for a flawless finish. Think of it as the primer for your nails—it helps the color stick better and prevents any stains from your polish. Nobody wants to deal with yellowed nails, right?

First, grab your favorite base coat. You can find many options at any beauty store. Apply a thin layer to each nail, making sure to cover the entire surface. Don’t forget the tips! This step is super important because it seals in the moisture and protects your nails from damage.

Let it dry completely before moving on. You wouldn’t want to ruin all your hard work by accidentally smudging it. And while you wait, feel free to do a little dance or sing your favorite song—nail care can be fun too!

Once the base coat is dry, you’re all set to apply your solid color polish. Trust me, taking this extra step will make a big difference in how long your manicure lasts.

Plus, your nails will look smoother and more vibrant, just like you want them to!

Mastering the Color Application

Maintaining_the_Longevity_of_Your_Solid_Color_Nails_0004.jpg

Get ready to transform your nails with a stunning solid color! It’s time to immerse yourself in the fun part: applying that beautiful polish. Start by giving your chosen nail polish a good shake. This helps mix it up, ensuring a smooth application.

Now, grab your brush and dip it in the polish, but don’t overload it. A little goes a long way!

When you apply the polish, start at the base of your nail and gently swipe the brush up towards the tip. Use three strokes for each nail: one down the center and one on each side. It’s like painting a tiny canvas—only this canvas is way more fabulous!

If you mess up a bit, don’t panic. You can always clean it up later with a small brush dipped in remover.

Let each coat dry before adding another. Two coats usually give you that rich, vibrant look you’re after. Remember, patience is key! You want your nails to look perfect, so take your time.

With a bit of practice, you’ll master the art of color application and have everyone asking for your nail secrets! Now, let’s get those colors on and shine!

Sealing With Top Coat

Maintaining_the_Longevity_of_Your_Solid_Color_Nails_0005.jpg

Now that you’ve perfected your color application, it’s time to lock in that vibrant look with a top coat. A top coat is like a superhero cape for your nails; it protects your beautiful color from chips, scratches, and fading. You’ll want to choose a good-quality top coat that suits your style. Matte, glossy, or even sparkly options are all out there!

When you’re ready to apply, start by making sure your color is completely dry. Then, pour a little top coat onto your brush, but not too much—nobody wants a goopy mess! Gently swipe the brush across your nails, covering the entire surface. Don’t forget the tips of your nails! Sealing those edges helps prevent chipping.

After applying, let it dry for a few minutes. It might feel like forever, but trust me, it’s worth it! If you want that extra shine, you can add a second coat once the first one’s dry.

Your nails will look fresh and fabulous for days! So, grab your top coat and give your nails the protection they deserve. You’ll love how it keeps your color looking brilliant!

Avoiding Common Mistakes

Maintaining_the_Longevity_of_Your_Solid_Color_Nails_0006.jpg

When applying nail color, it’s easy to make a few common mistakes that can affect the final look. First off, don’t skip the base coat! It’s like a protective shield between your nails and the color. If you skip it, you might end up with stains or uneven color.

Also, be careful not to overload your brush with polish. Too much can lead to clumps and uneven application. Remember, less is more; you can always add another coat if needed.

Another mistake is painting your nails too quickly. Patience is key! Give each coat time to dry before adding the next one. If you rush, you risk smudging your masterpiece.

Oh, and don’t forget to cap the edges! This means running the brush along the tip of your nail to seal the color. It helps prevent chips and keeps everything looking fresh.

Lastly, always clean up any polish on your skin. It’s a small step that makes a big difference! Grab a small brush and some remover, and tidy up those edges.

Protecting Nails in Daily Life

Maintaining_the_Longevity_of_Your_Solid_Color_Nails_0007.jpg

Protecting your nails in daily life requires some mindful habits. First off, wear gloves when doing chores like washing dishes or cleaning. Those harsh chemicals can wreak havoc on your beautiful nails. Remember, you want your nails to shine, not shrivel up like a raisin!

Next, be careful when typing or using your phone. It’s easy to accidentally bang your nails against the keyboard or screen. Try to be a bit gentler; your nails aren’t a drum set!

Also, avoid using your nails as tools. Opening cans or prying things apart can lead to chips and breaks. Just say no!

When you’re out and about, consider carrying a small bottle of top coat with you. If you notice a chip, a quick touch-up can save the day.

And let’s not forget about hand cream. Keep your hands moisturized, so your nails don’t get dry and brittle.

Lastly, try to eat a balanced diet. Foods rich in vitamins will help keep your nails strong. So, grab those carrots and almonds! Your nails will thank you, and you’ll keep them looking fabulous longer.

Maintaining Nail Health

Maintaining_the_Longevity_of_Your_Solid_Color_Nails_0008.jpg

Nail health is essential for maintaining that polished look you desire. Think of your nails like a garden; if you don’t care for them, they won’t bloom beautifully.

To keep your nails strong, start by keeping them clean and trimmed. Regularly wash your hands and avoid biting or picking at your nails—trust me, it’s not a good look!

Moisturizing is another key step. Use a good hand cream and don’t forget about your cuticles! They need love too. Applying cuticle oil can make a big difference, keeping them soft and healthy.

Also, be mindful of what you eat. A balanced diet packed with vitamins and minerals will help your nails grow strong. Foods rich in biotin, like eggs and nuts, can work wonders.

Lastly, if you’re doing any household chores, remember to wear gloves. They’ll protect your nails from harsh chemicals and prevent breakage.

Taking care of your nails doesn’t have to be a chore; it can be a fun part of your beauty routine! A little effort goes a long way, so start pampering those nails and enjoy a healthy, vibrant manicure!

Regular Touch-Up Techniques

Maintaining_the_Longevity_of_Your_Solid_Color_Nails_0009.jpg

Regular touch-ups are essential for keeping your solid color nails looking fresh and vibrant. You don’t want chips or fading to steal the show, right?

Start by investing in a good topcoat; it’s like a superhero cape for your nails! Apply a new layer every few days to protect your color and add shine.

If you spot a chip, don’t panic! Grab your nail polish and carefully dab some color on the affected area. Make sure to blend it in with the rest of your nail for a seamless look.

If your polish starts to chip at the tips, you can also try a quick file to smooth things out.

Another great trick is to keep your nails hydrated. A little cuticle oil goes a long way in preventing breakage and keeping your nails looking polished.

Don’t forget to wash your hands regularly and wear gloves while doing chores to avoid wear and tear.

With these simple techniques, you’ll keep your solid color nails looking fabulous without too much hassle.

Seasonal Care Tips

Maintaining_the_Longevity_of_Your_Solid_Color_Nails_0010.jpg

As the seasons change, your nail care routine should adapt to keep your solid color nails looking their best.

In summer, the heat and humidity can cause your polish to chip faster. To combat this, use a top coat that’s designed for hot weather. Don’t forget to stay hydrated, too! Your nails thrive when you drink plenty of water.

When fall rolls around, it’s time to think about moisture. The air gets drier, which can lead to brittle nails. Keep a nourishing cuticle oil handy, and apply it regularly to keep your nails flexible and strong.

You can even treat yourself to a cozy spa day at home!

Winter is all about protection. Cold weather can make your nails weak and prone to breaking. Wear gloves whenever you head outside, and consider switching to a thicker hand cream.

Your nails will thank you!

Conclusion

Taking care of your solid color nails doesn’t have to be a chore! By choosing the right products, prepping your nails, and sealing everything with a good top coat, you can keep your nails looking fabulous for longer. Remember to protect them in your daily life and give them some TLC with regular touch-ups. So, go ahead and show off those gorgeous nails—you’ve earned it! Happy polishing, and may your nails shine like the stars!